When we bought True North she already had a water maker installed. It was meant to run on 120v AC with the generator running and only produced about 15 gallons an hour of water. Jason and I HATE listening to the generator and want to avoid using it as much as possible and our last watermaker that we had on Peregrine made almost 20 gallons an hour and only used 20 amps of DC 12v power. So because we’re apparently obsessed with redundancy… we kept our old watermaker and bought another one so we can just have two of them! With the amount of solar power we have we will be able to run both watermakers for a few hours a day and really keep our tanks filled! Now the fun begins.

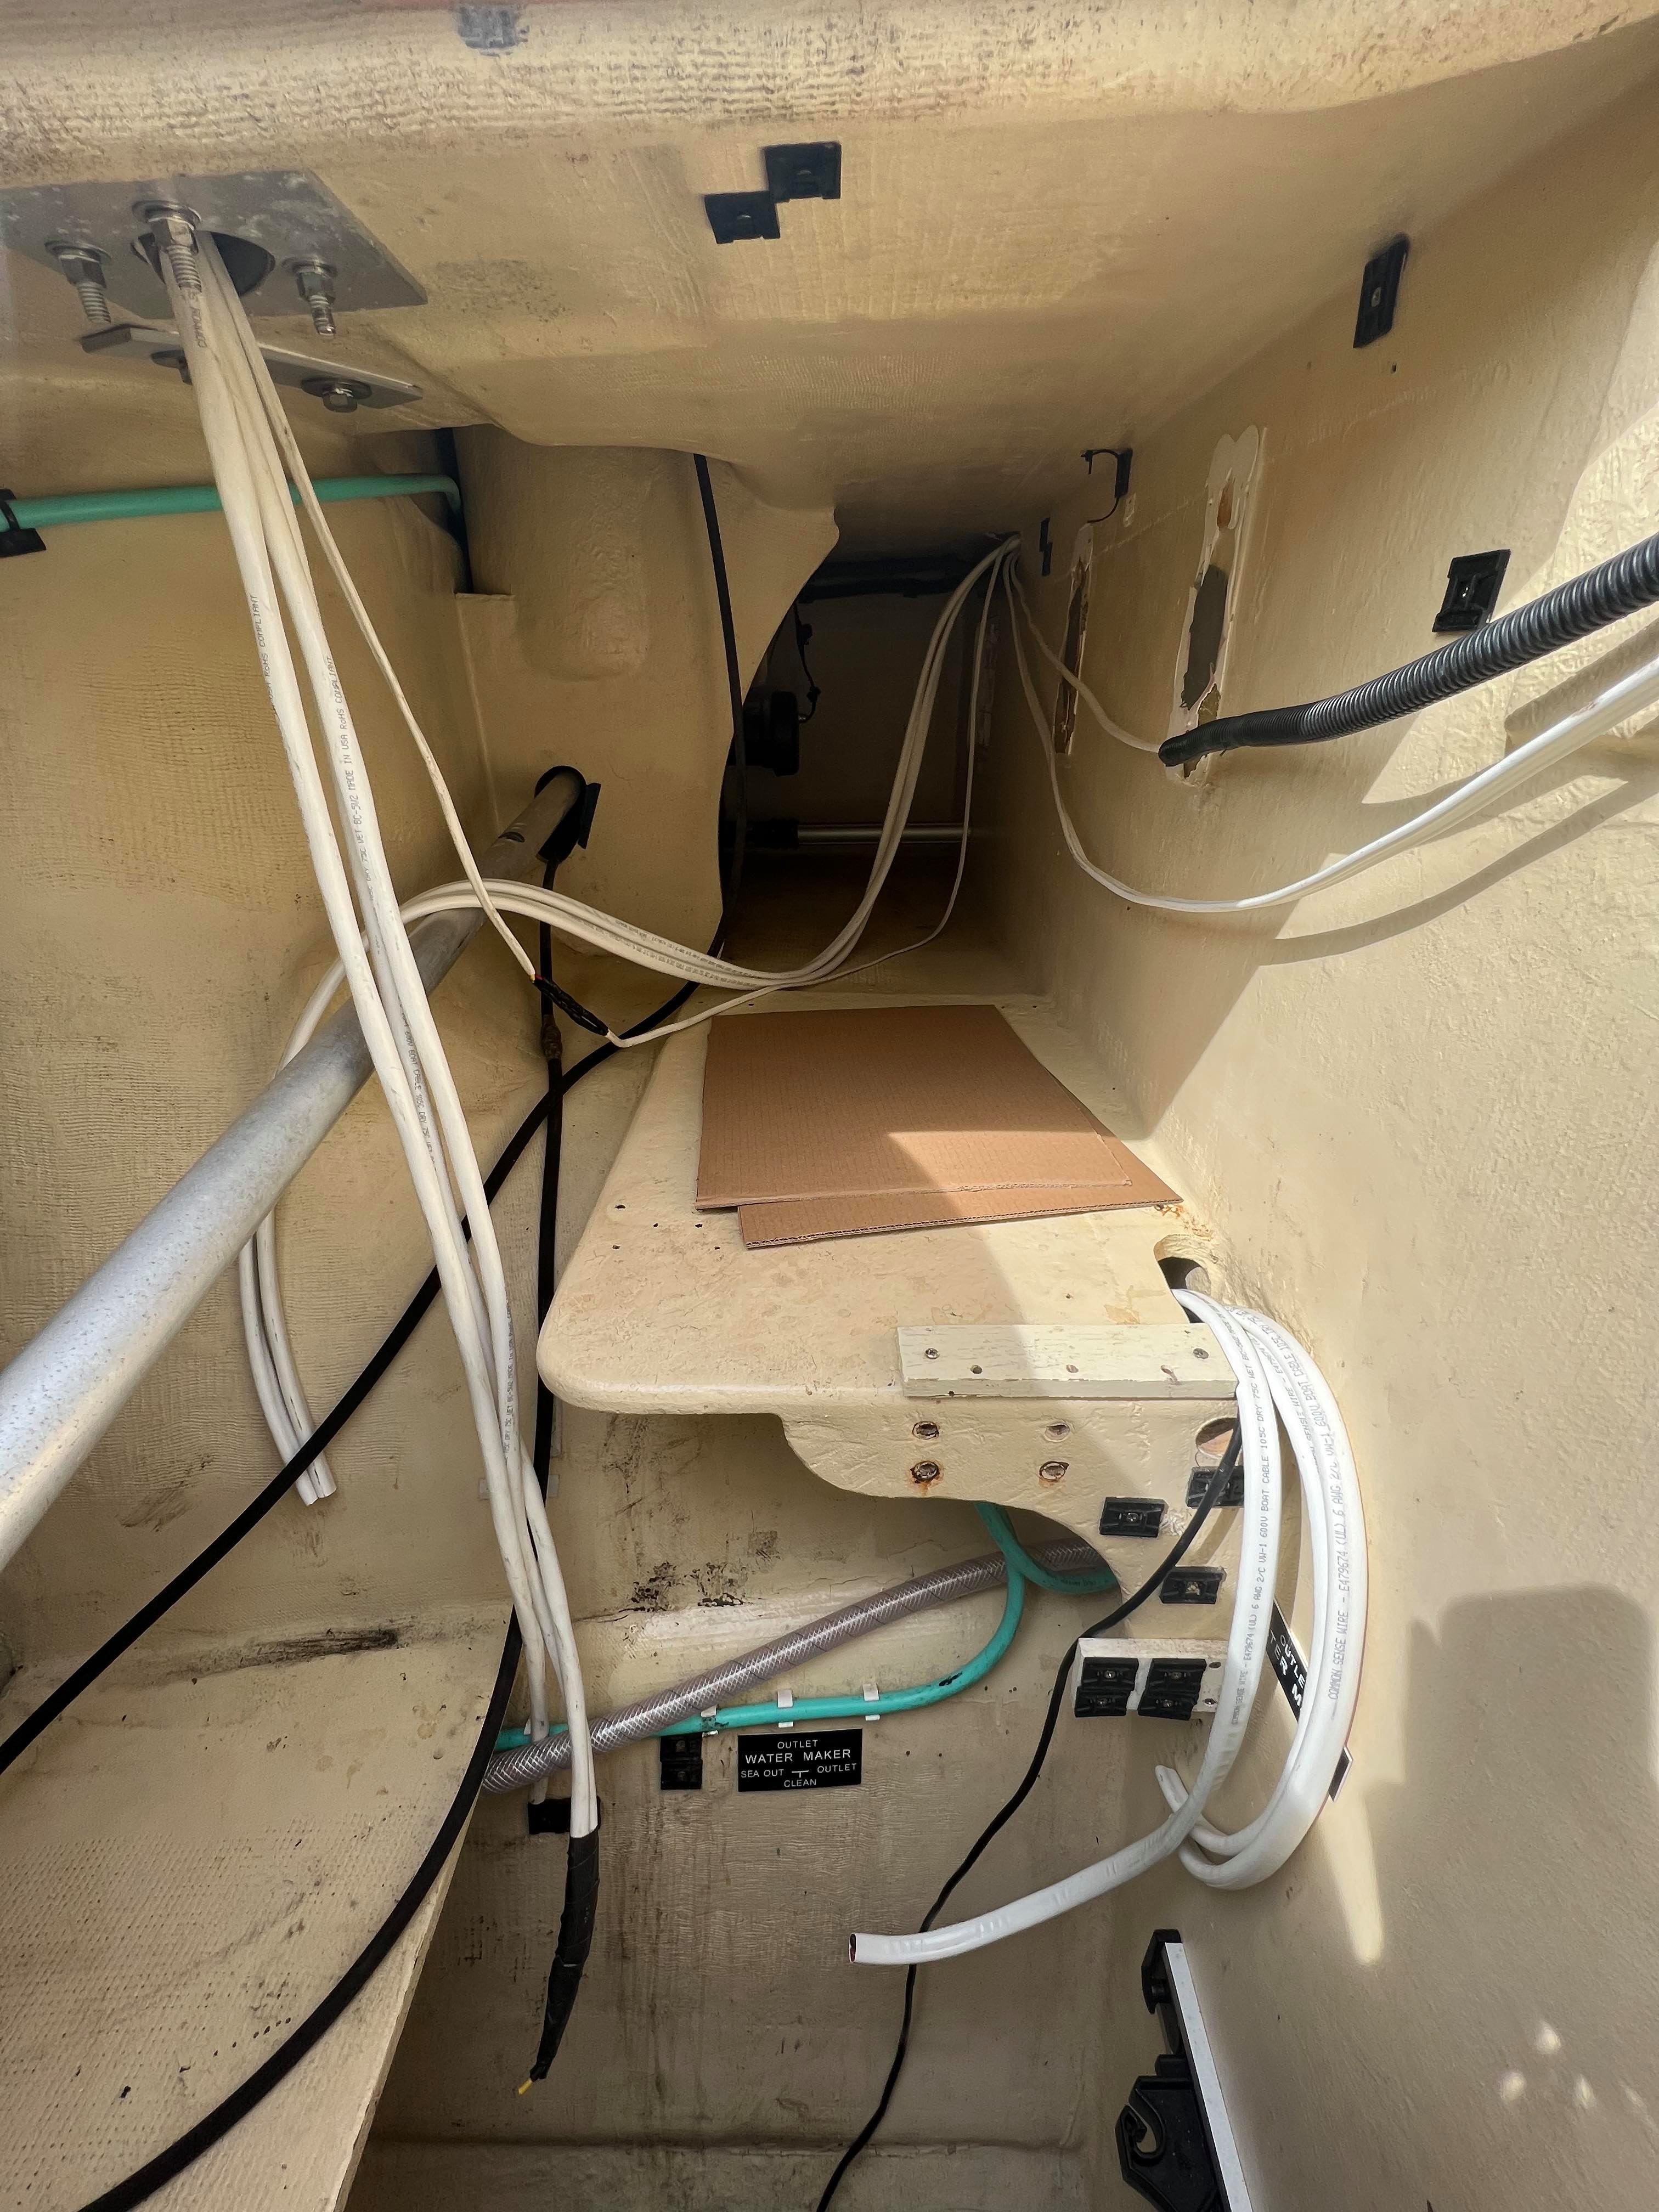
The removal of the old unit wasn’t technically difficult, but I had to wedge myself between the deck and the top of the box in order to reach all the way in the back. This is probably the only time I’ve ever wished for smaller boobs… Eventually I wrestled it out of the locker and out of my way, leaving quite a lot of space to work with.
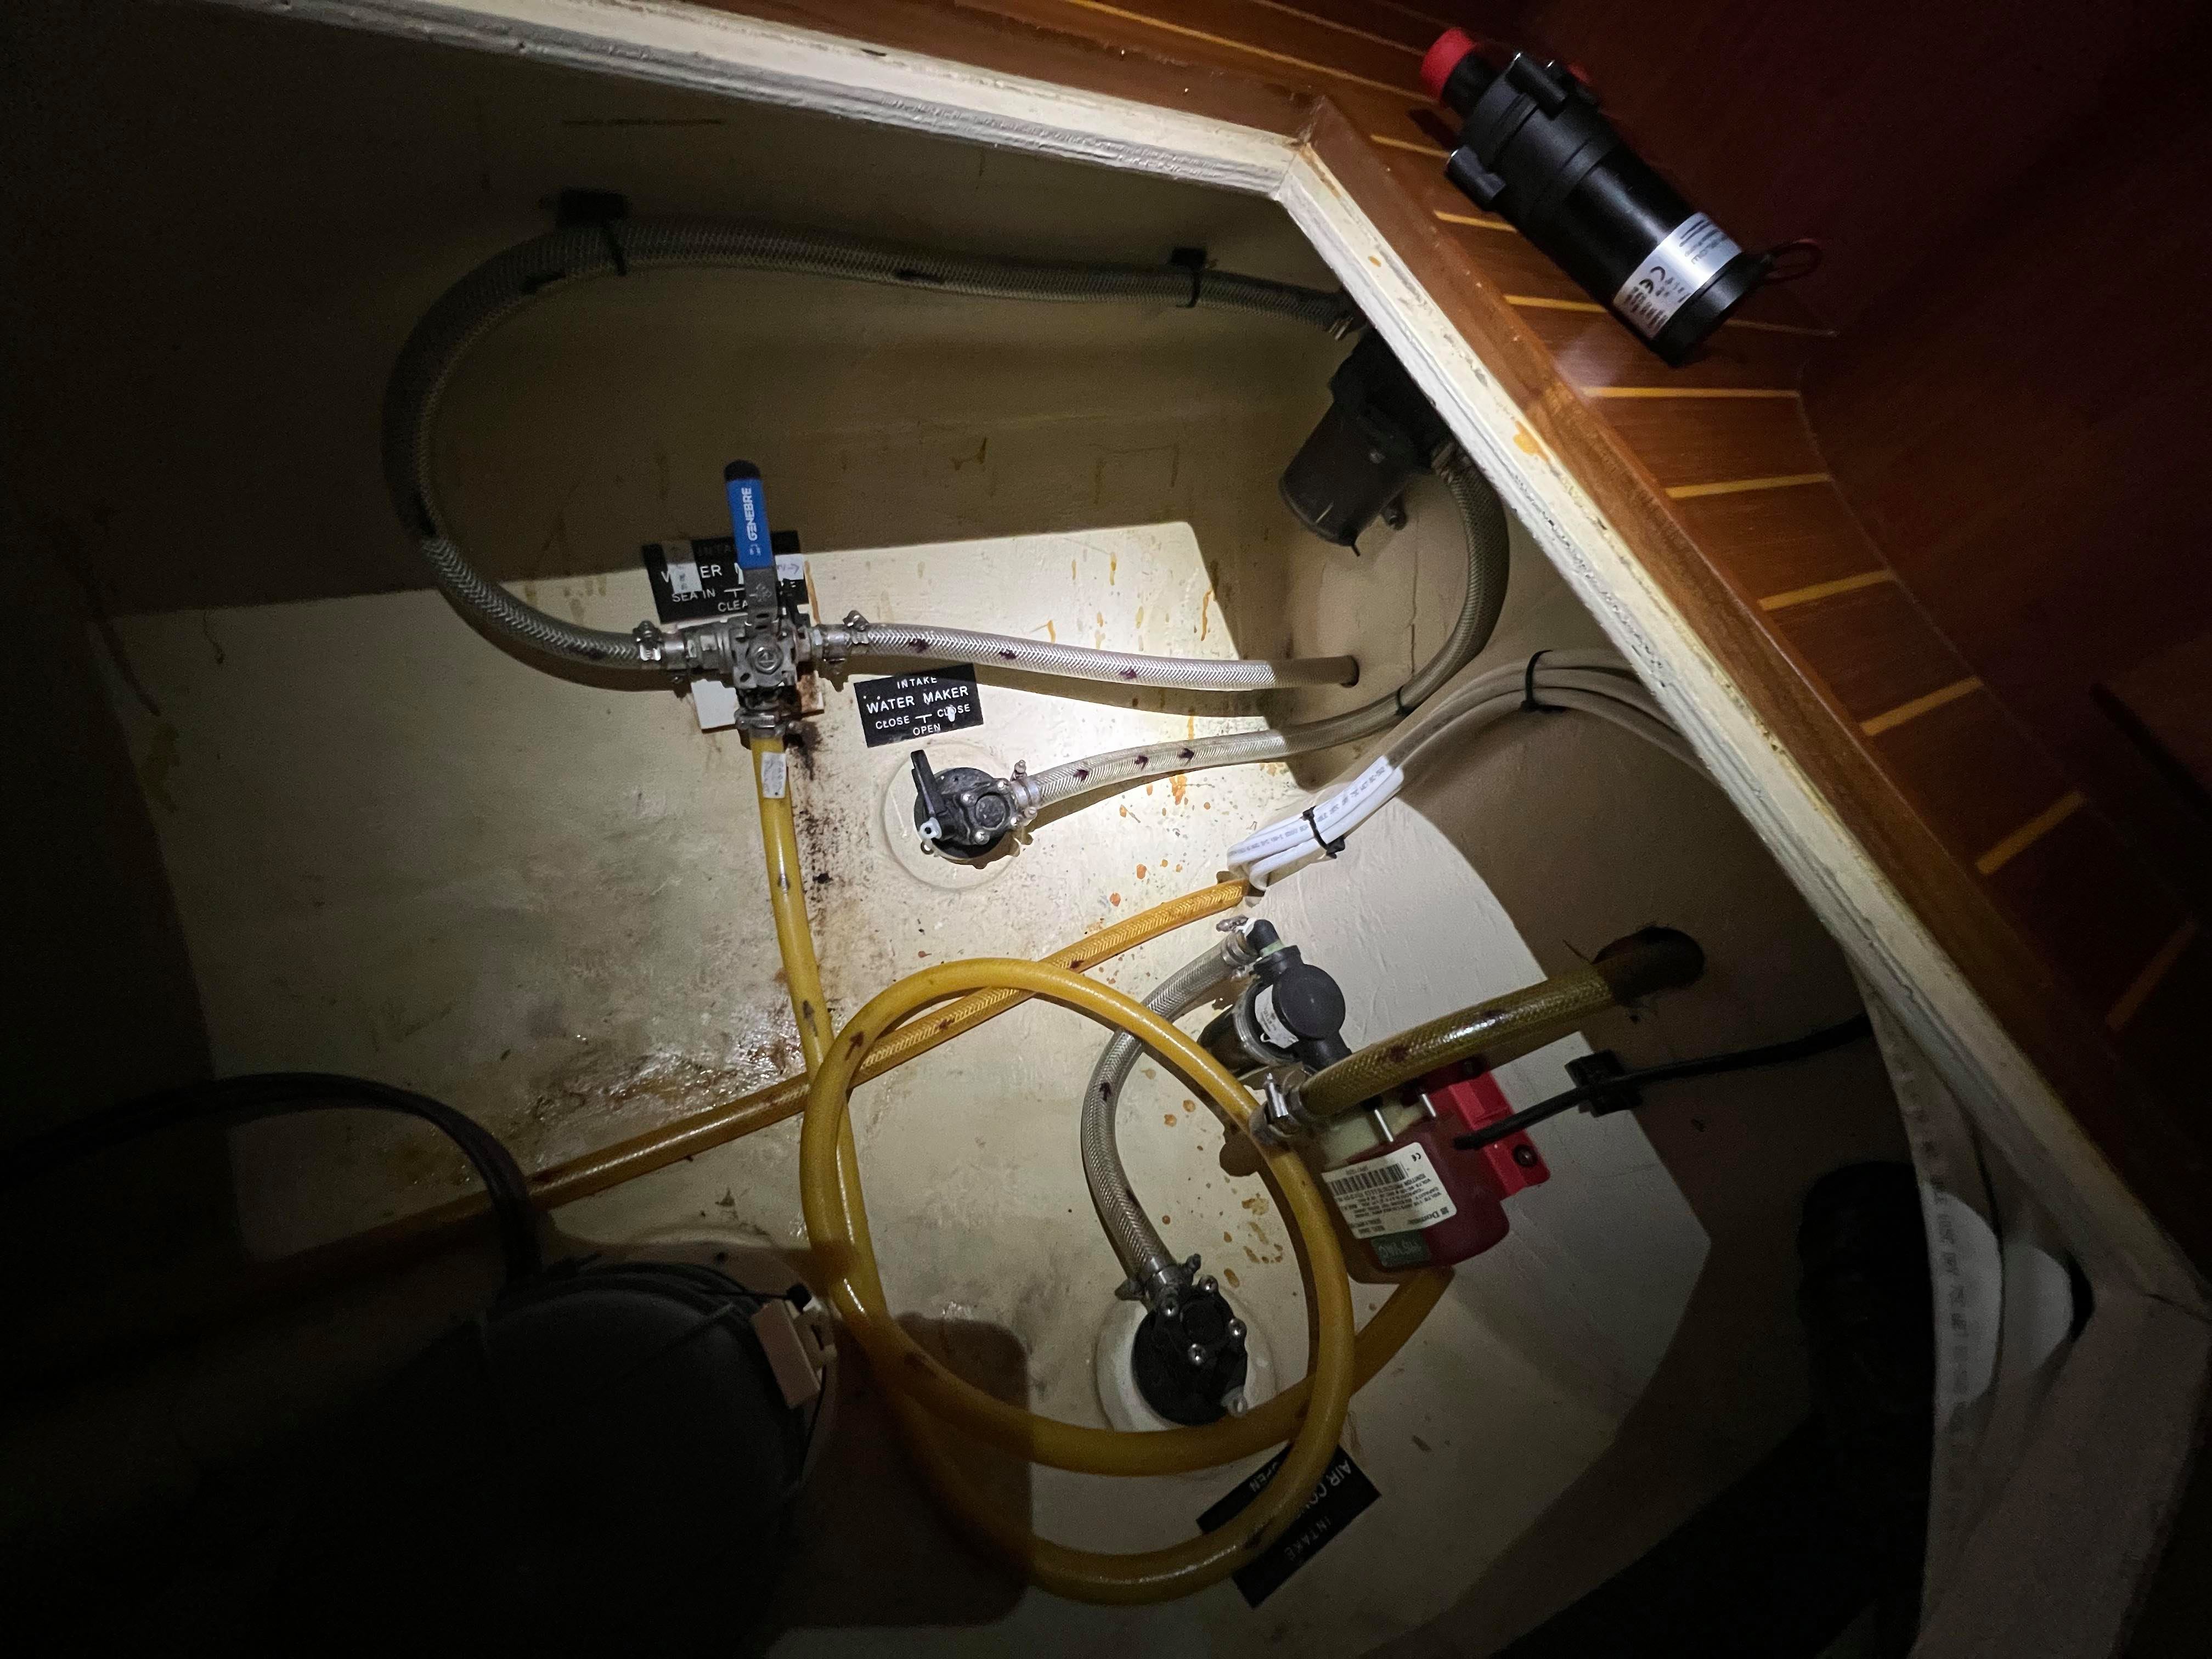
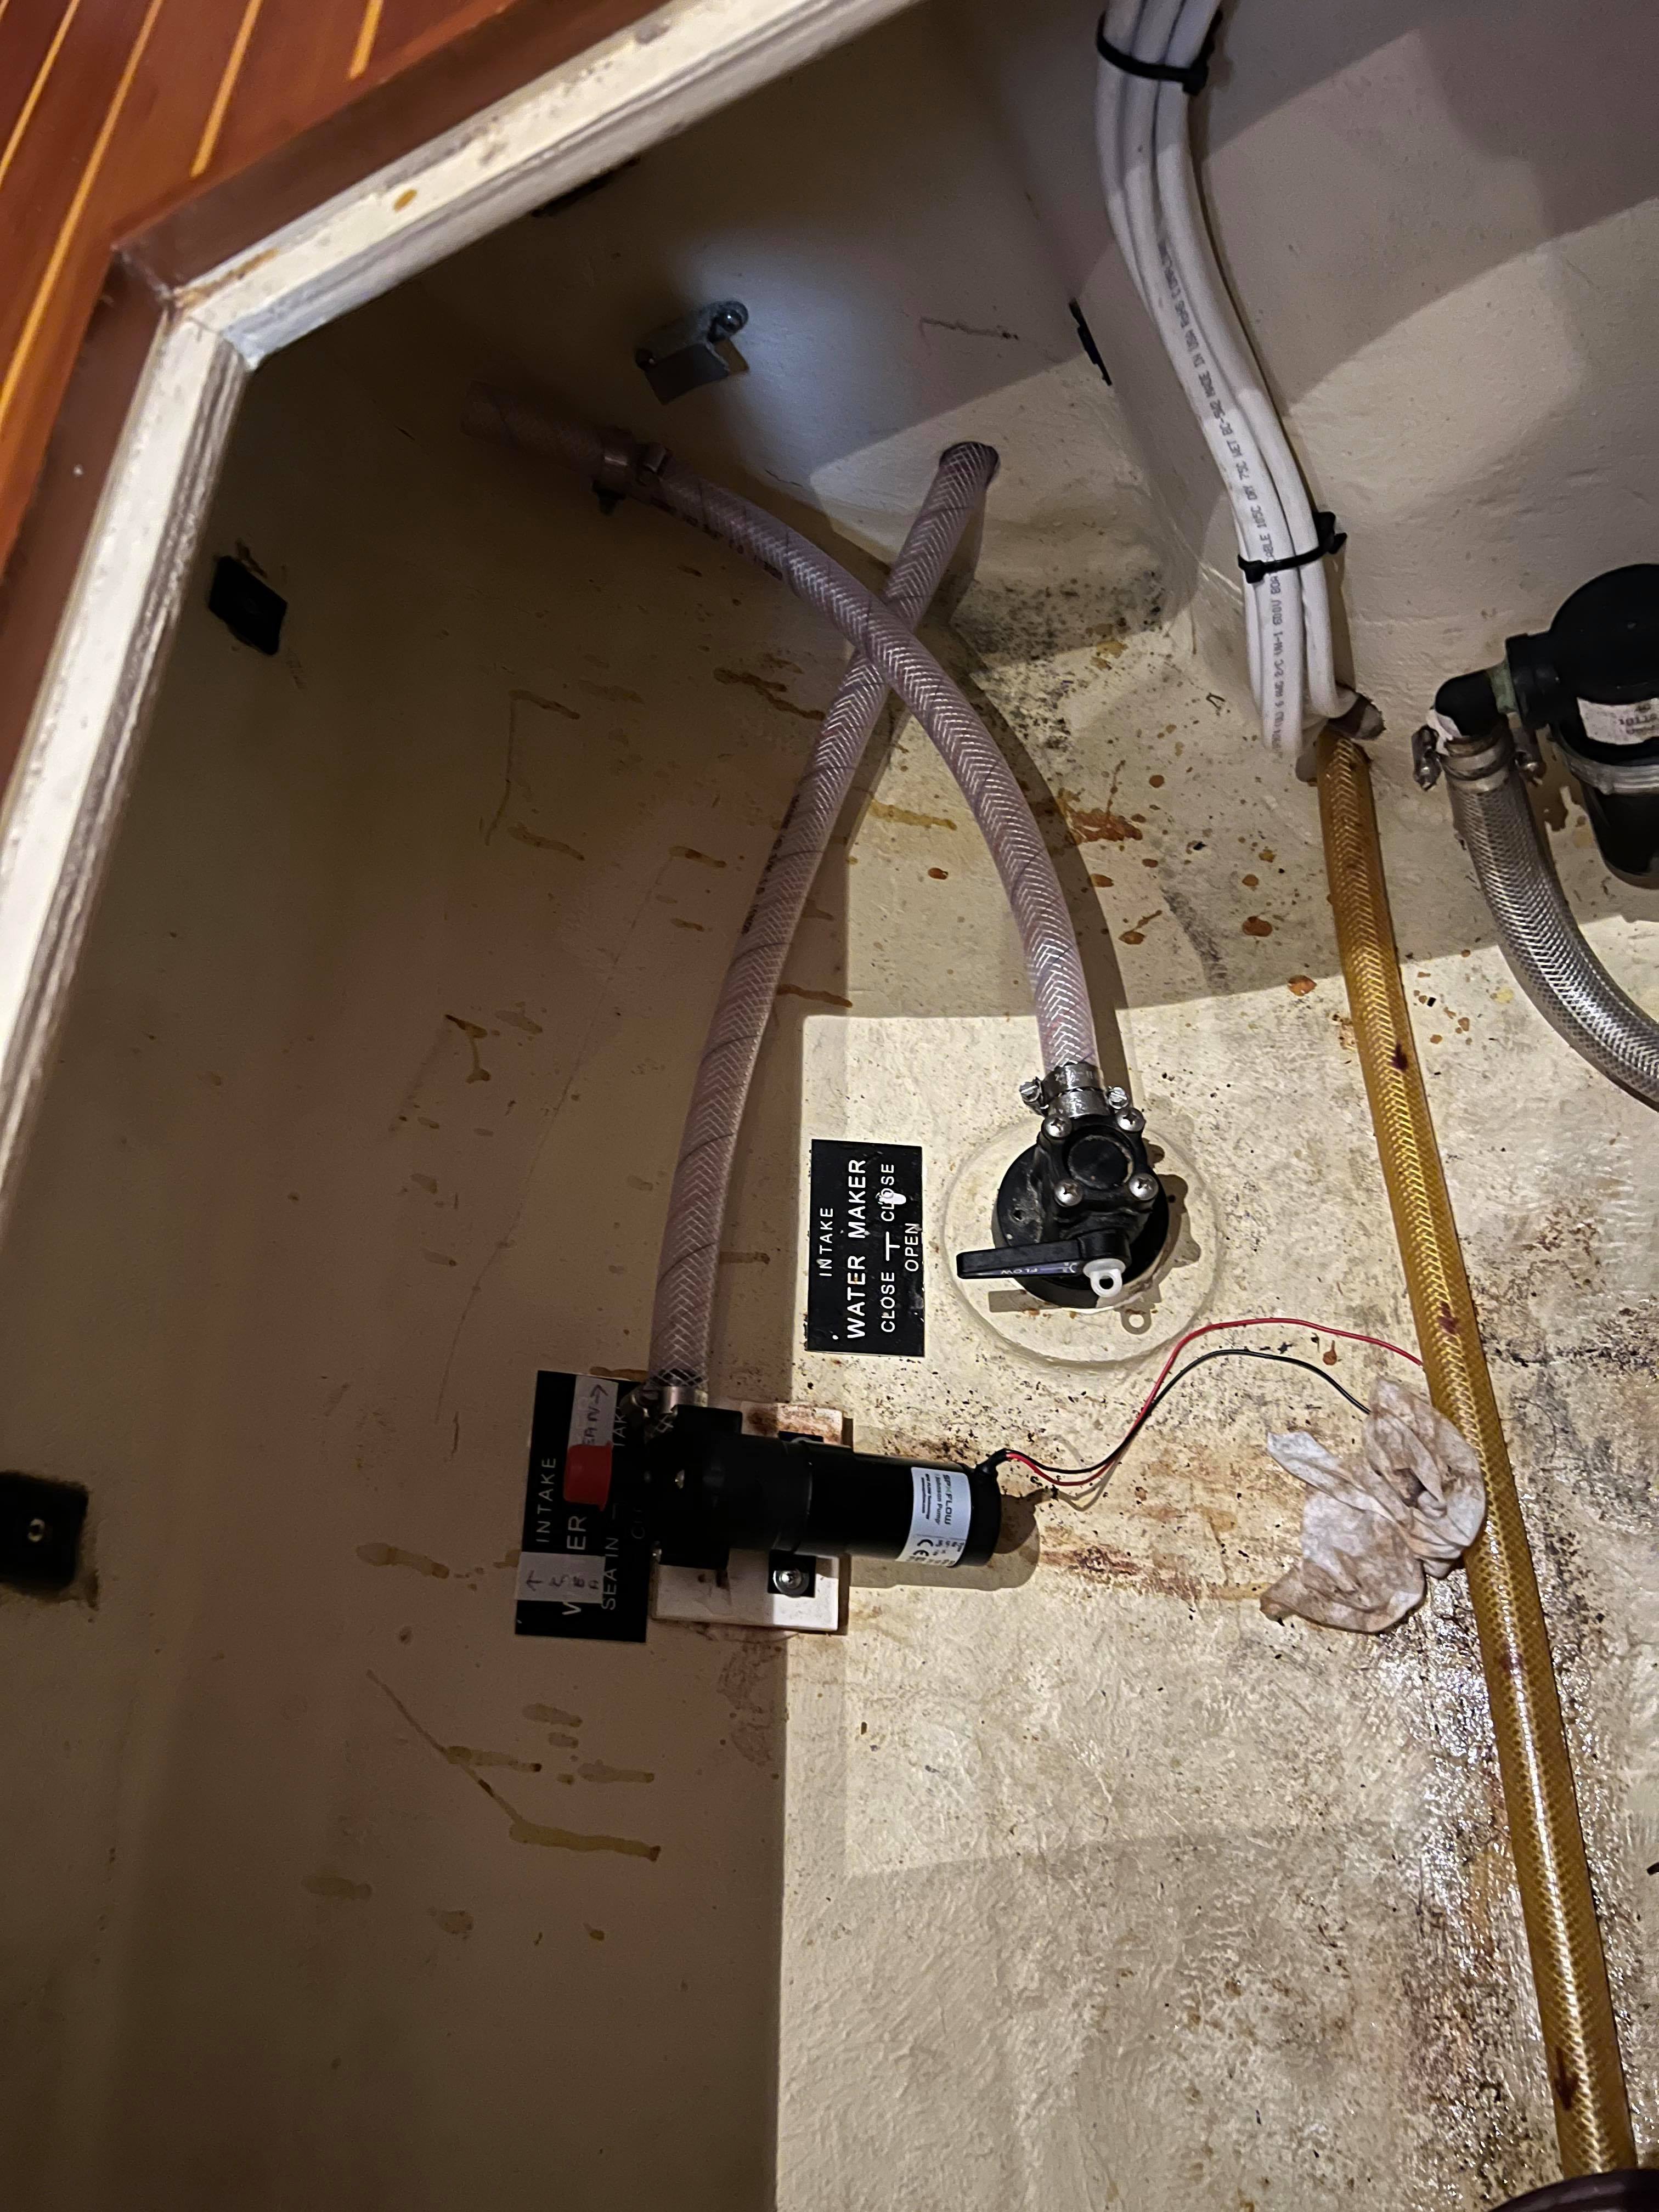
Since the water maker designs are different, the seawater supply to the new units could be simplified quite a bit (there’s a 3-way ball valve and a coil of hose that we don’t need). I started by just removing everything. Seawater had been sitting in there for a long time and smelled disgusting so the entire strainer got tossed out the emergency hatch to be dealt with later!
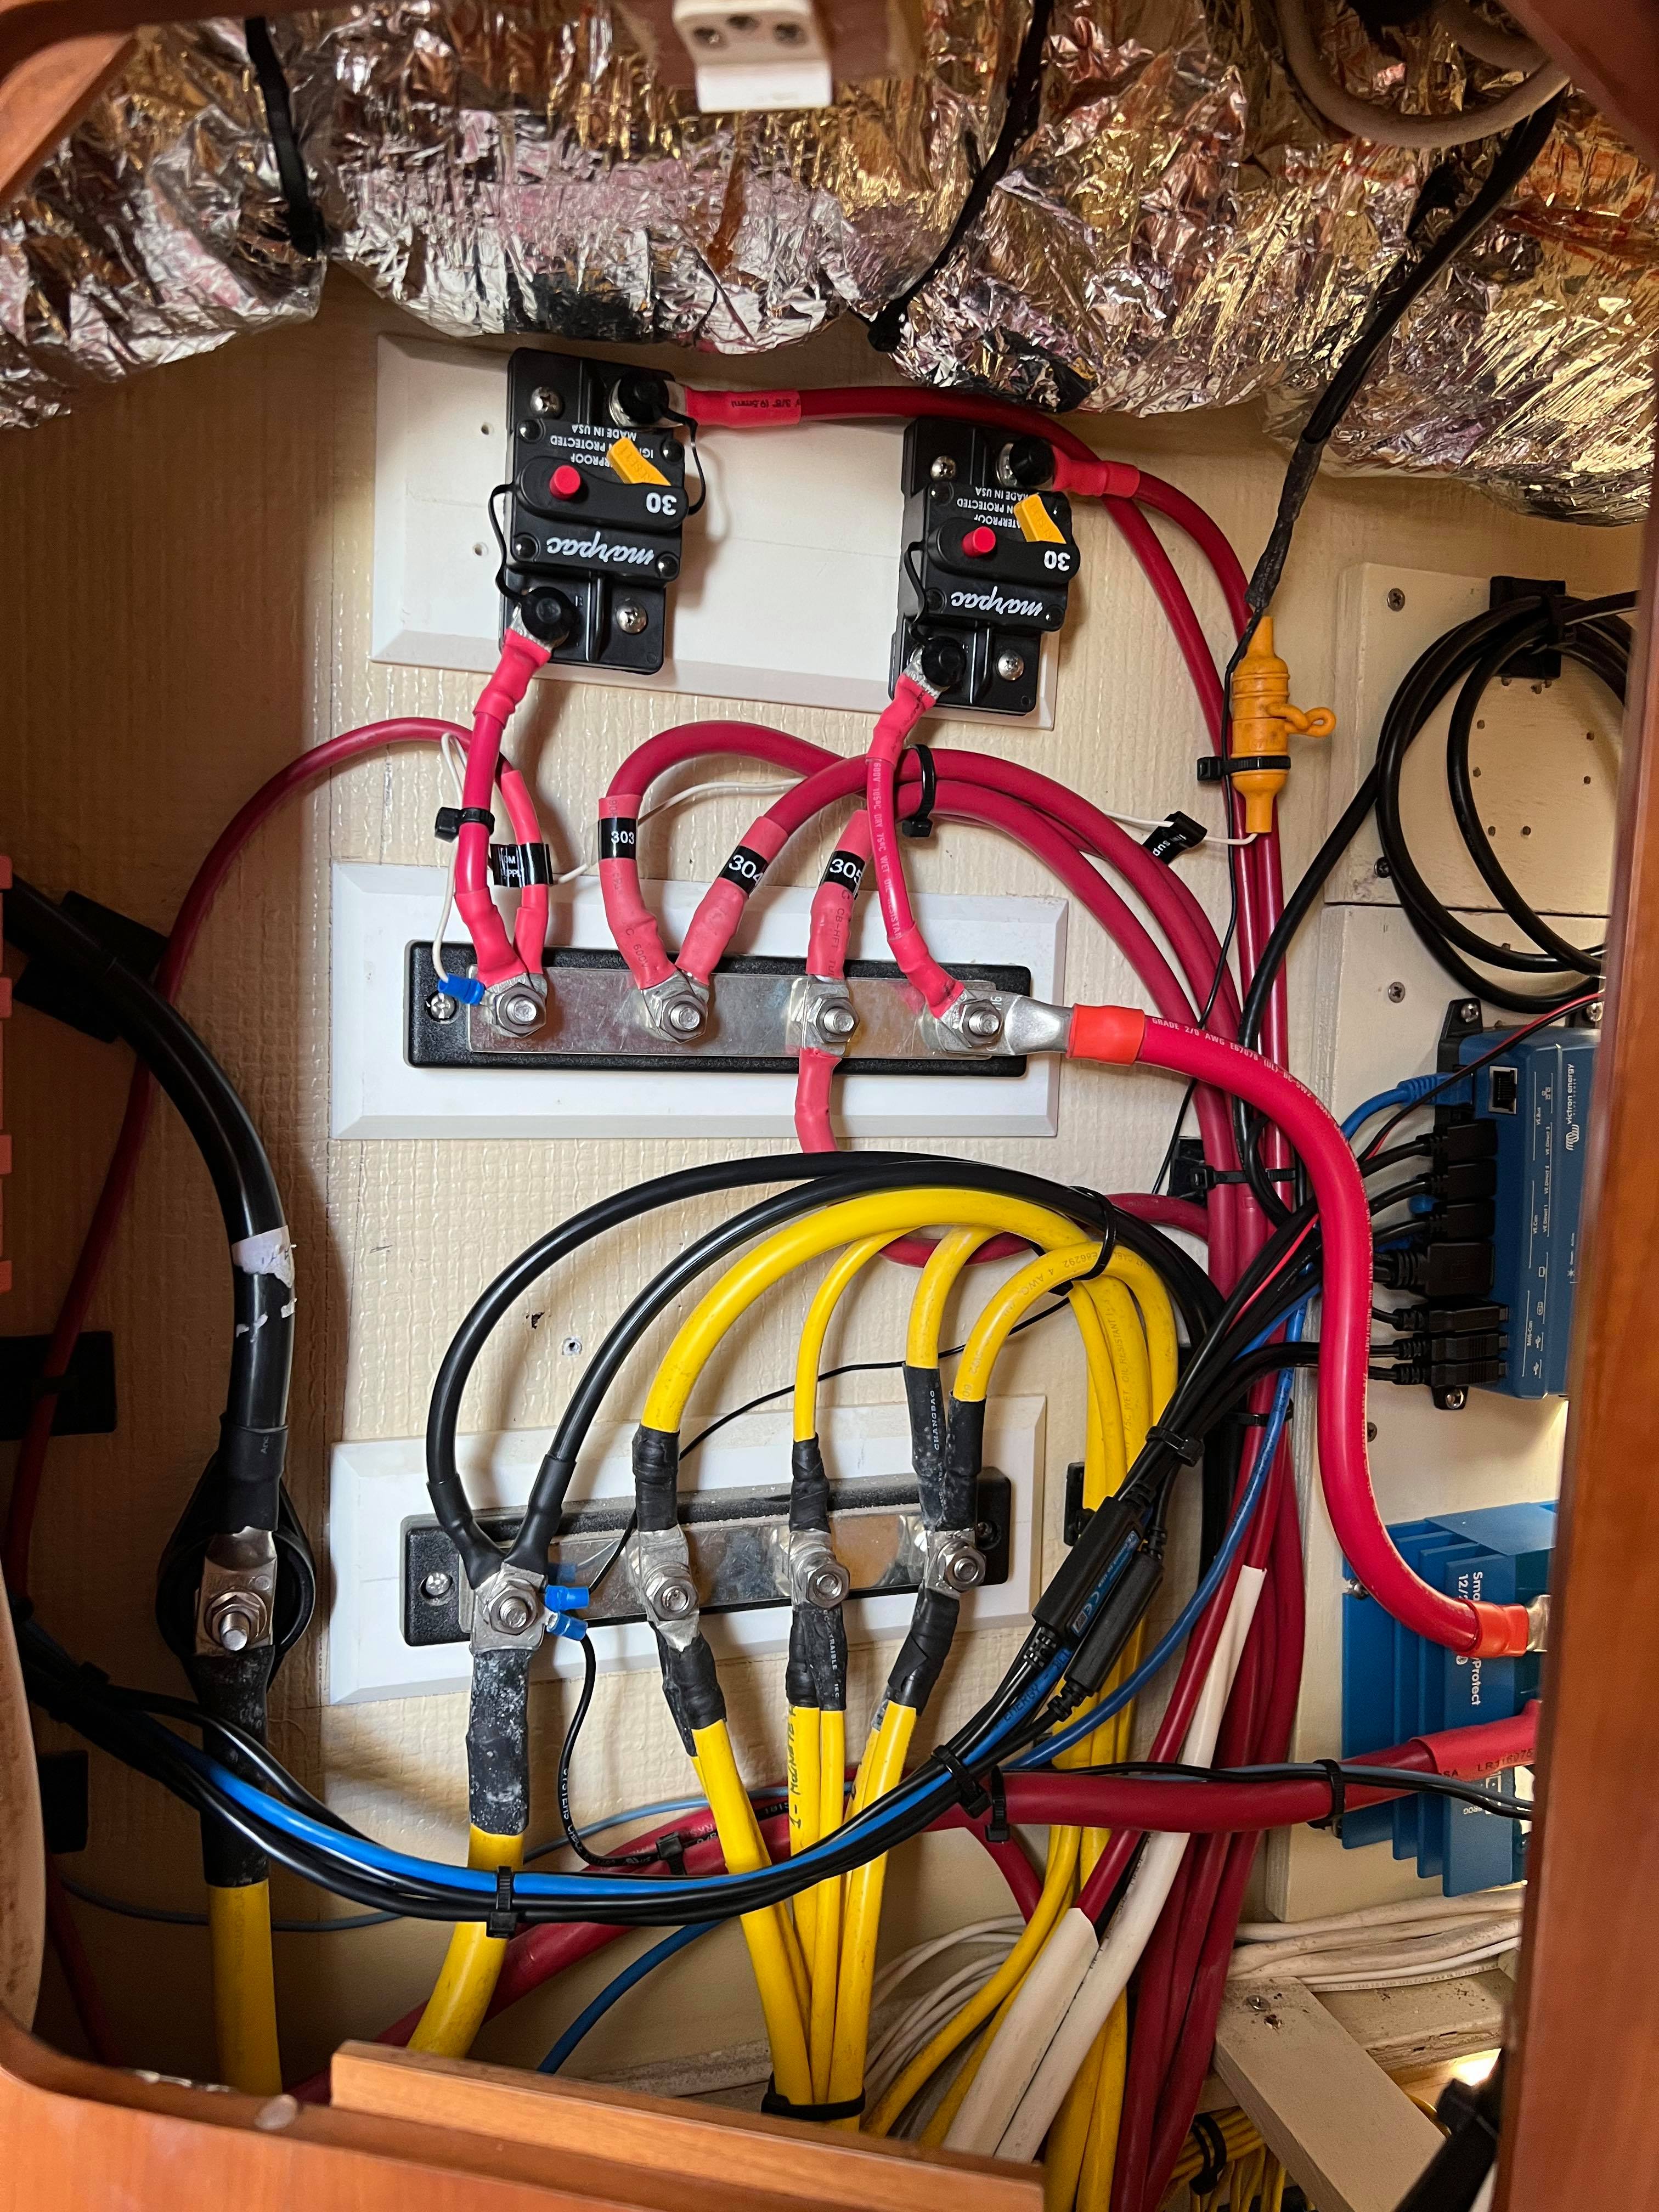
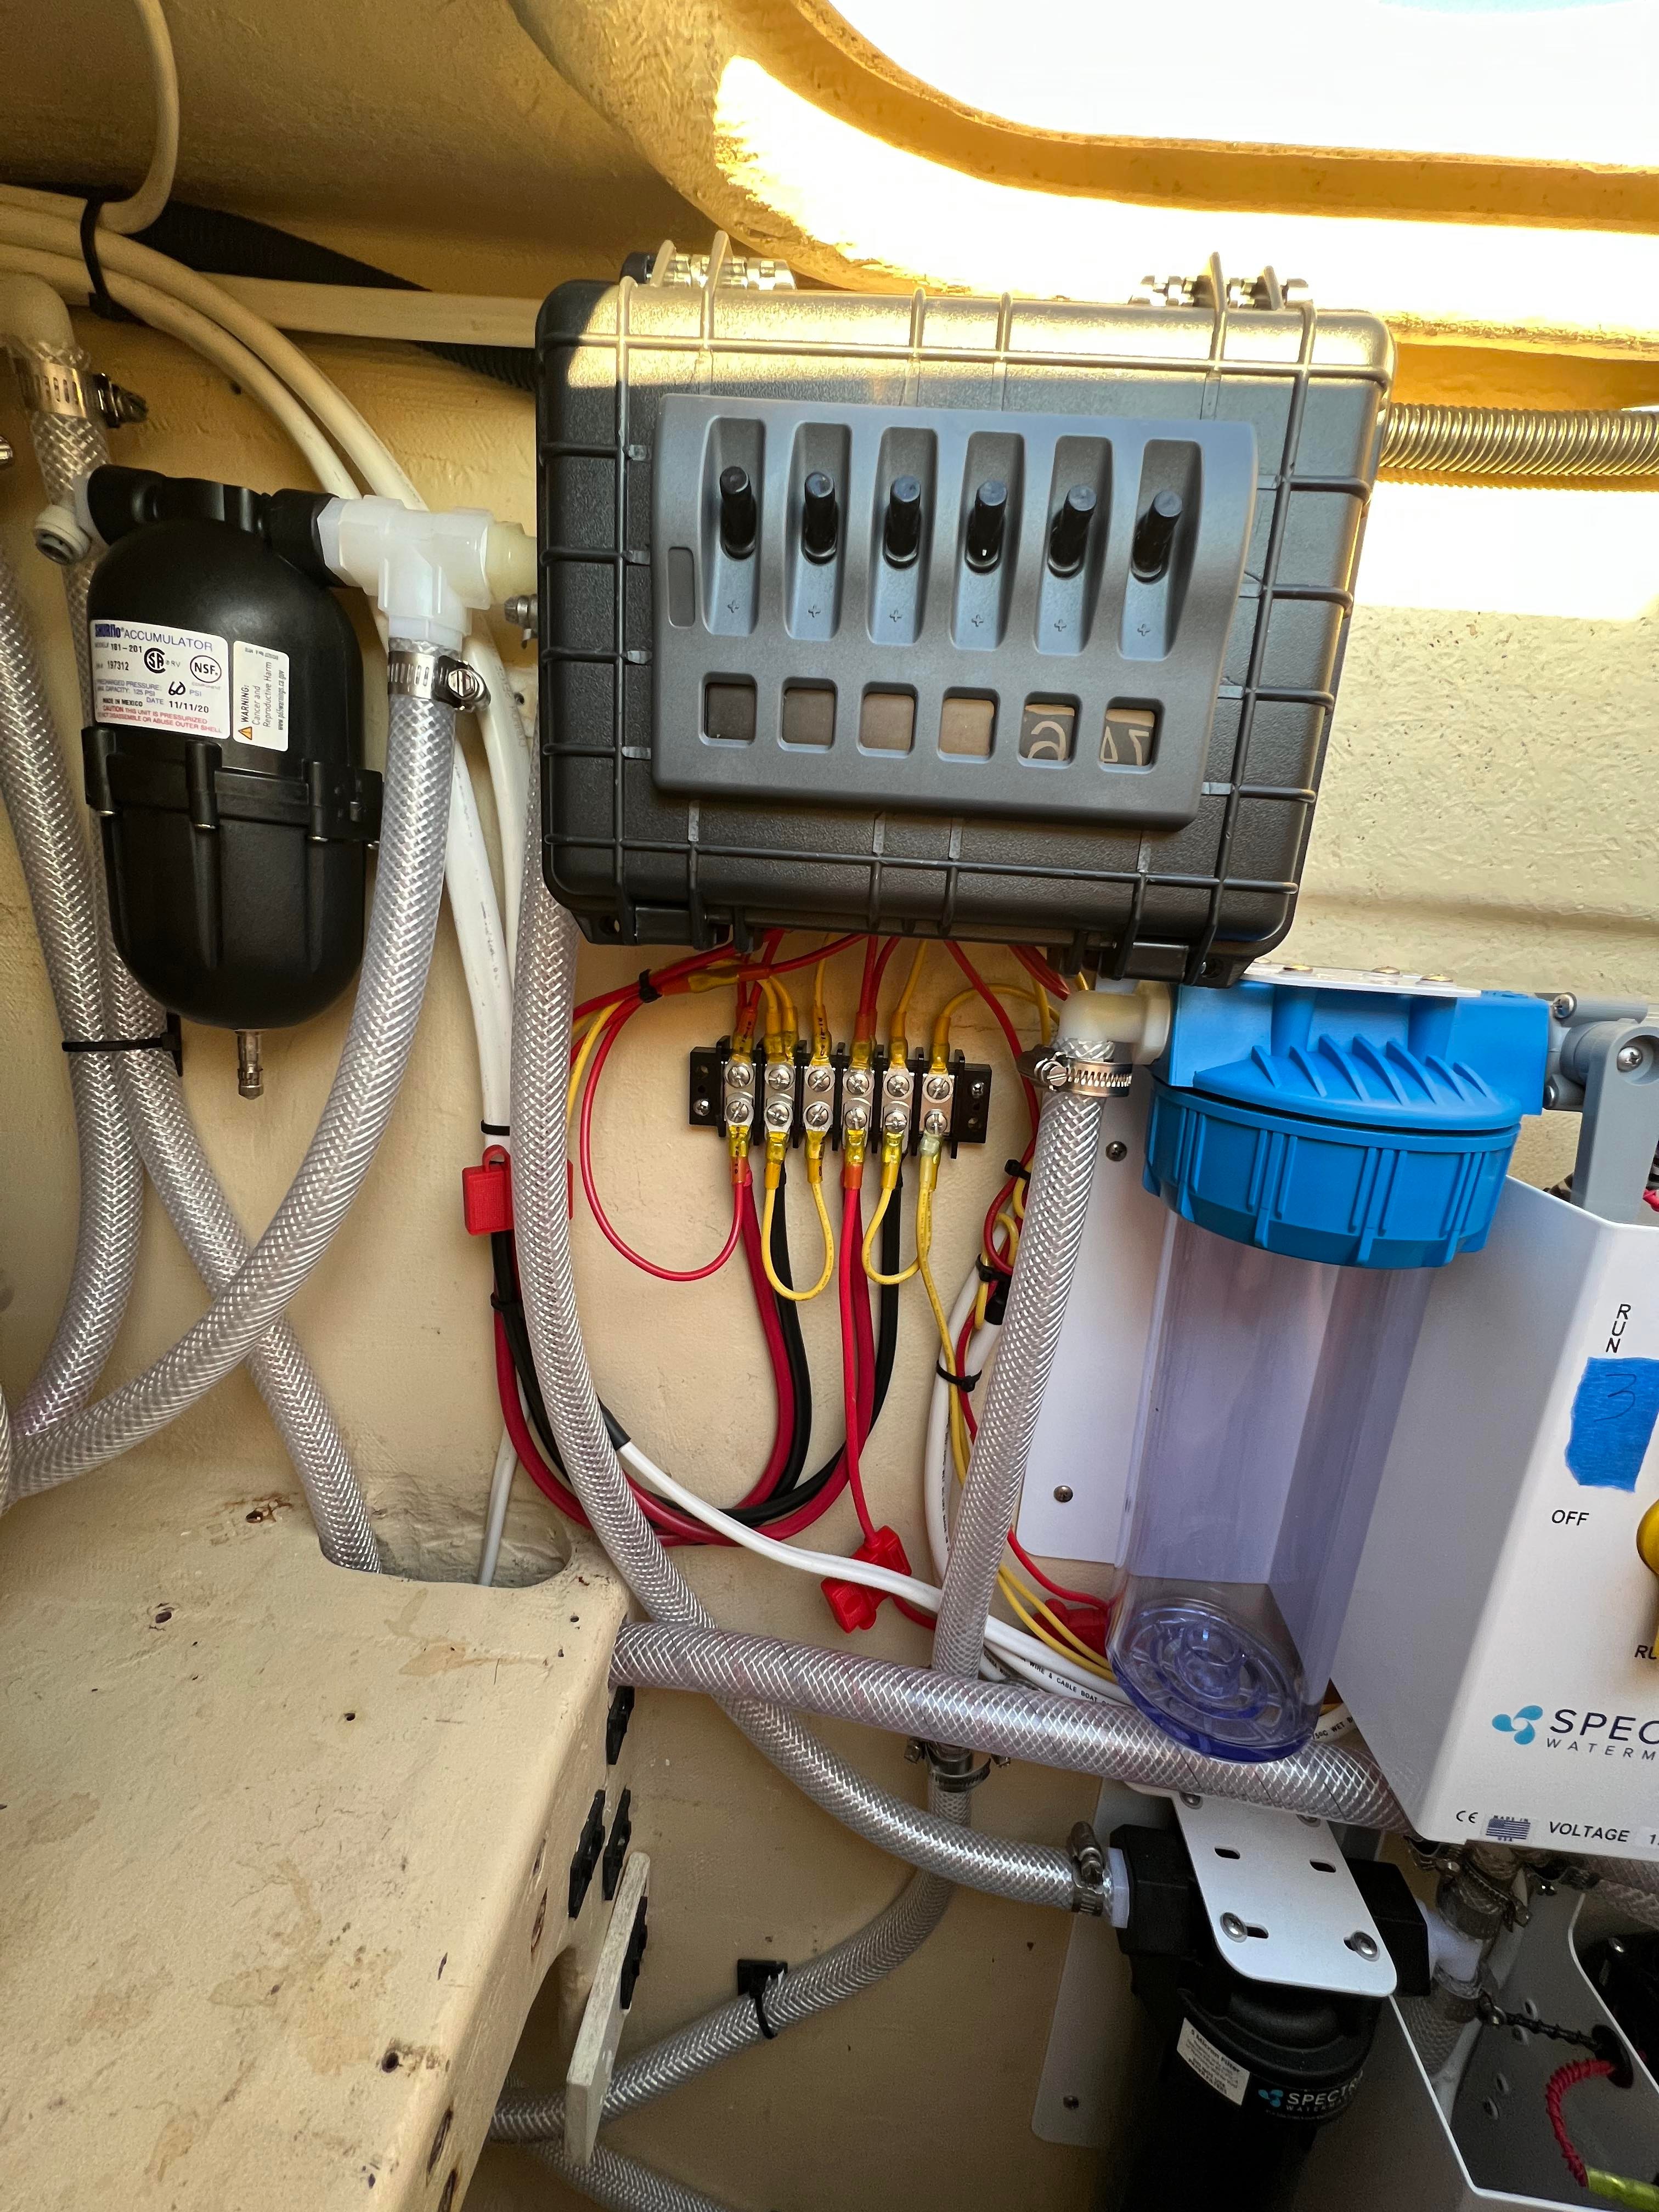
We’re waiting on parts again, so time to move on to something else for a bit! Since the old watermaker was AC and the new ones are DC, we couldn’t reuse any of the wiring. I got to crawl around in the boat and remove all of the old wiring and due to the length required to reach all the way to the back of the boat, the new wiring was the same gigantic 6 ga duplex wire that we ran for the solar panels. Voltage drop is a pain in the ass! We didn’t have enough room on the main breaker panel to add new breakers there, so I added remote breakers off of the main power bus. There are switches on the units themselves, so we plan on just leaving these on all the time unless we need to isolate the system for some reason.
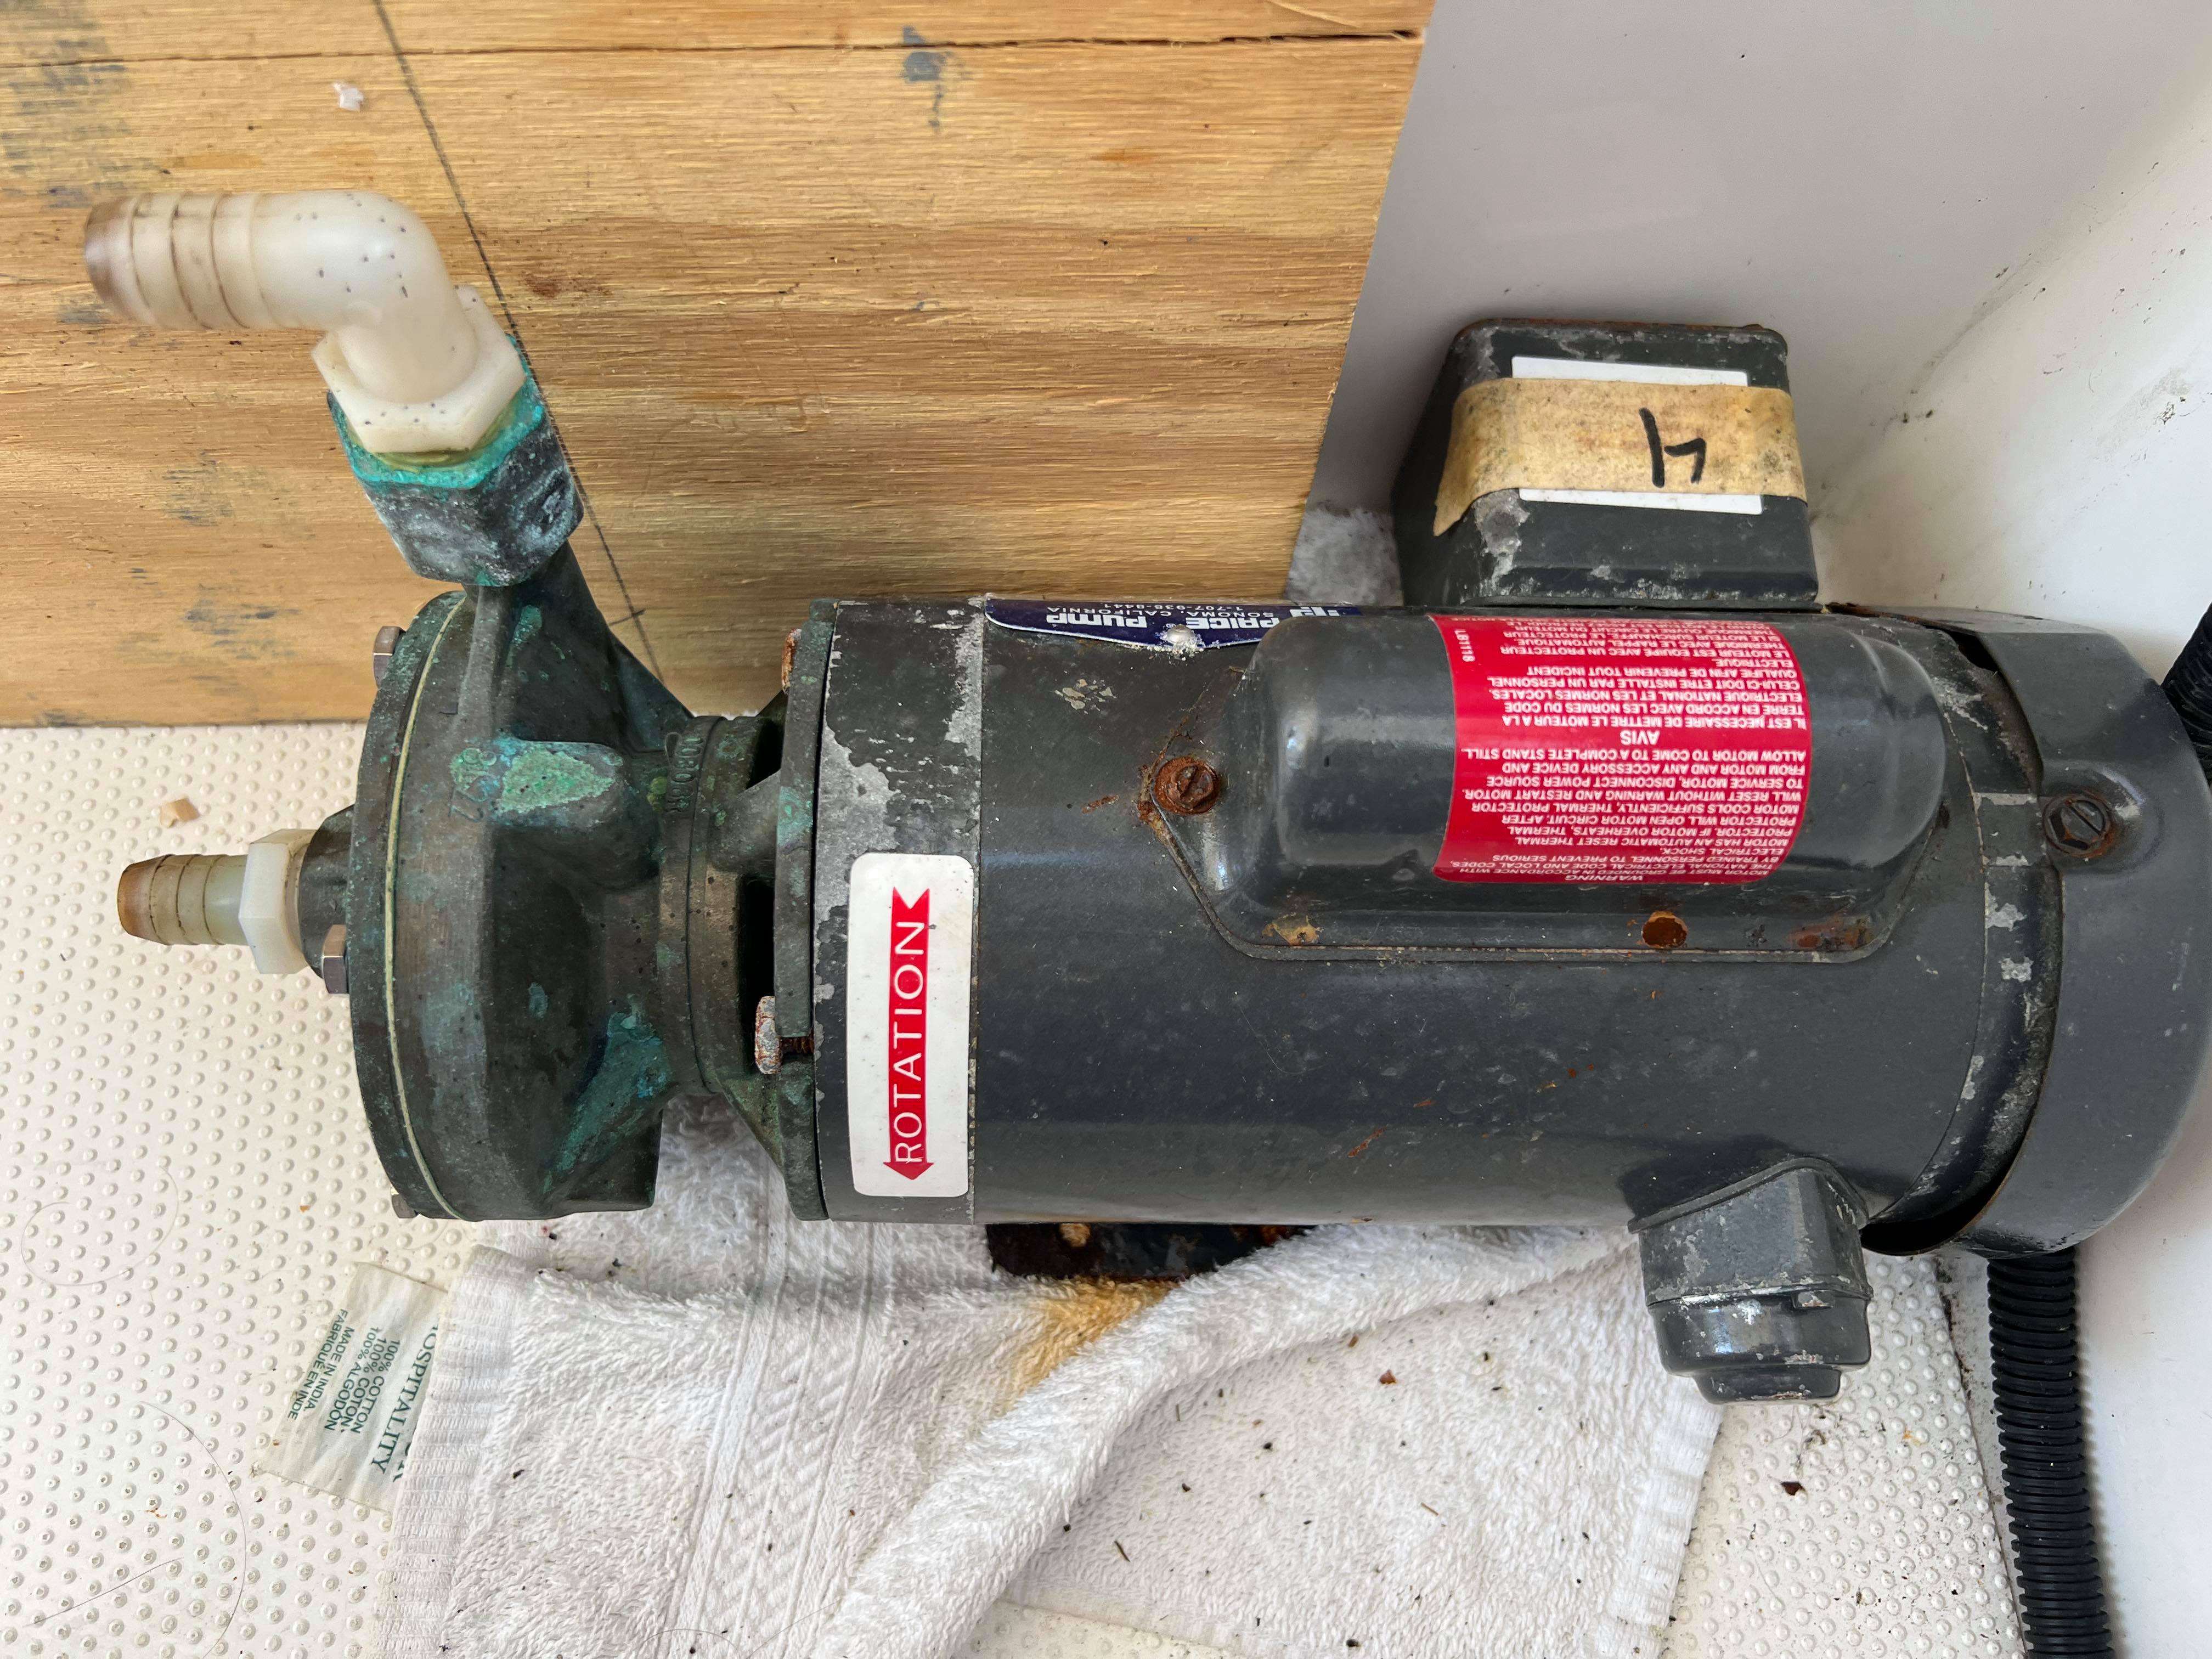
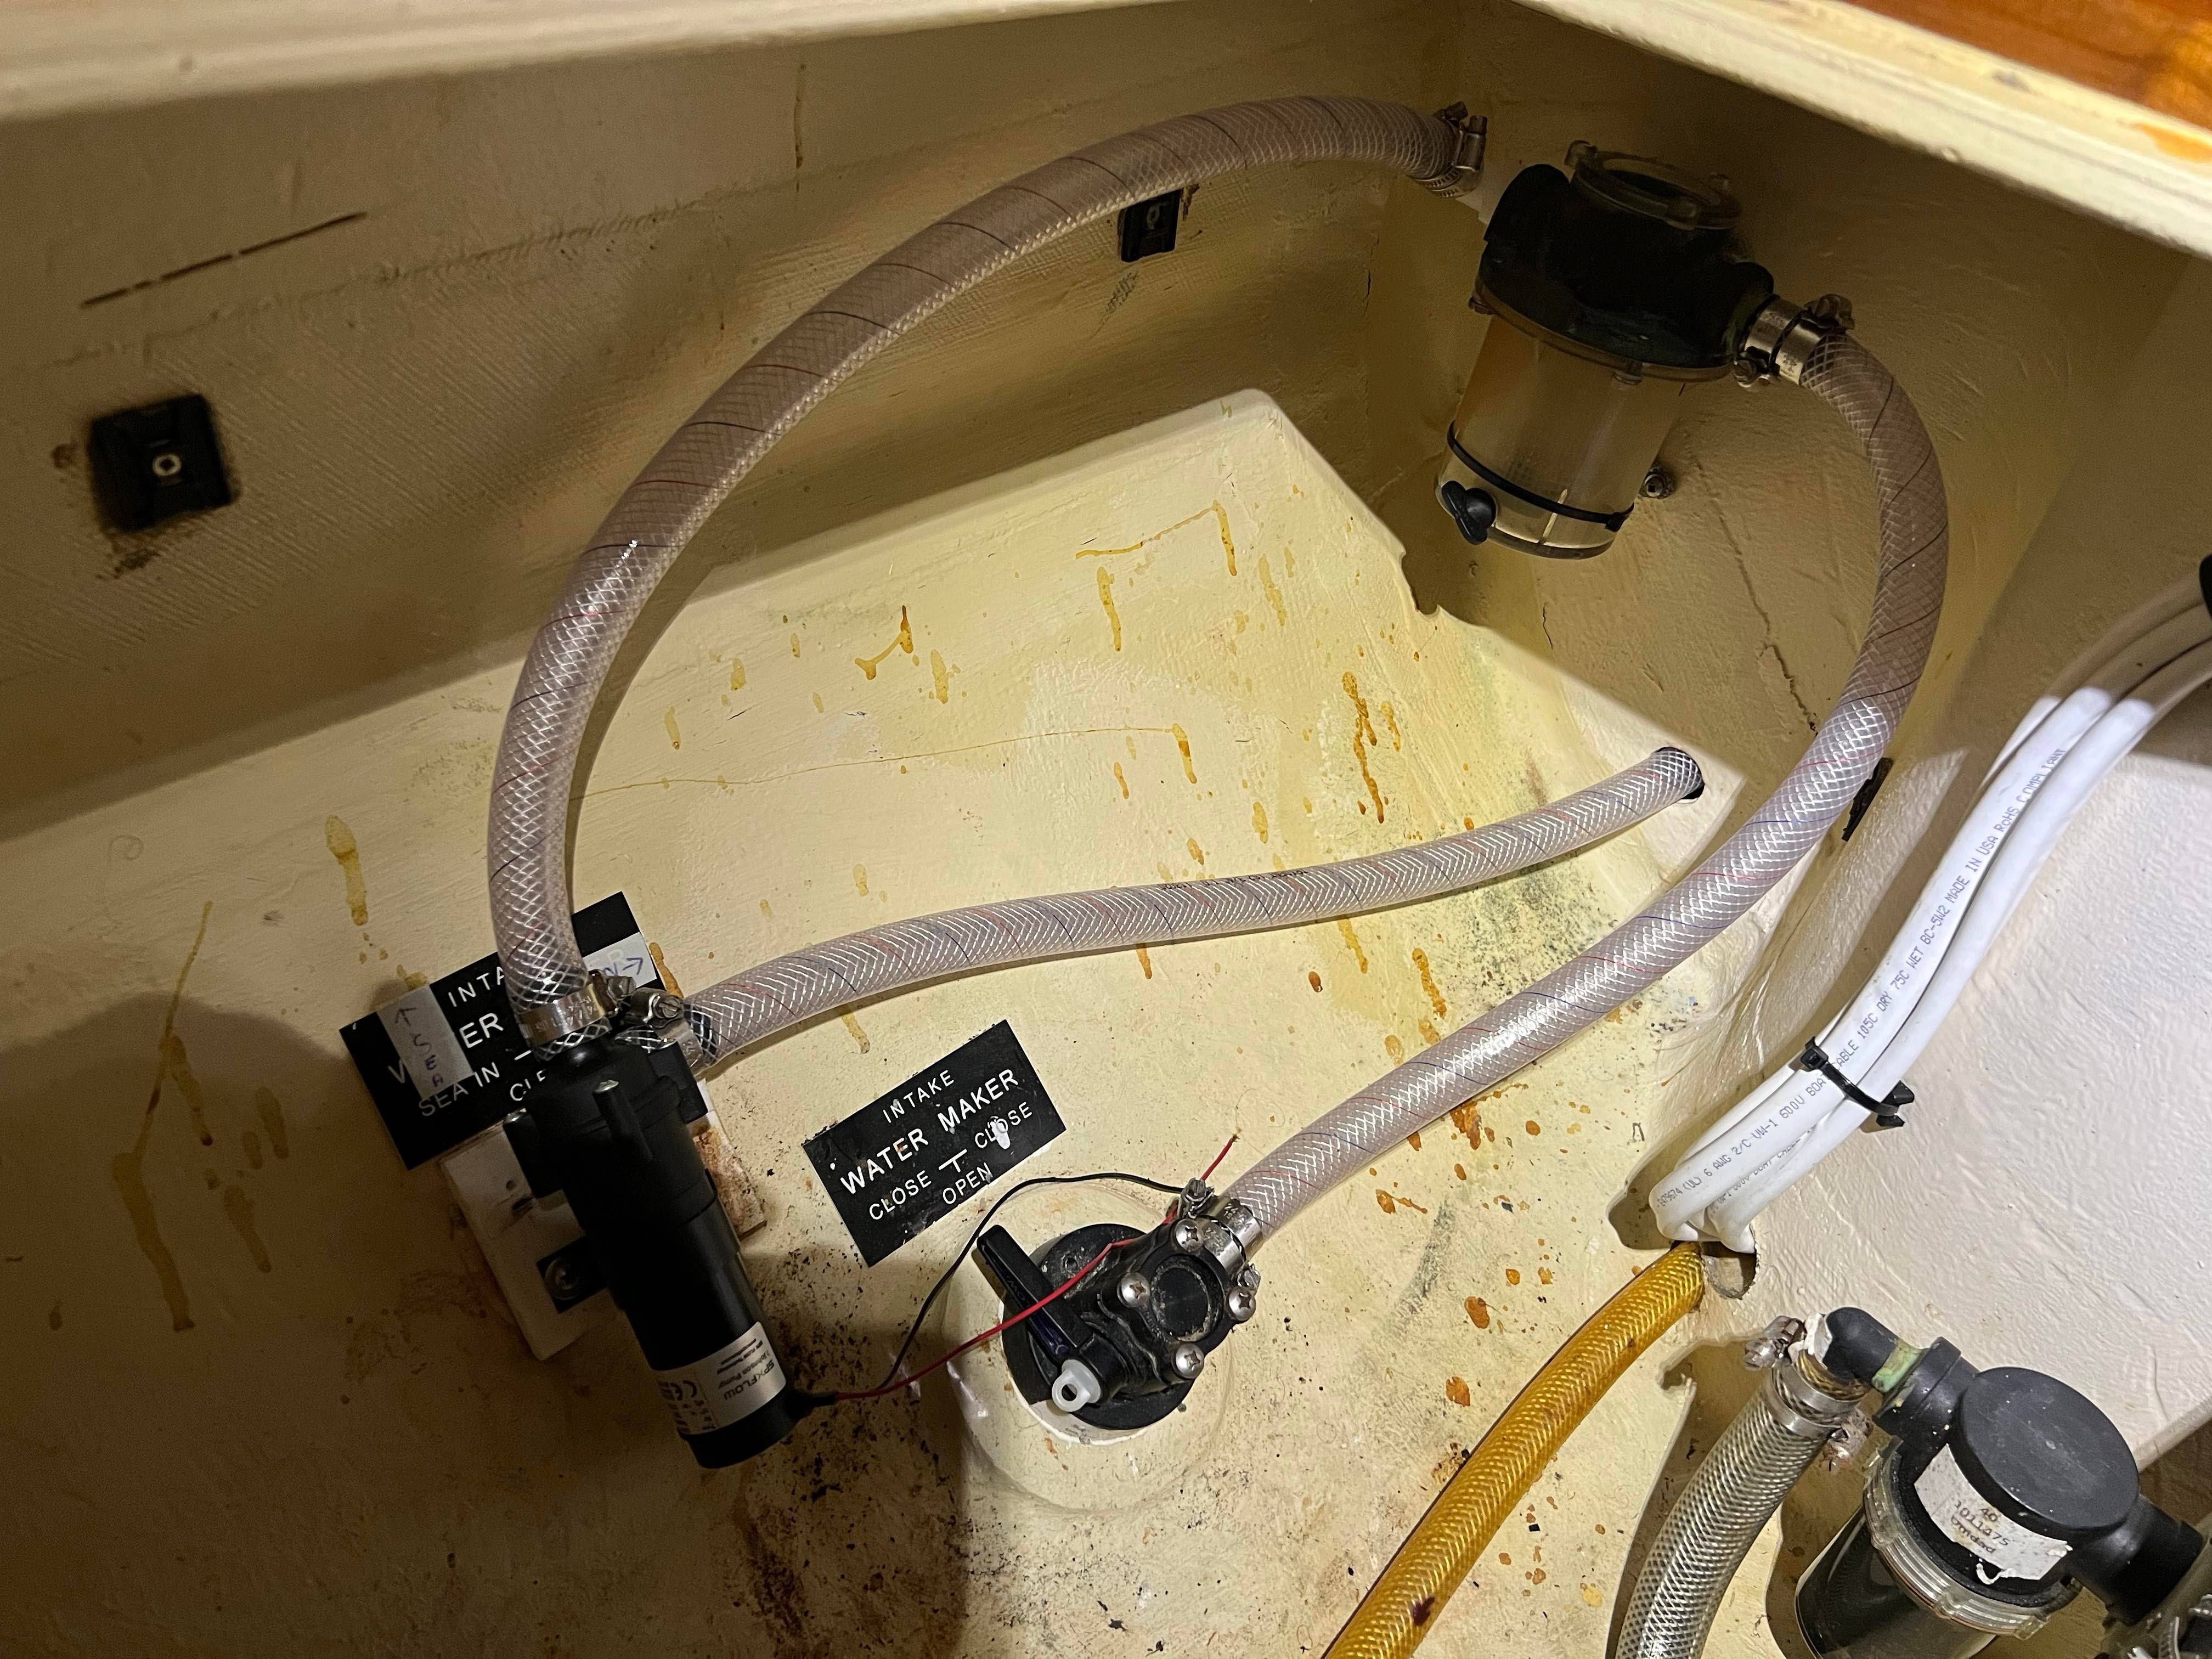
The old watermaker had a giant 120v pump mounted underneath our bed. It was like 20lbs of solid steel and seemed like complete overkill. Due to the length of the run of hose from the seacock to the inlet of the new watermaker, we still needed to have a boost pump. The new one is 12v and is so tiny I thought they sent me the wrong one at first. It’s about the size of my cell phone so I mounted it inside the bilge next to the strainer and freed up some space under my bed for storage.
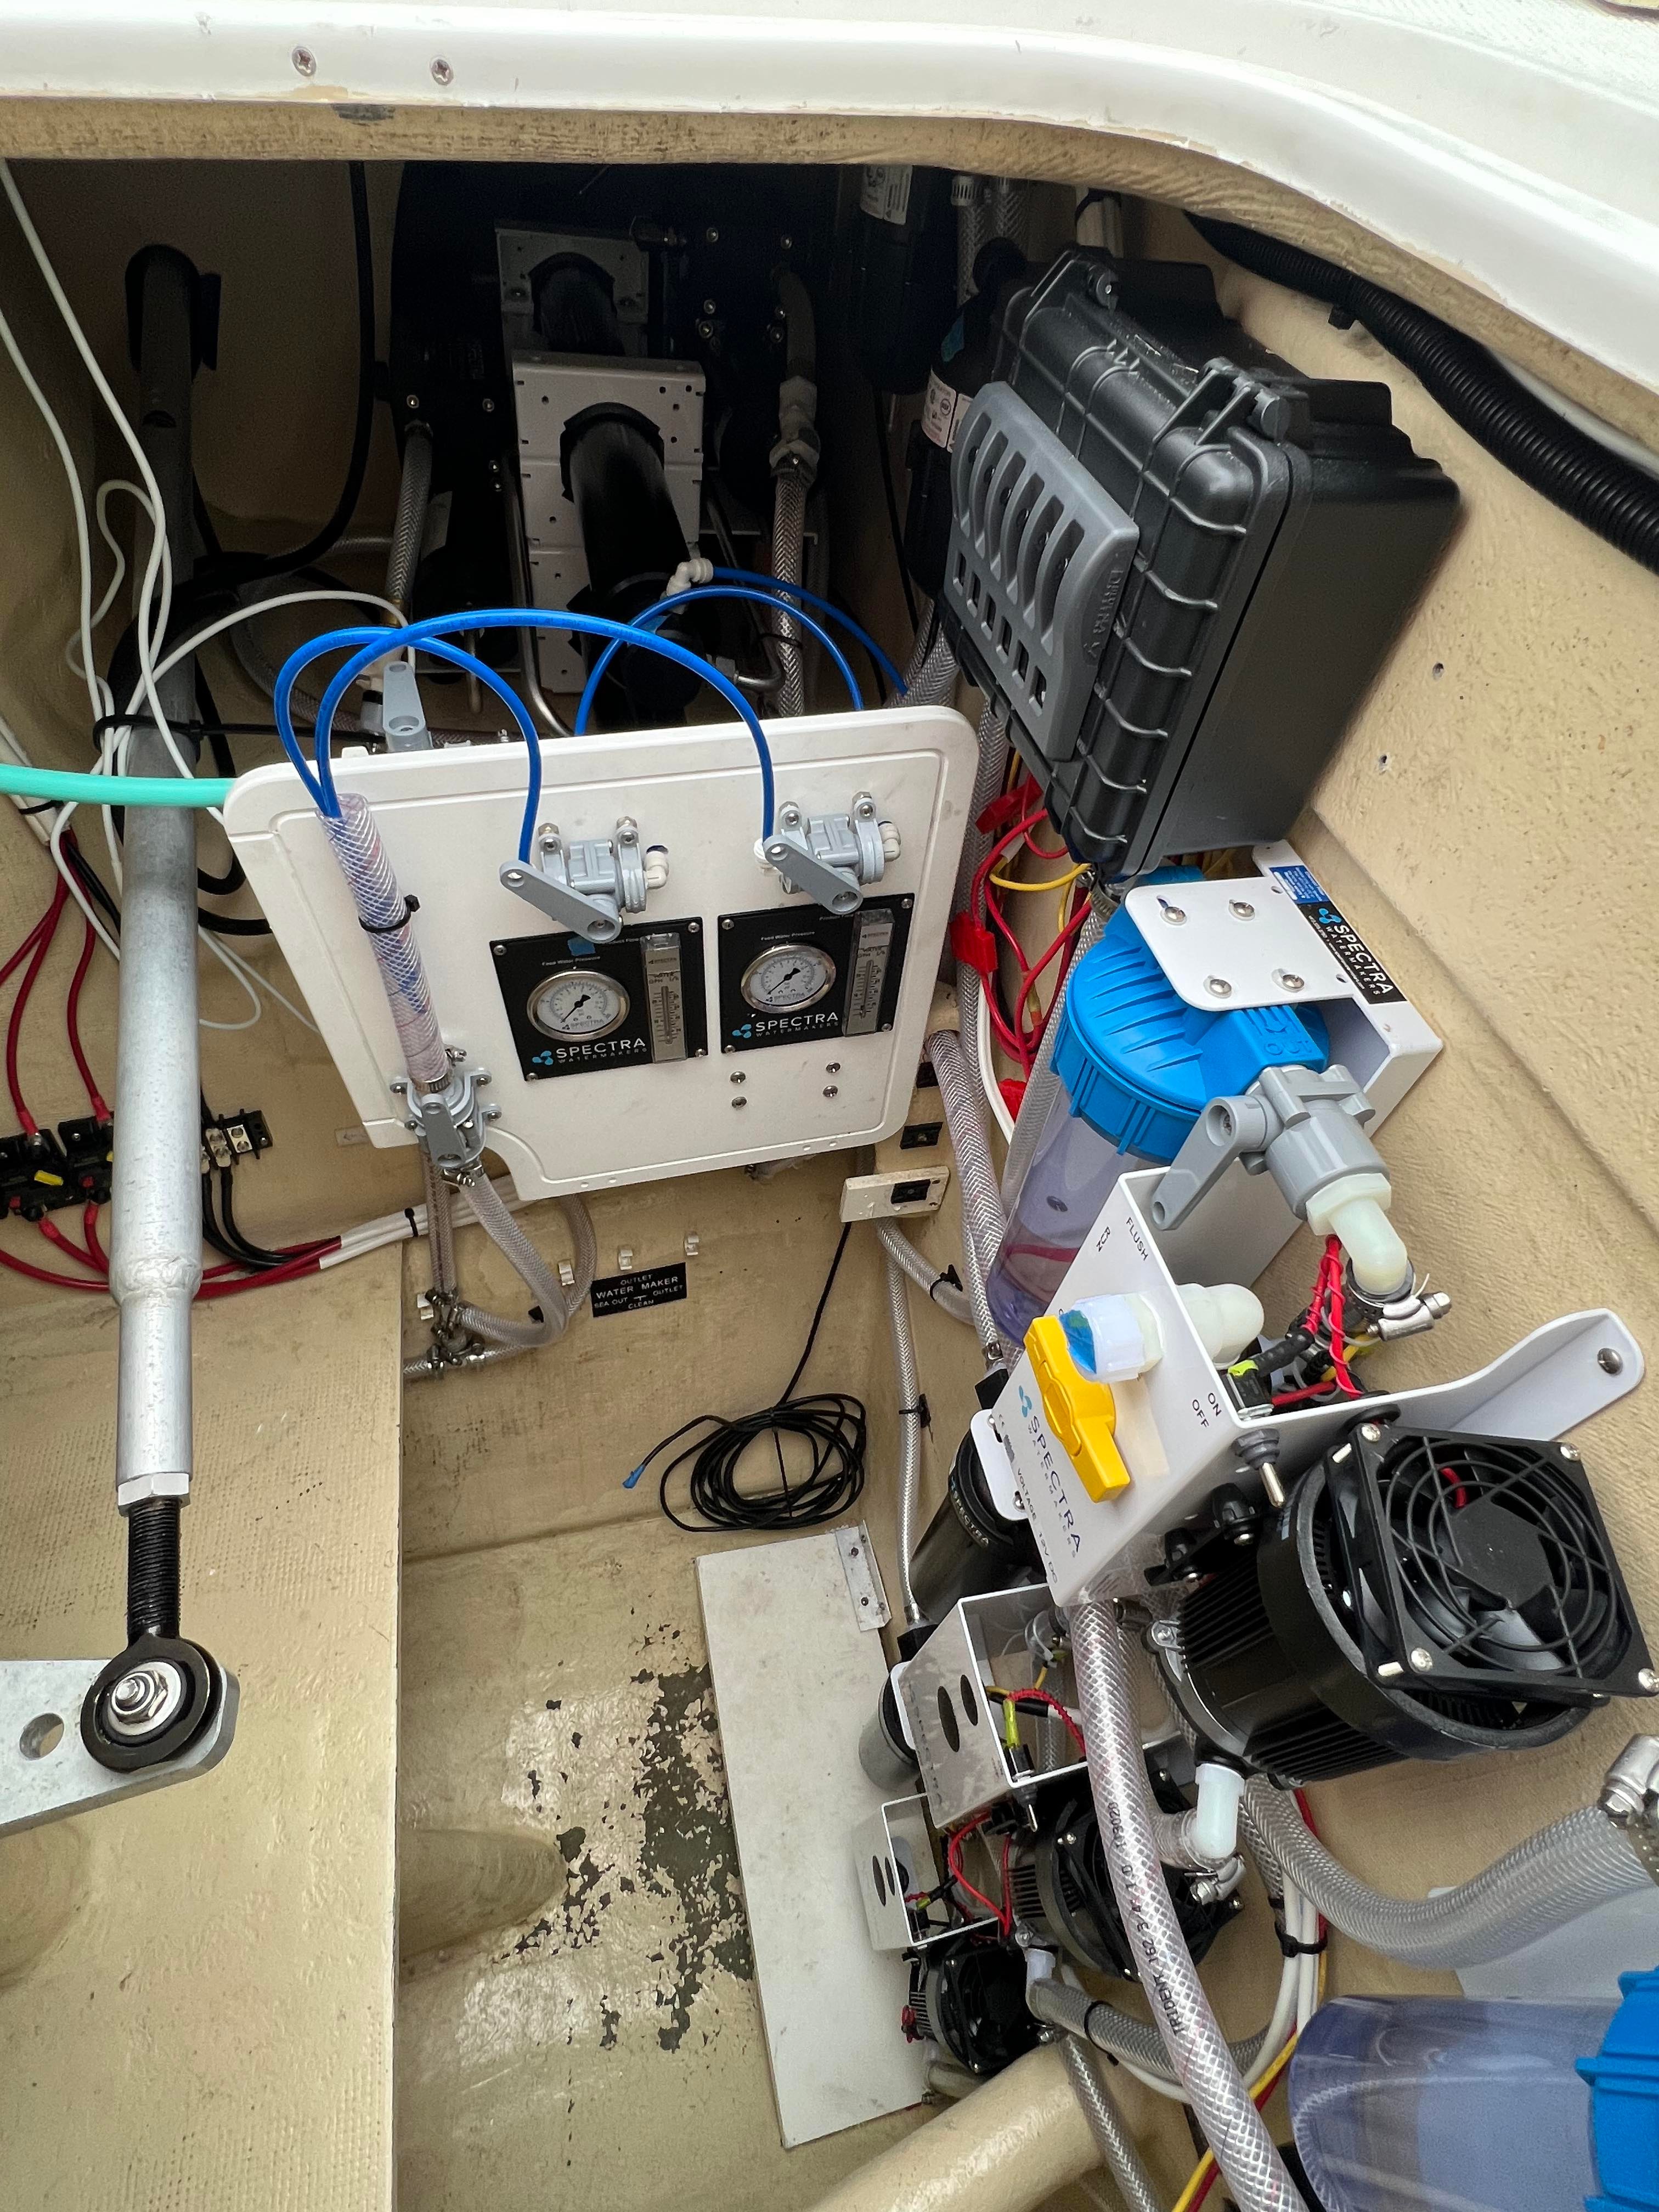
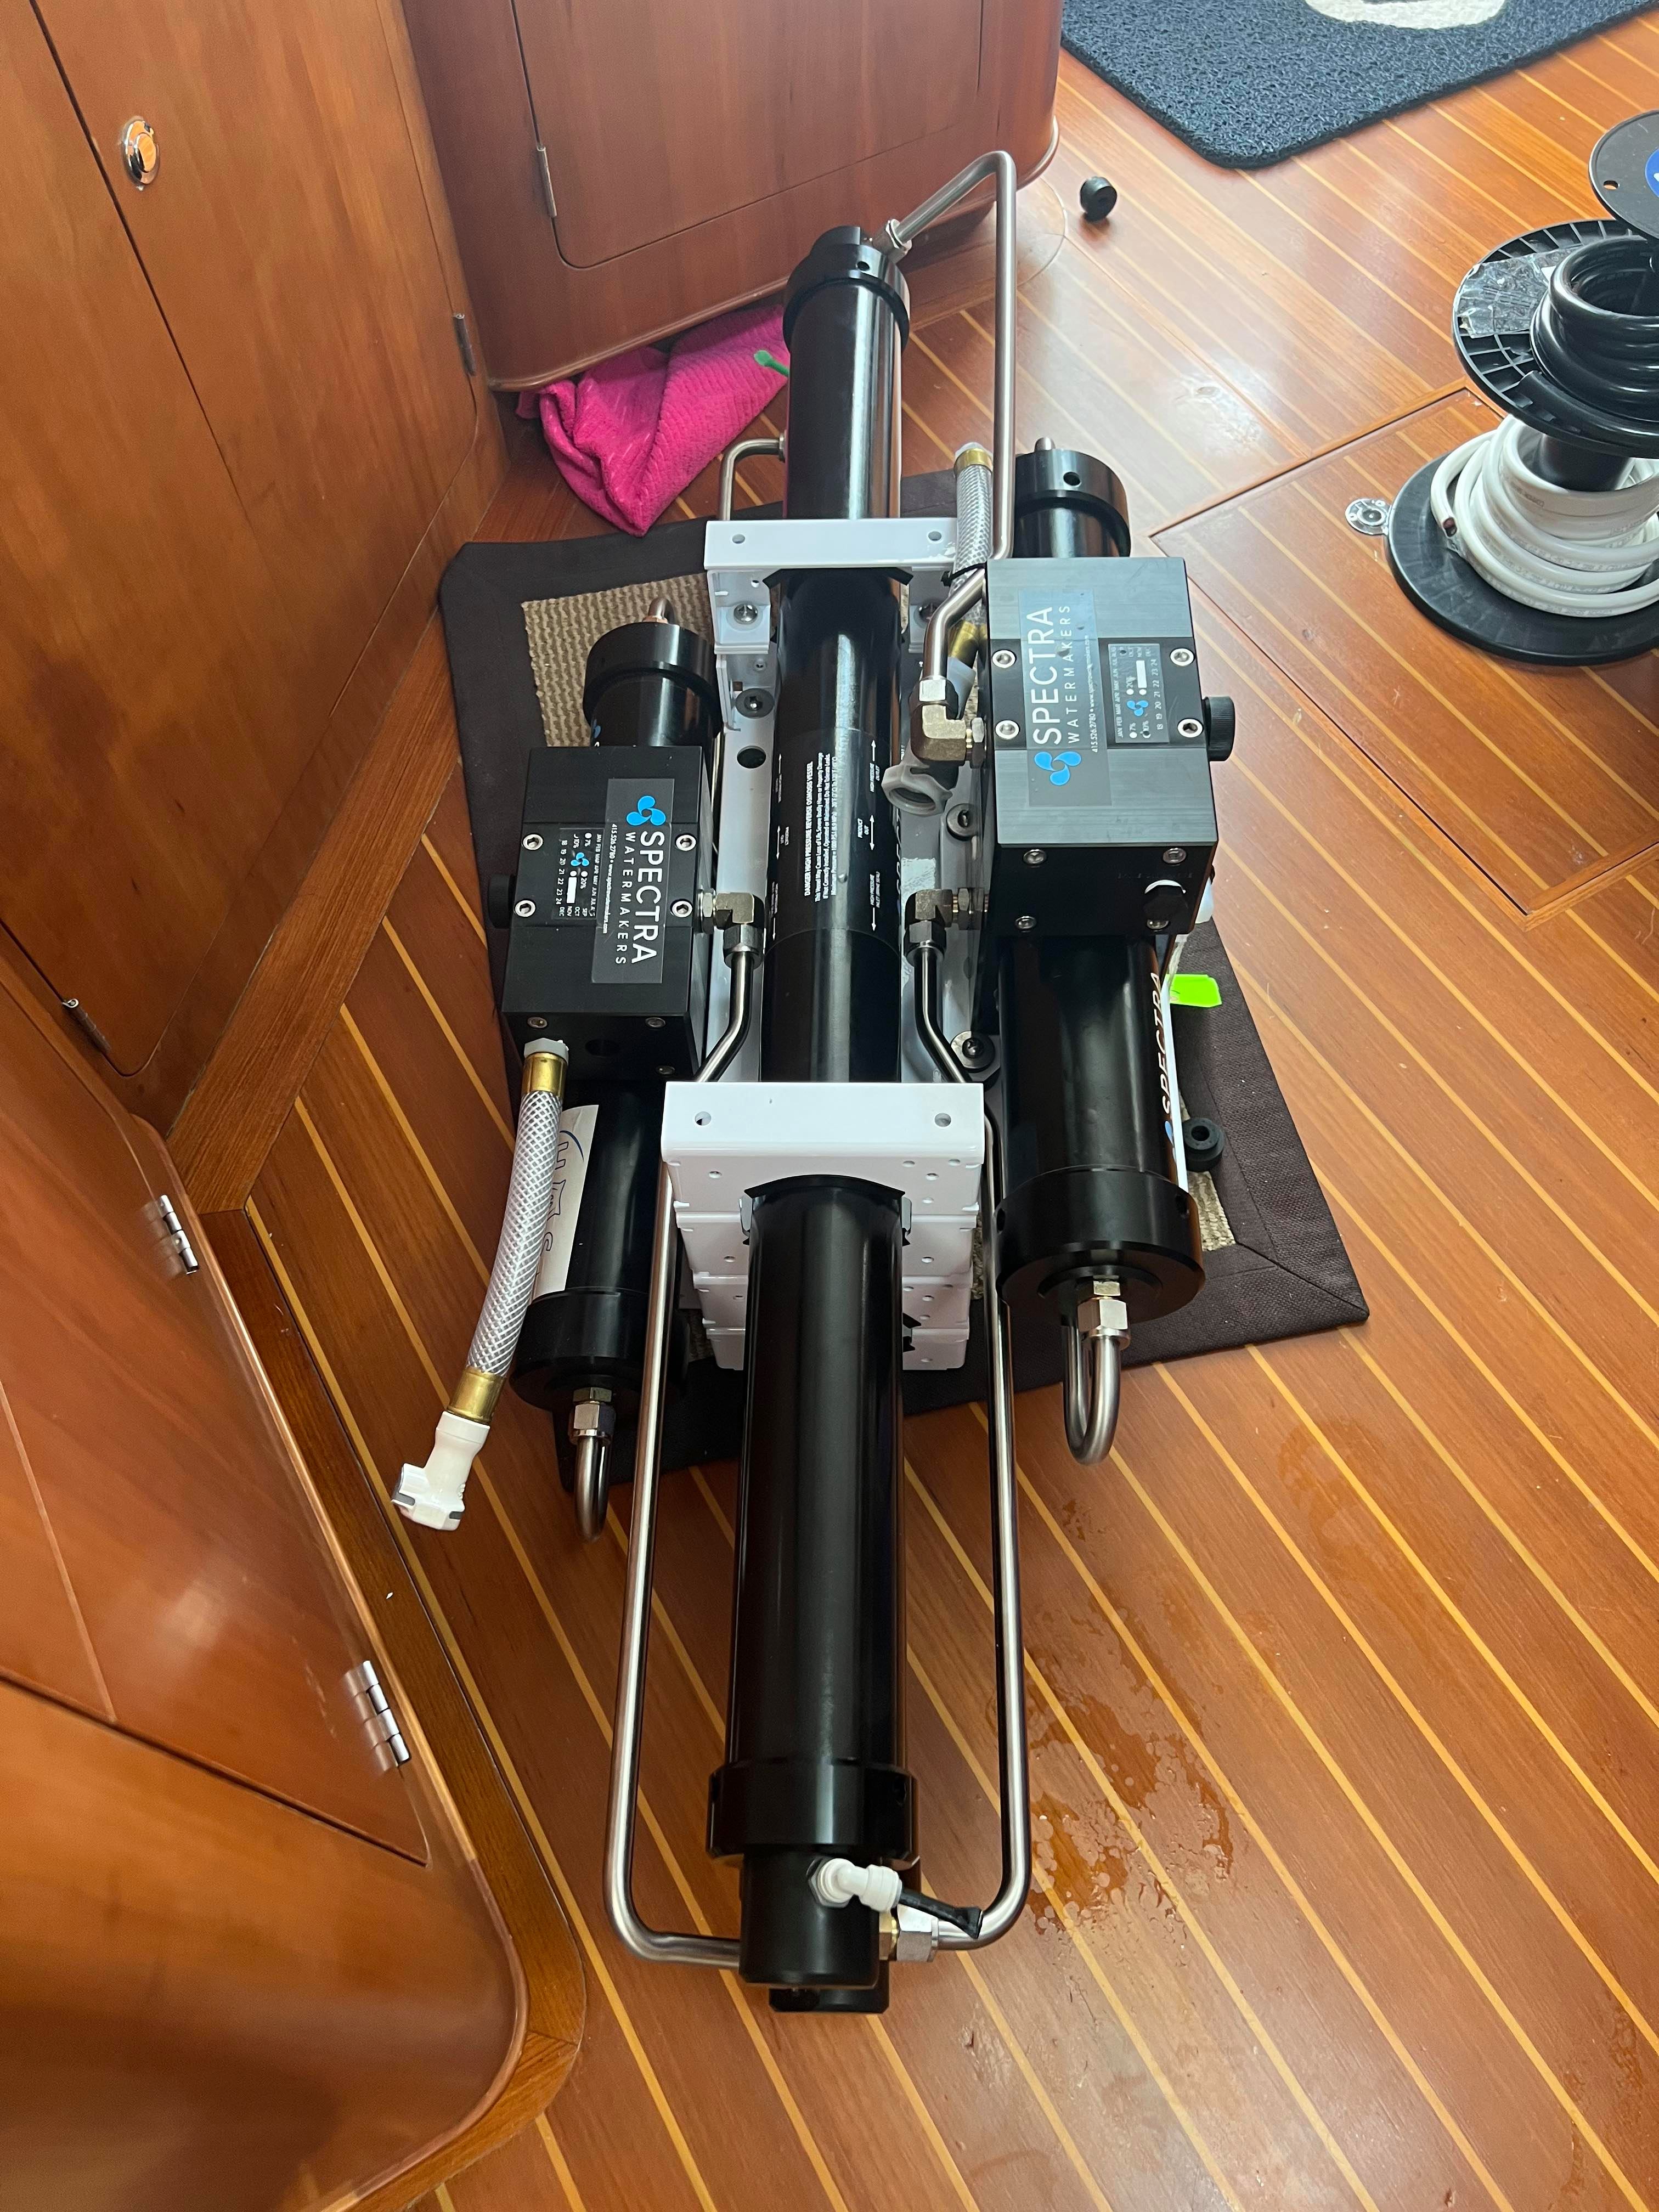
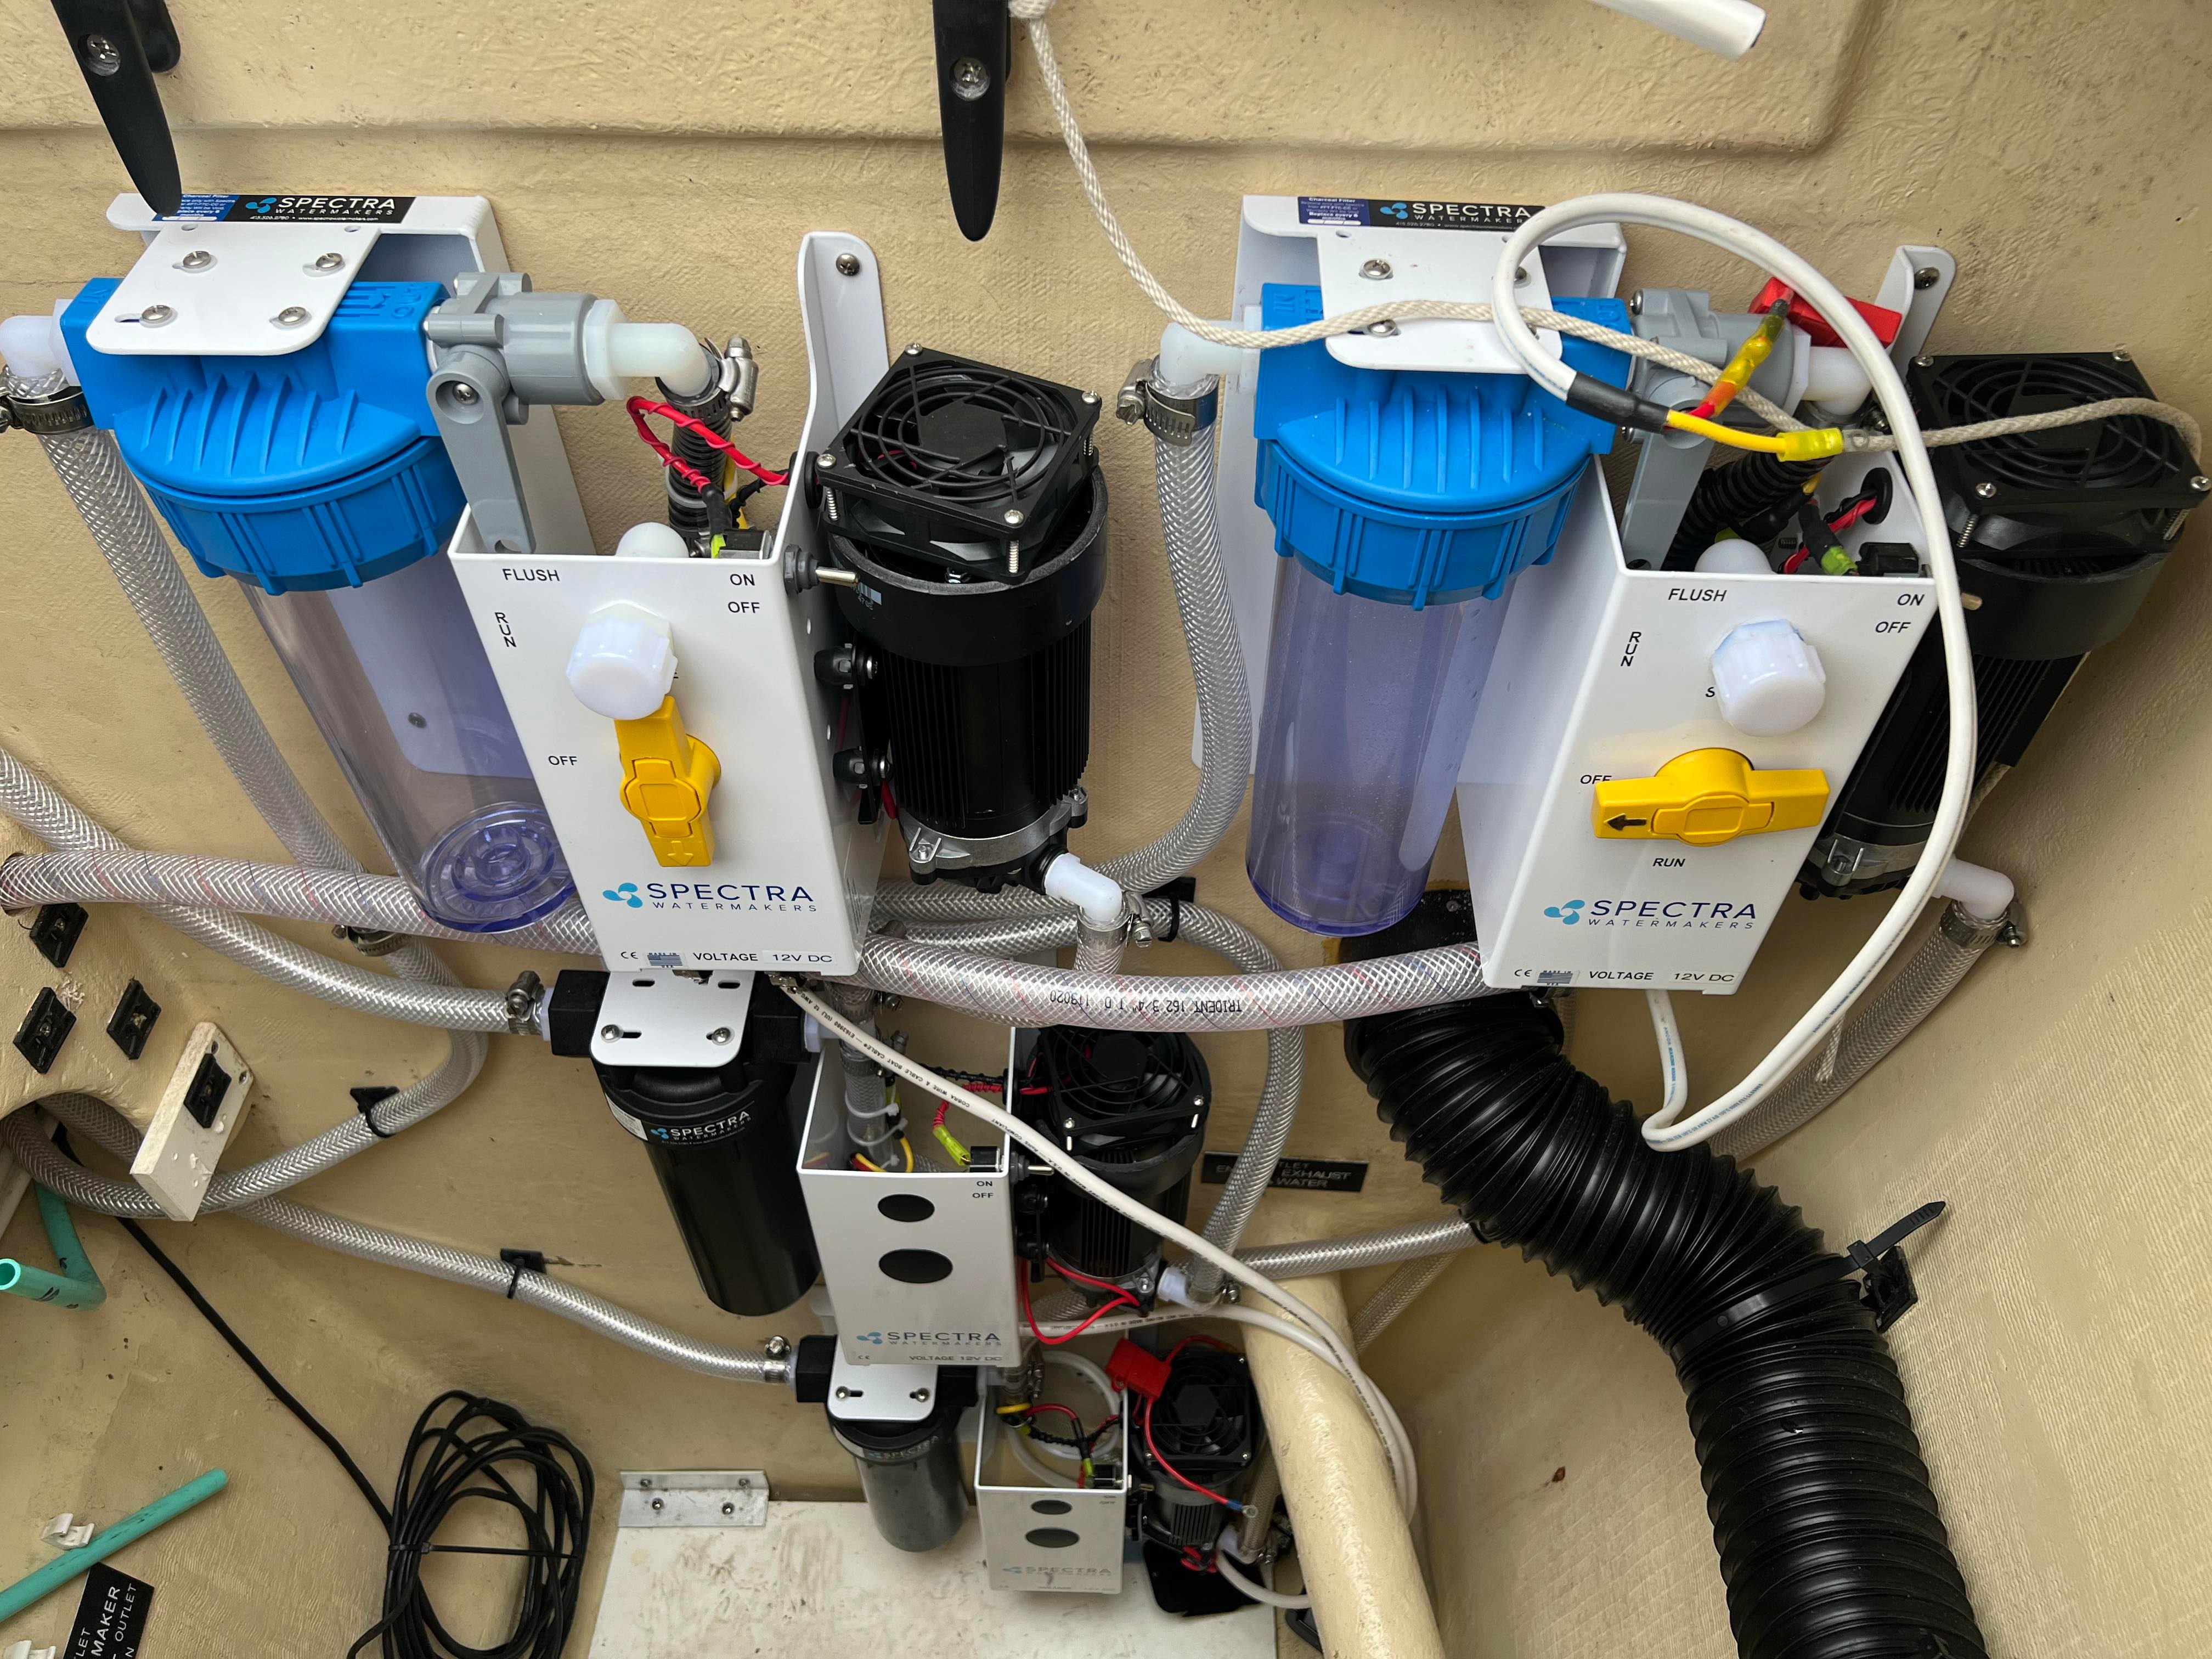
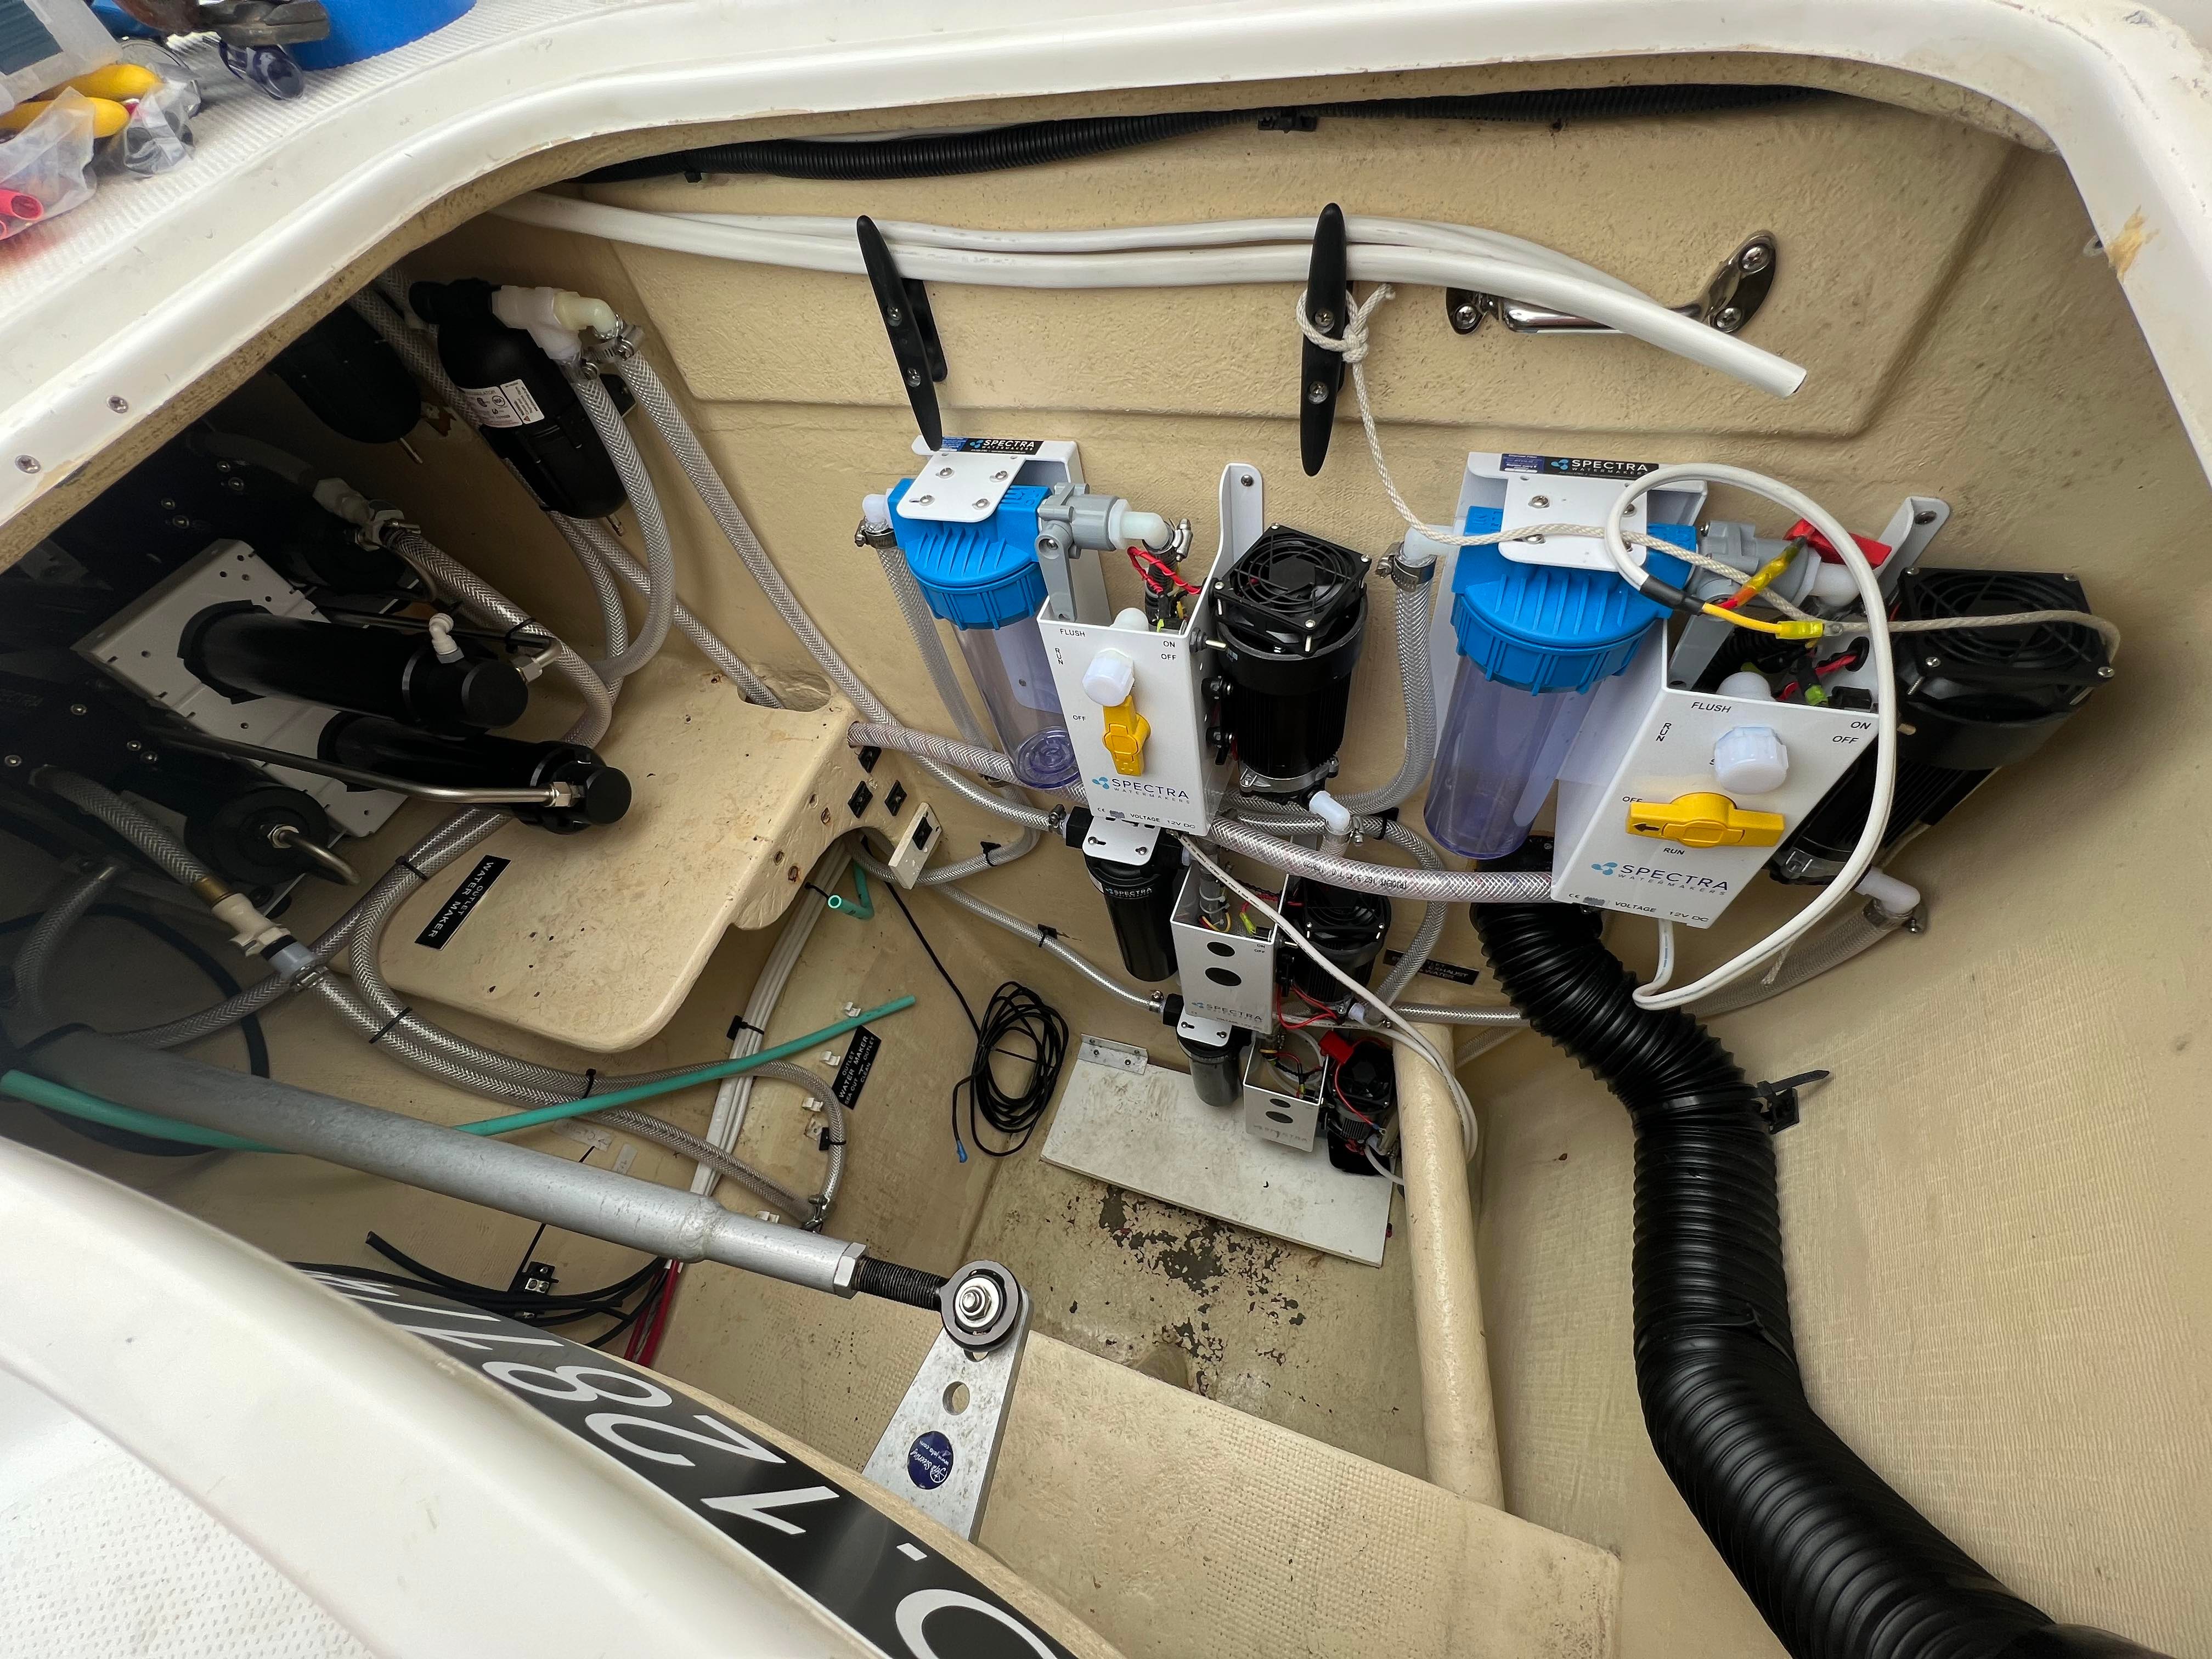
I didn’t get any good pictures of the old watermaker installed on the shelf before I got excited and ripped it all out. I had planned on just putting the 2 new water maker units side by side, but there’s not enough room for that. The factory has an option to remotely mount the membrane units with high pressure tubing, but I didn’t want to mess with that. Jason and I figured out a way to stack the two units on top of each other, but offset slightly. All it took was drilling 2 holes and they fit like they were made to be done this way!
I finally got around to finishing the install for the sea strainer and boost pump in the bilge. This will give me a lot more room under the master bed for storage since there won’t be a pump in there anymore!
After bolting the watermaker units together, Jason helped me wrangle them into place on the shelf in the lazarette. Drilling the holes and screwing them into the platform was pretty obnoxious and I had to lay on top of them to get to the screws in the back but eventually I got it done! I had to offset it a little further than I had planned and one of the mounting feet is hanging off, but it’s rock solid! I even made a little support for the edge of the top unit just in case the boat gets into some rough weather.
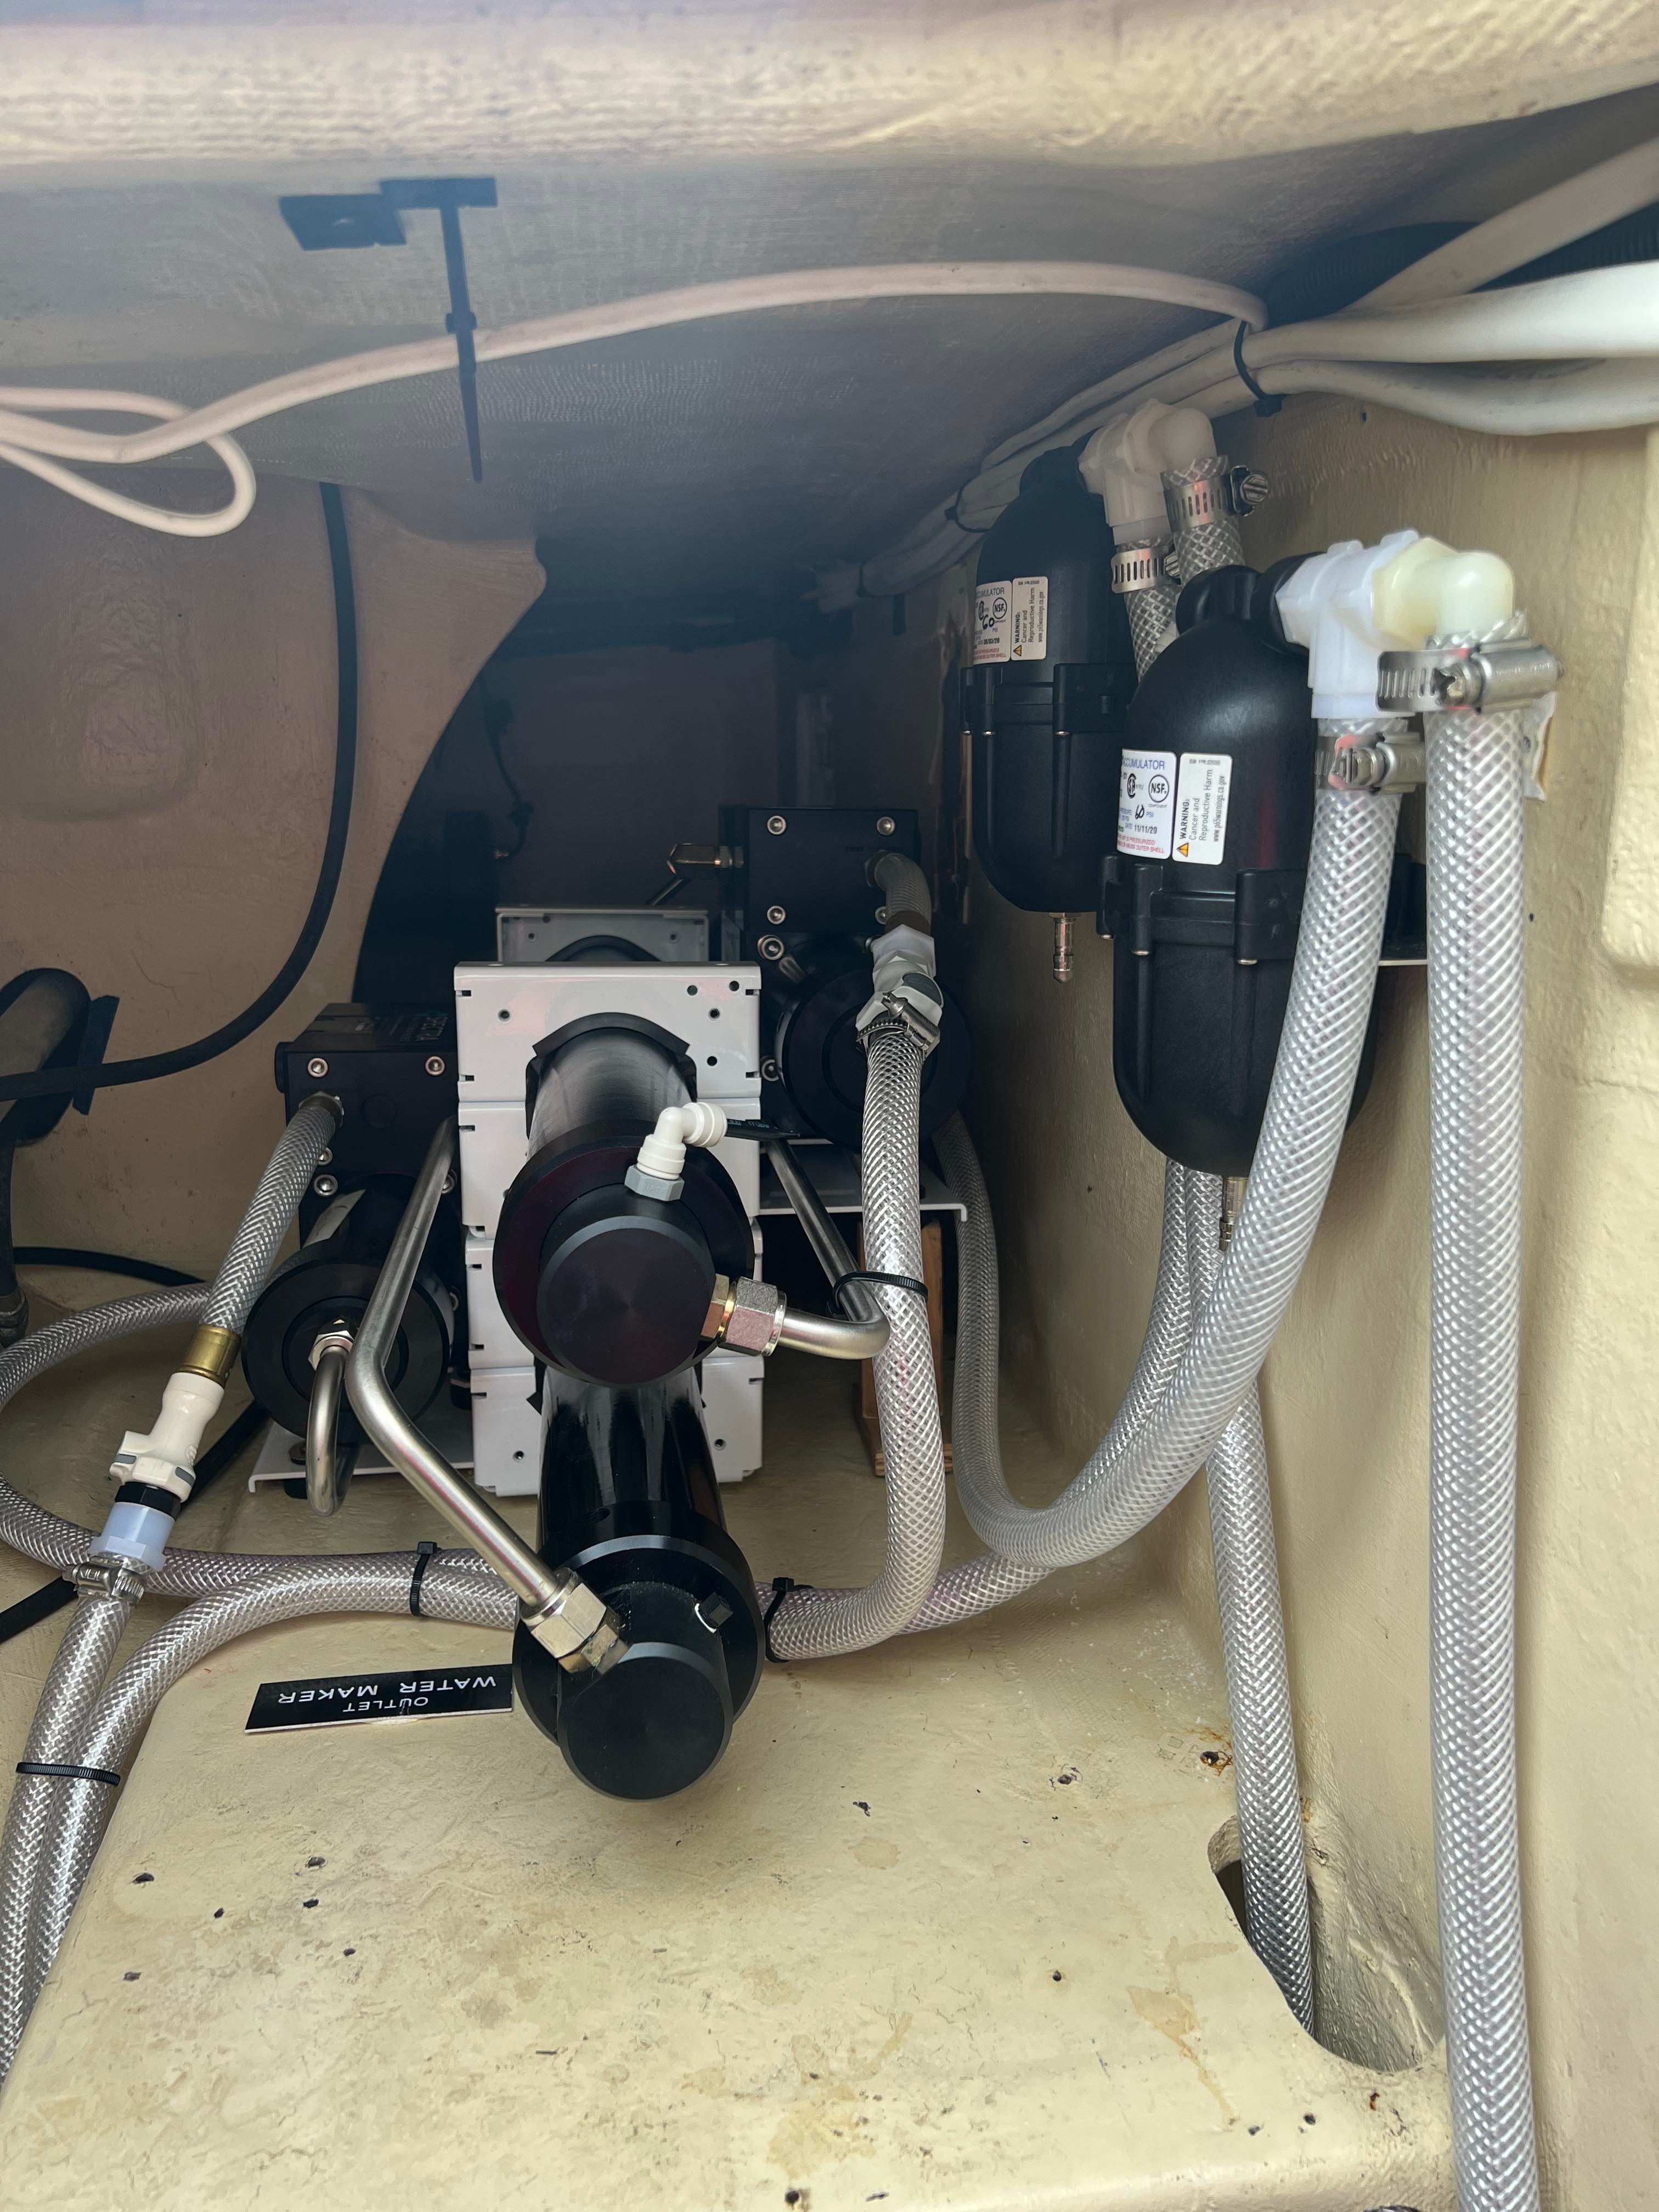
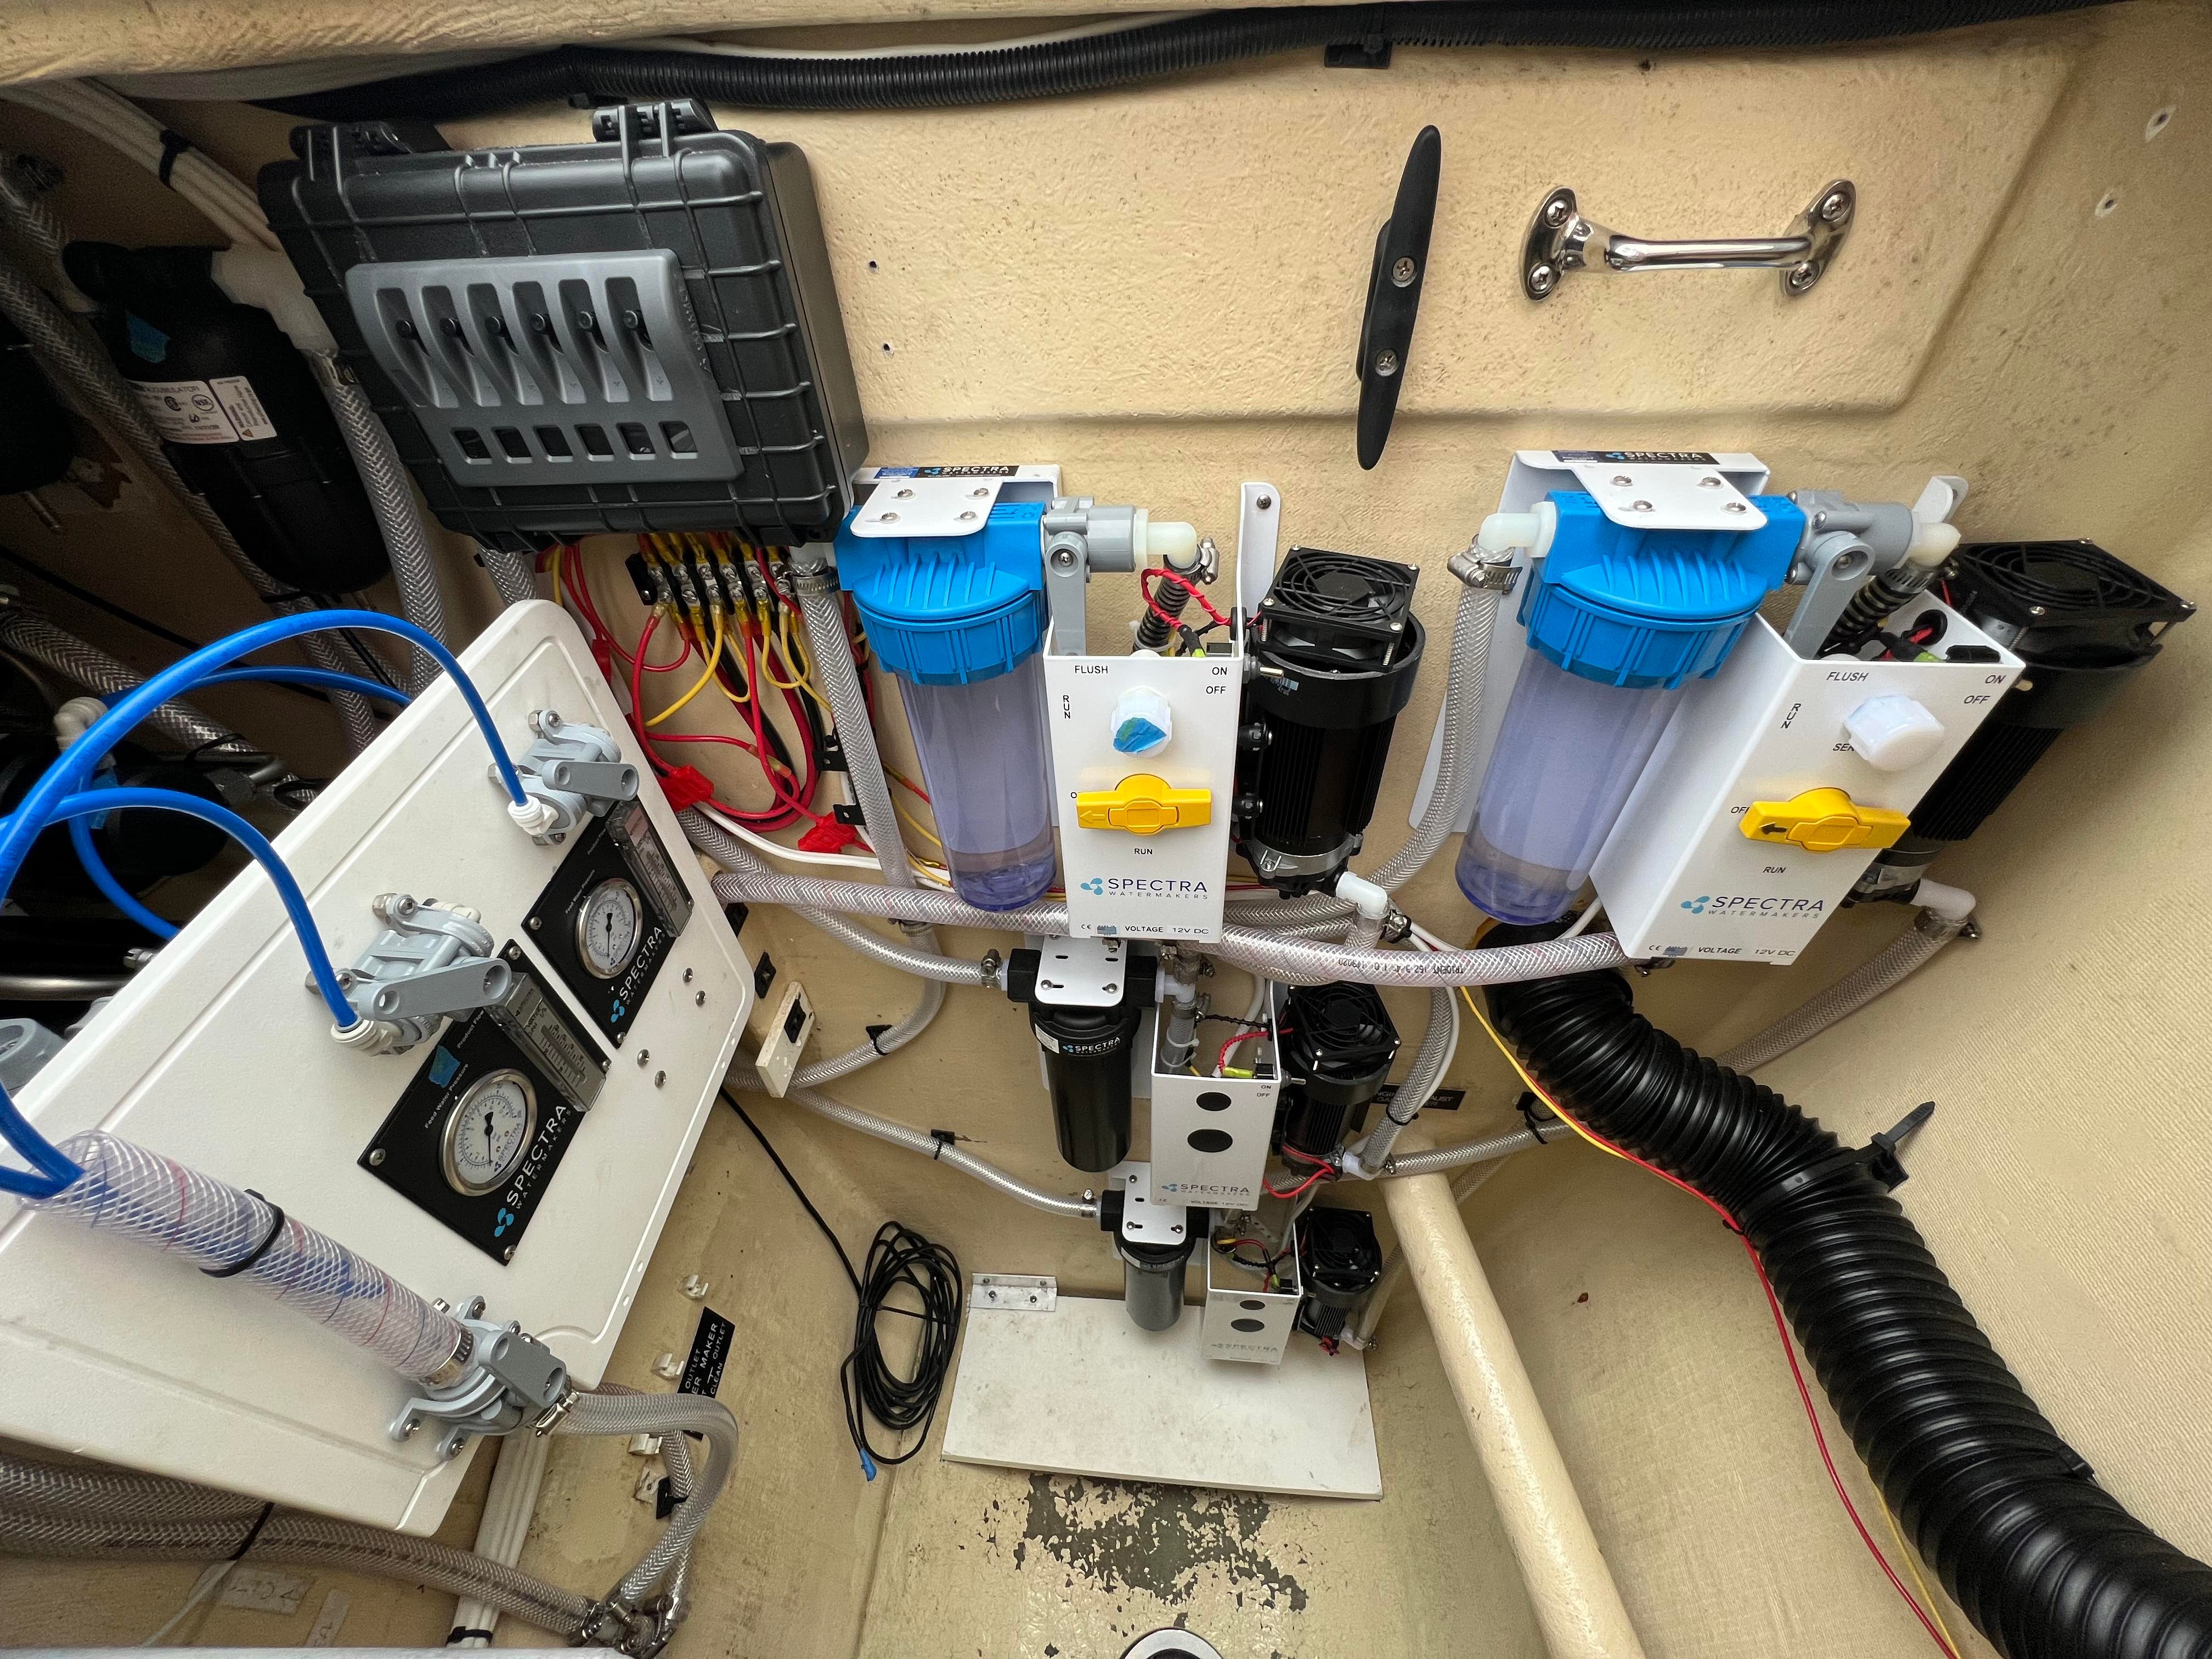
Now the membrane and clark pump assemblies are just one part… there’s also a set of 2 pumps and filters for each water maker. That’s a total of 4 panels in a spot that’s not that large. Awesome. I had to relocate the emergency steering handle to the other side of the boat to have room.
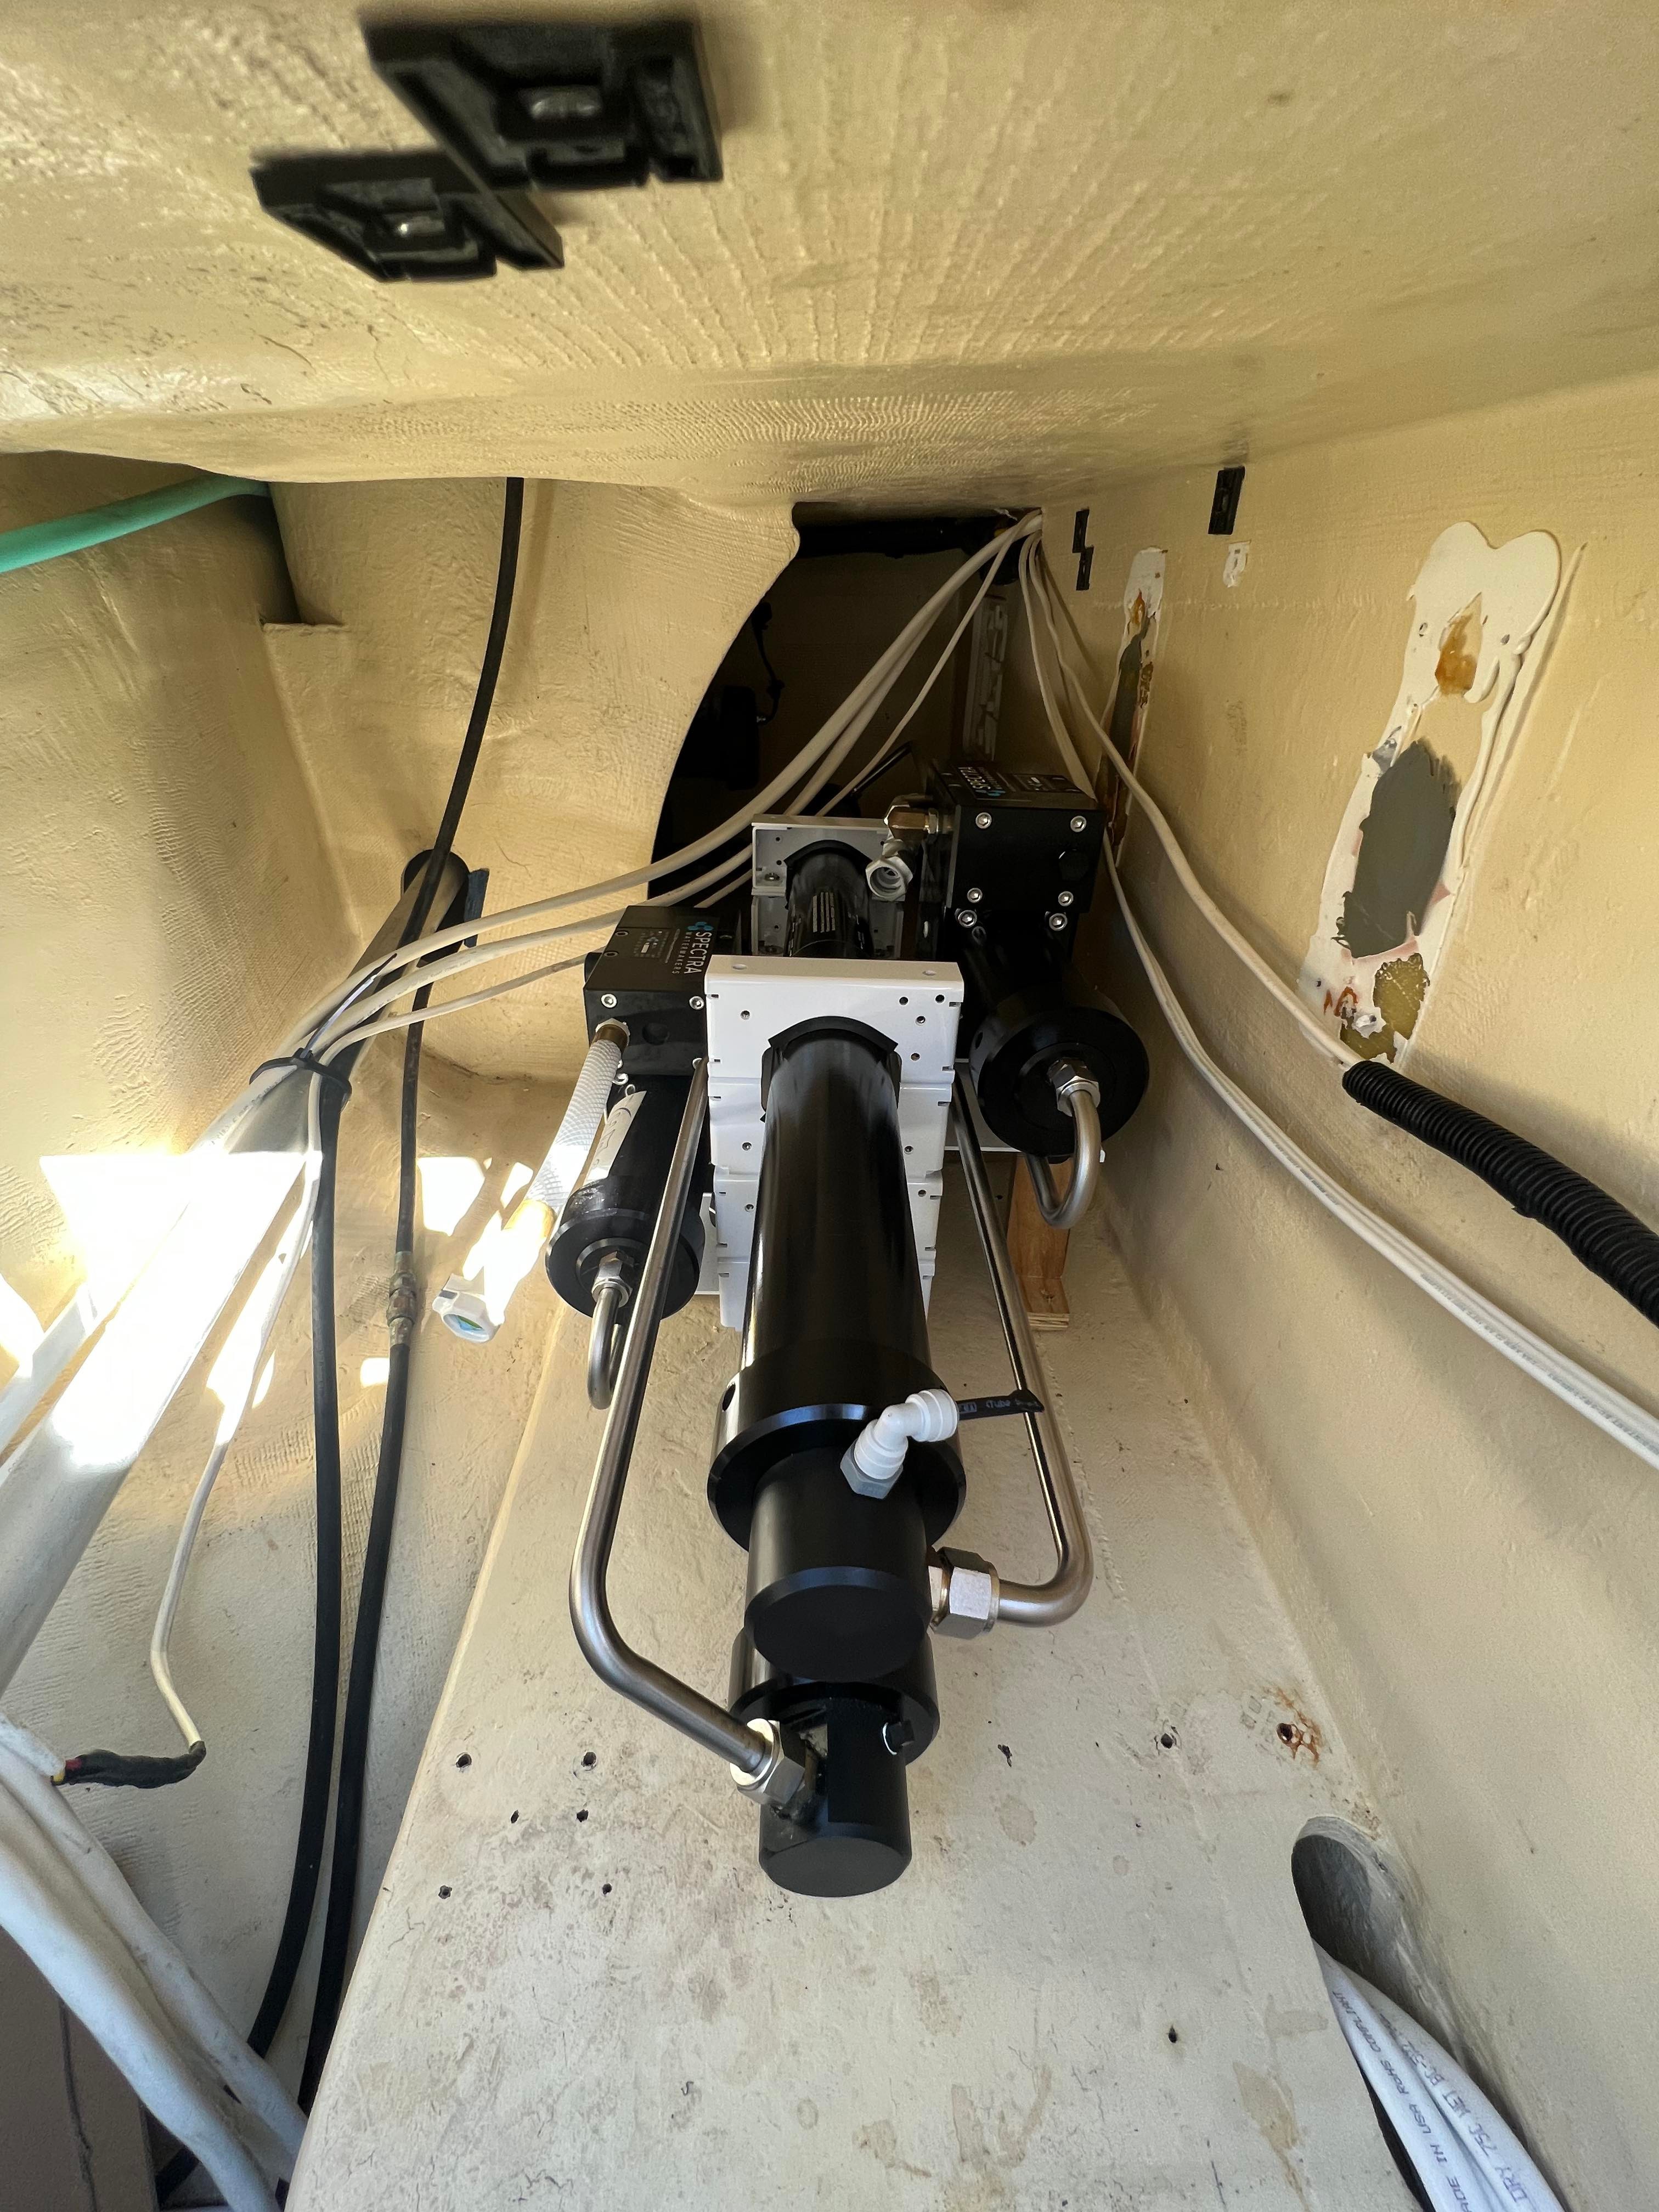
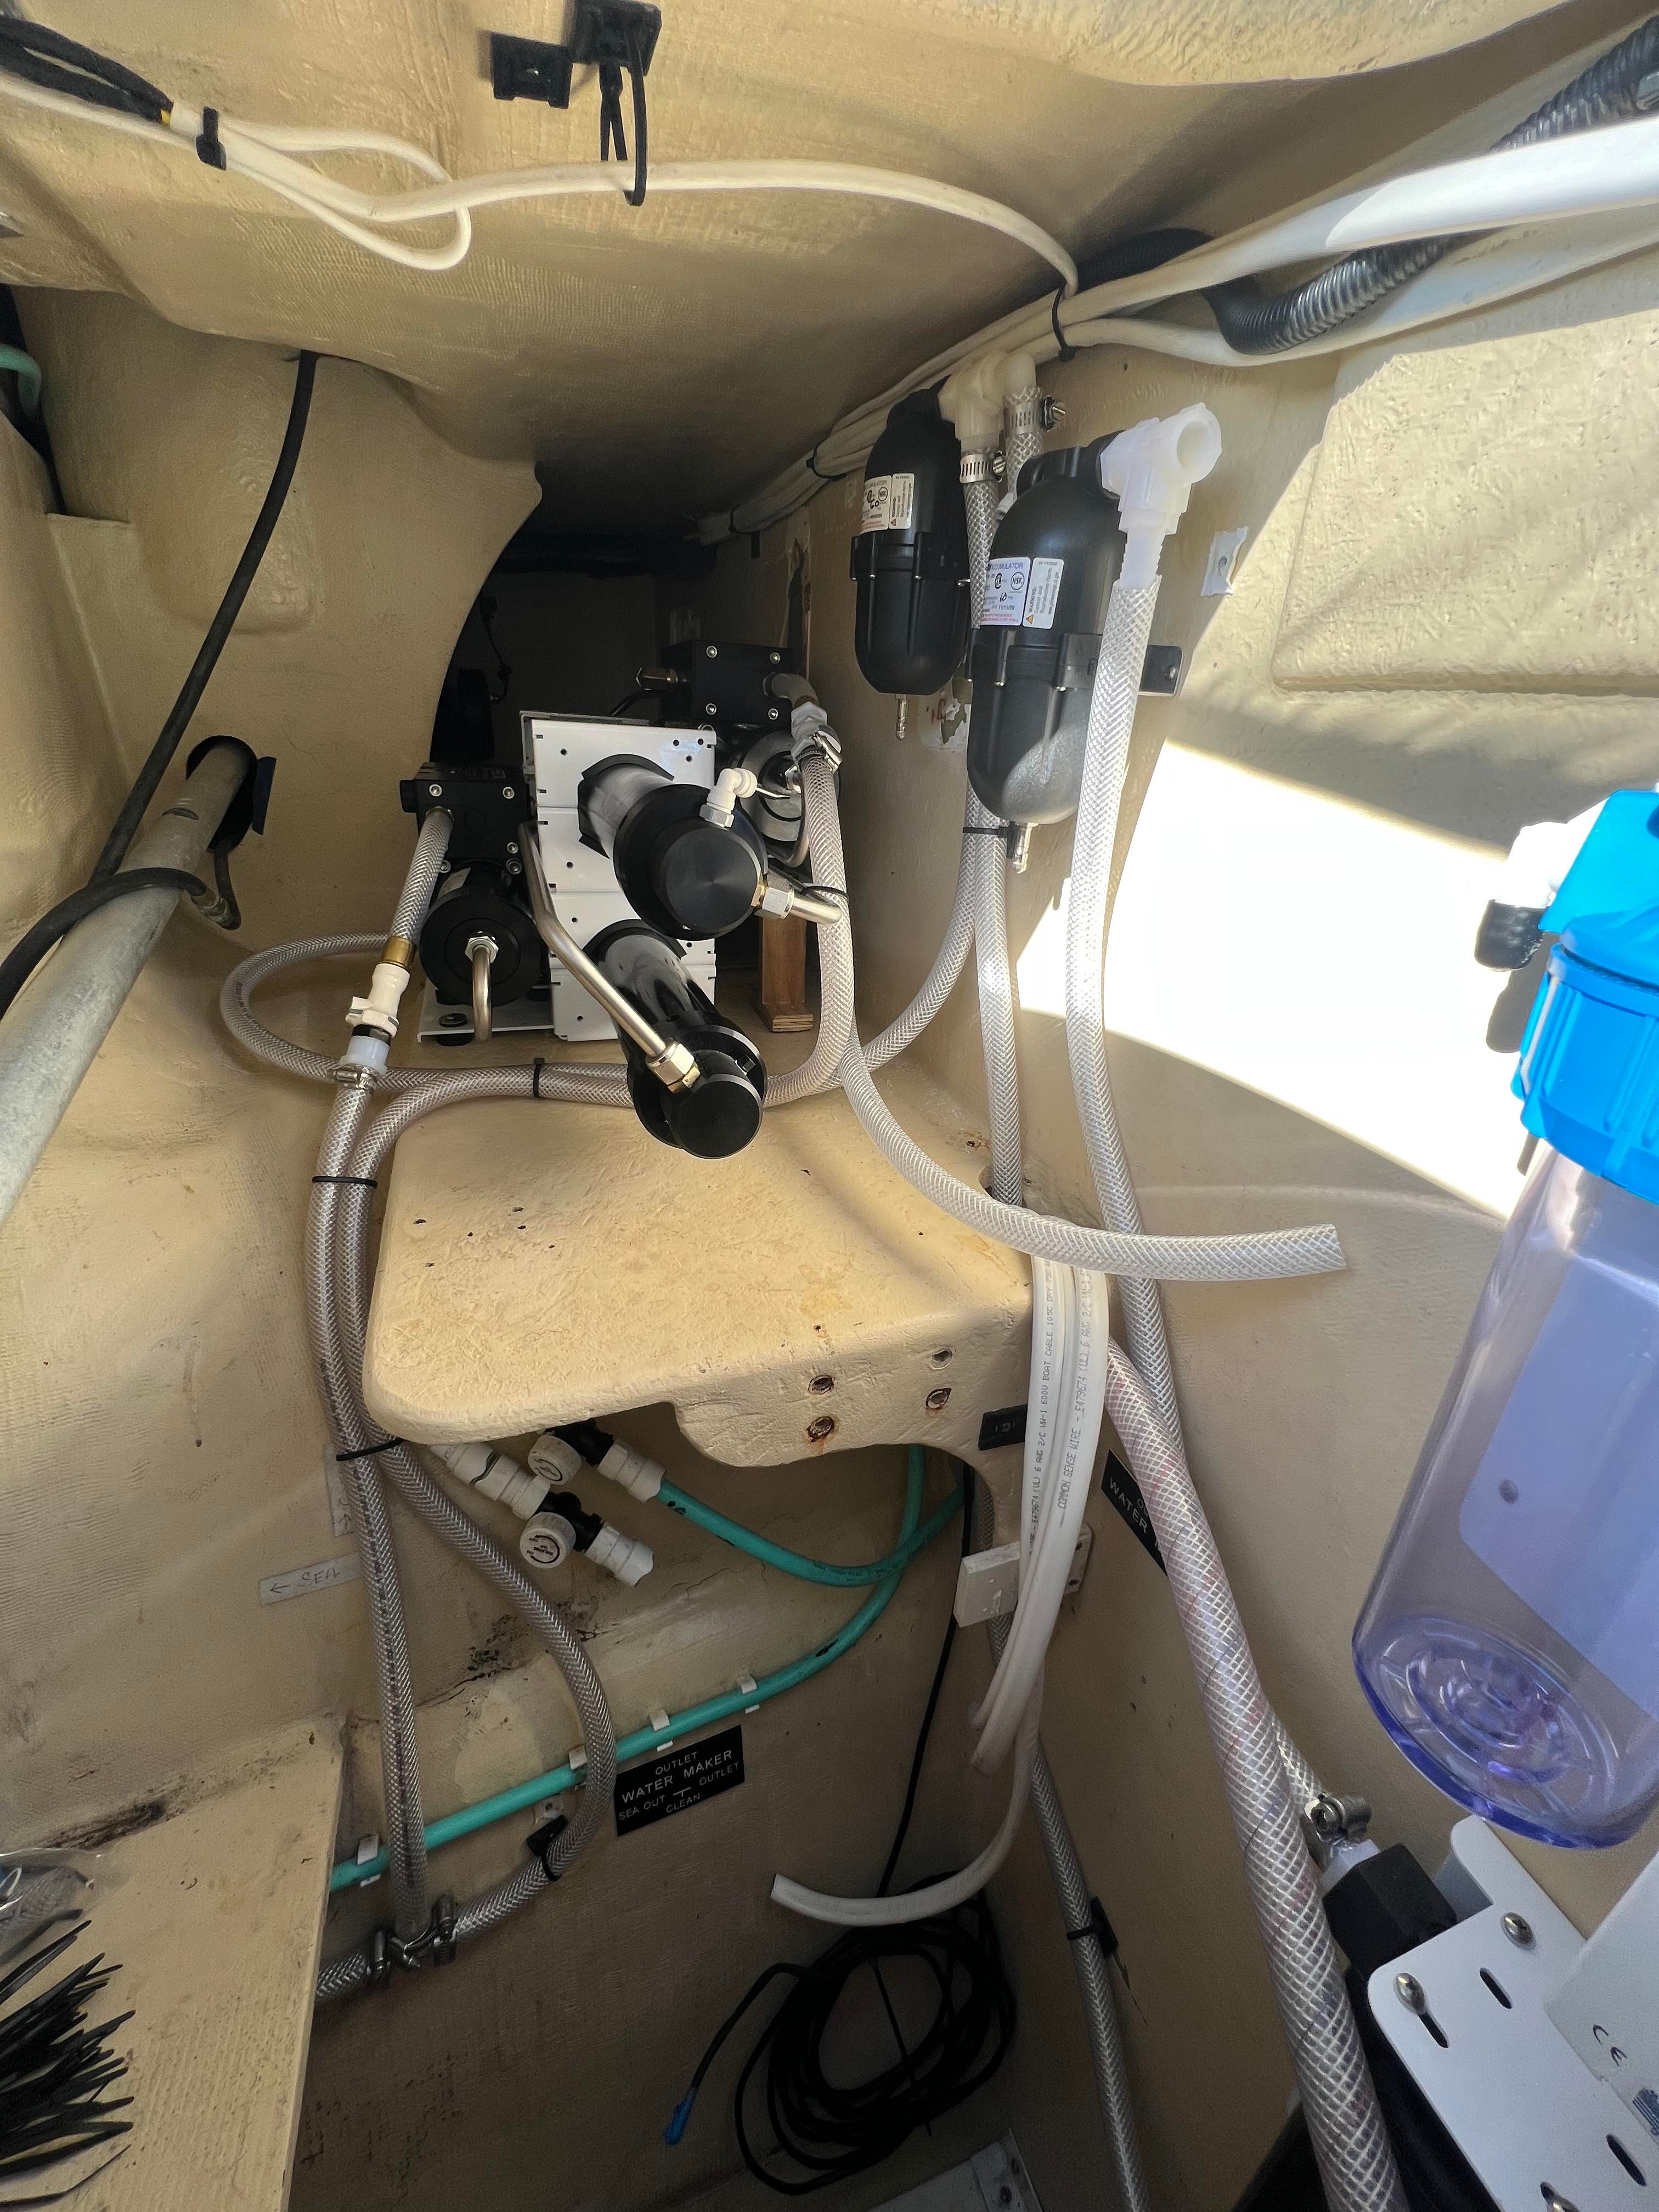
There’s a fantastic installation manual that shows exactly where all of these hoses go, so it wasn’t too bad. I had to buy some extra fittings so the hoses were routed nicely. I routed fresh water and sea water to both pumps and then connected both banks of feed pumps together and then to the actual water maker unit for each. It actually turned out a lot easier than I thought it would be. (still have all the wiring to do, so it’s dangling everywhere)
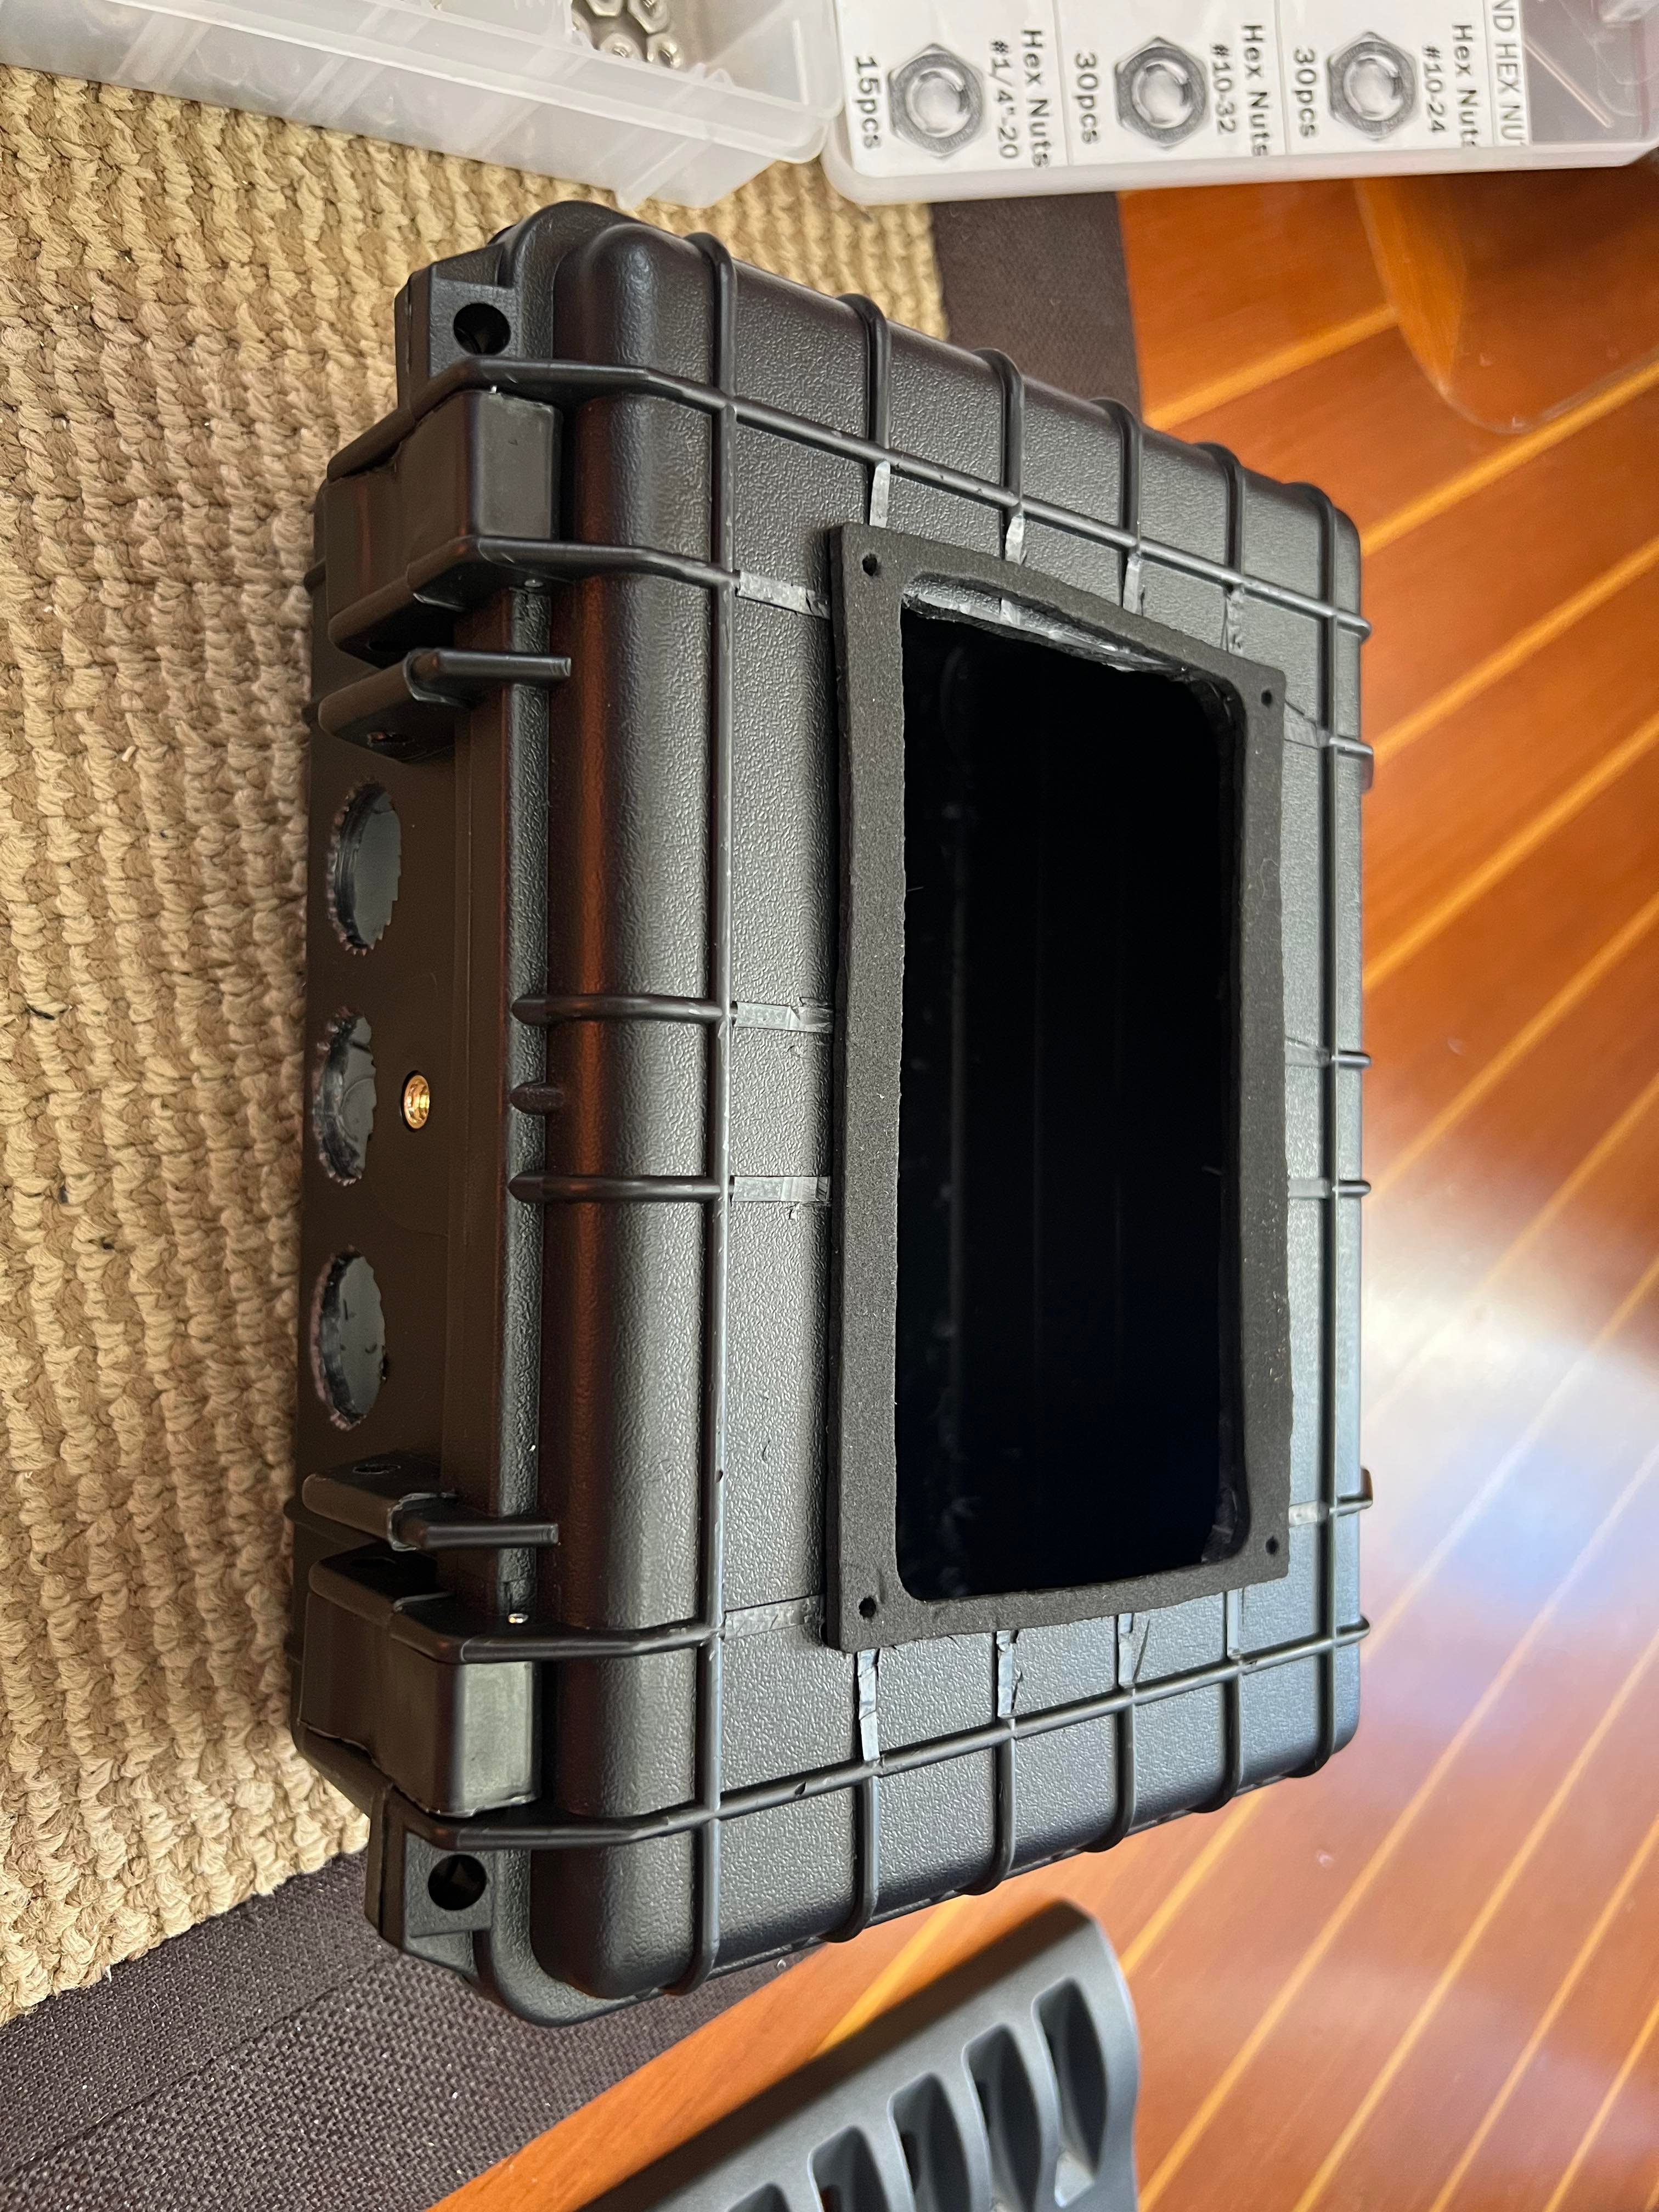
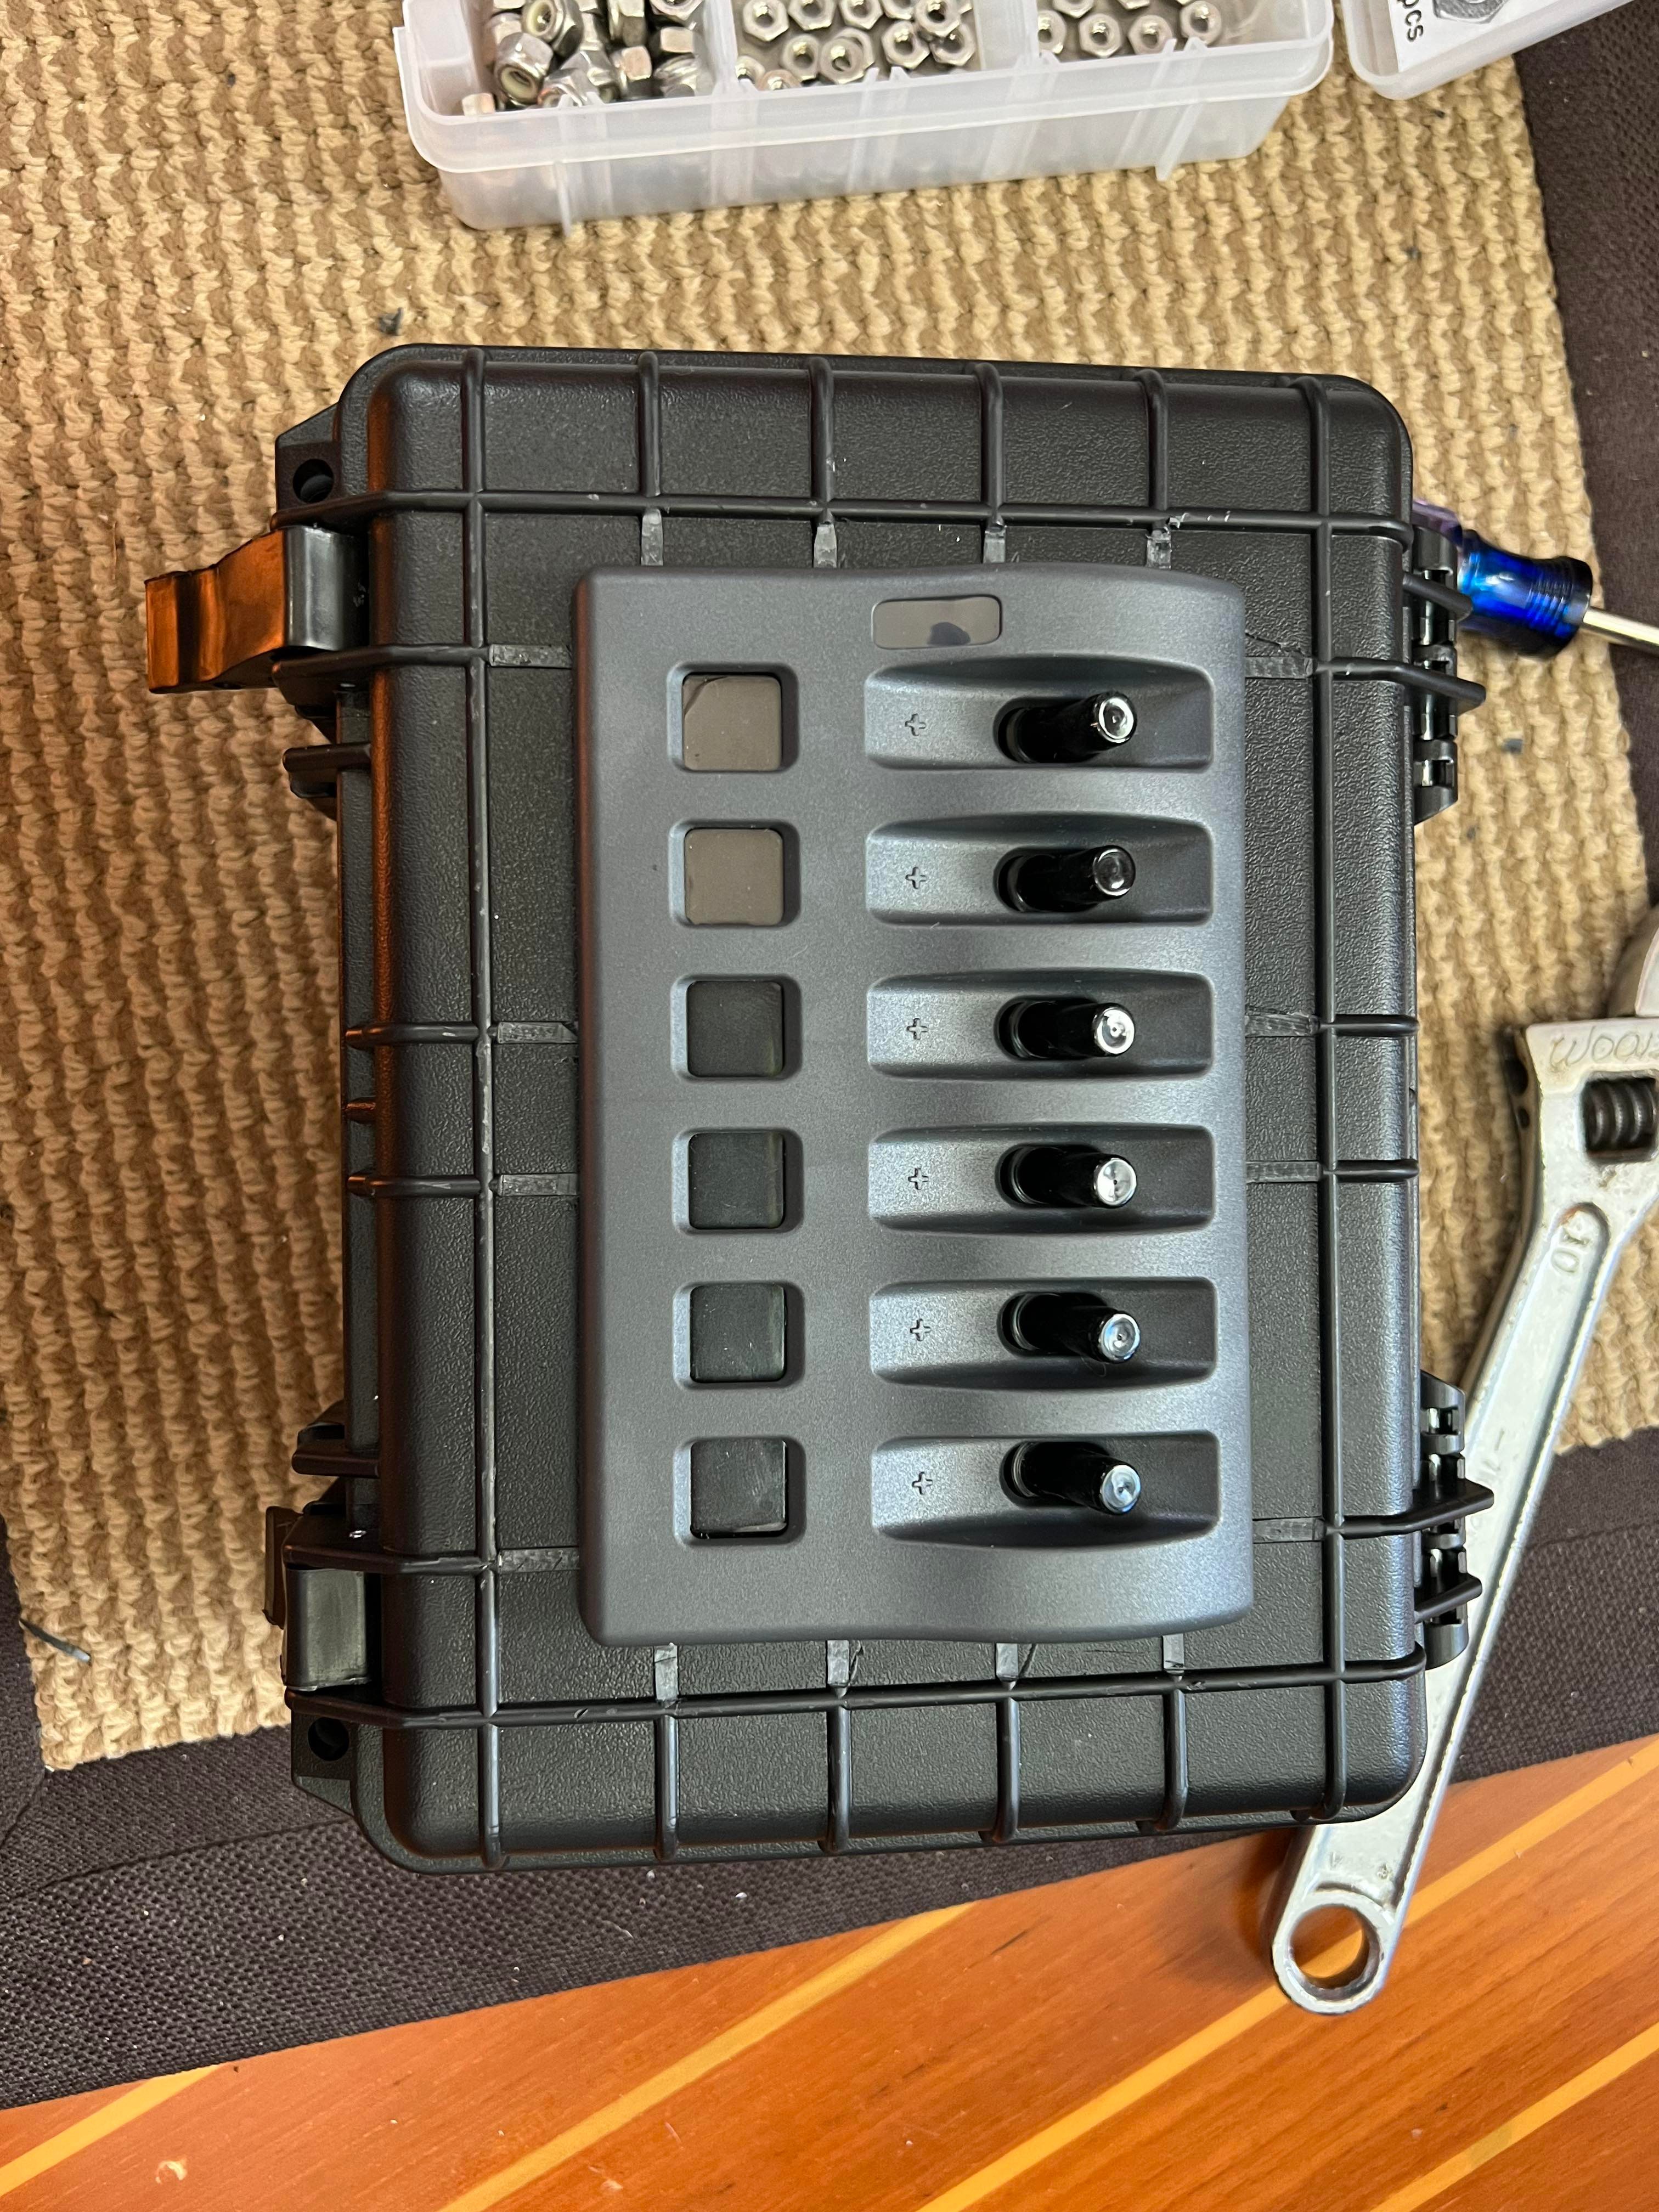
Now that all the main equipment is in, I need to wire everything up. Jason and I already ran the 6ga main power cables from the batteries, so that part is ready to go. We would really like to be able to operate the water makers without having to crawl into the hole every time but to do that I need to relocate all the power switches on each pump to somewhere we can reach them. We decided to leave the factory wiring to the switches alone and add a large switch panel in the power supply line to the pumps. The panel we bought is really nice…waterproof with nice “clicky” switches etc, but it’s meant to be mounted in a bulkhead and I need to just have it in the space. We toyed with the idea of building a wood box for it until I remembered that Harbor Freight sells these cheap knockoff waterproof cases. So for a whopping $12 I have a nice plastic waterproof box that I can cut up and mount on the wall!
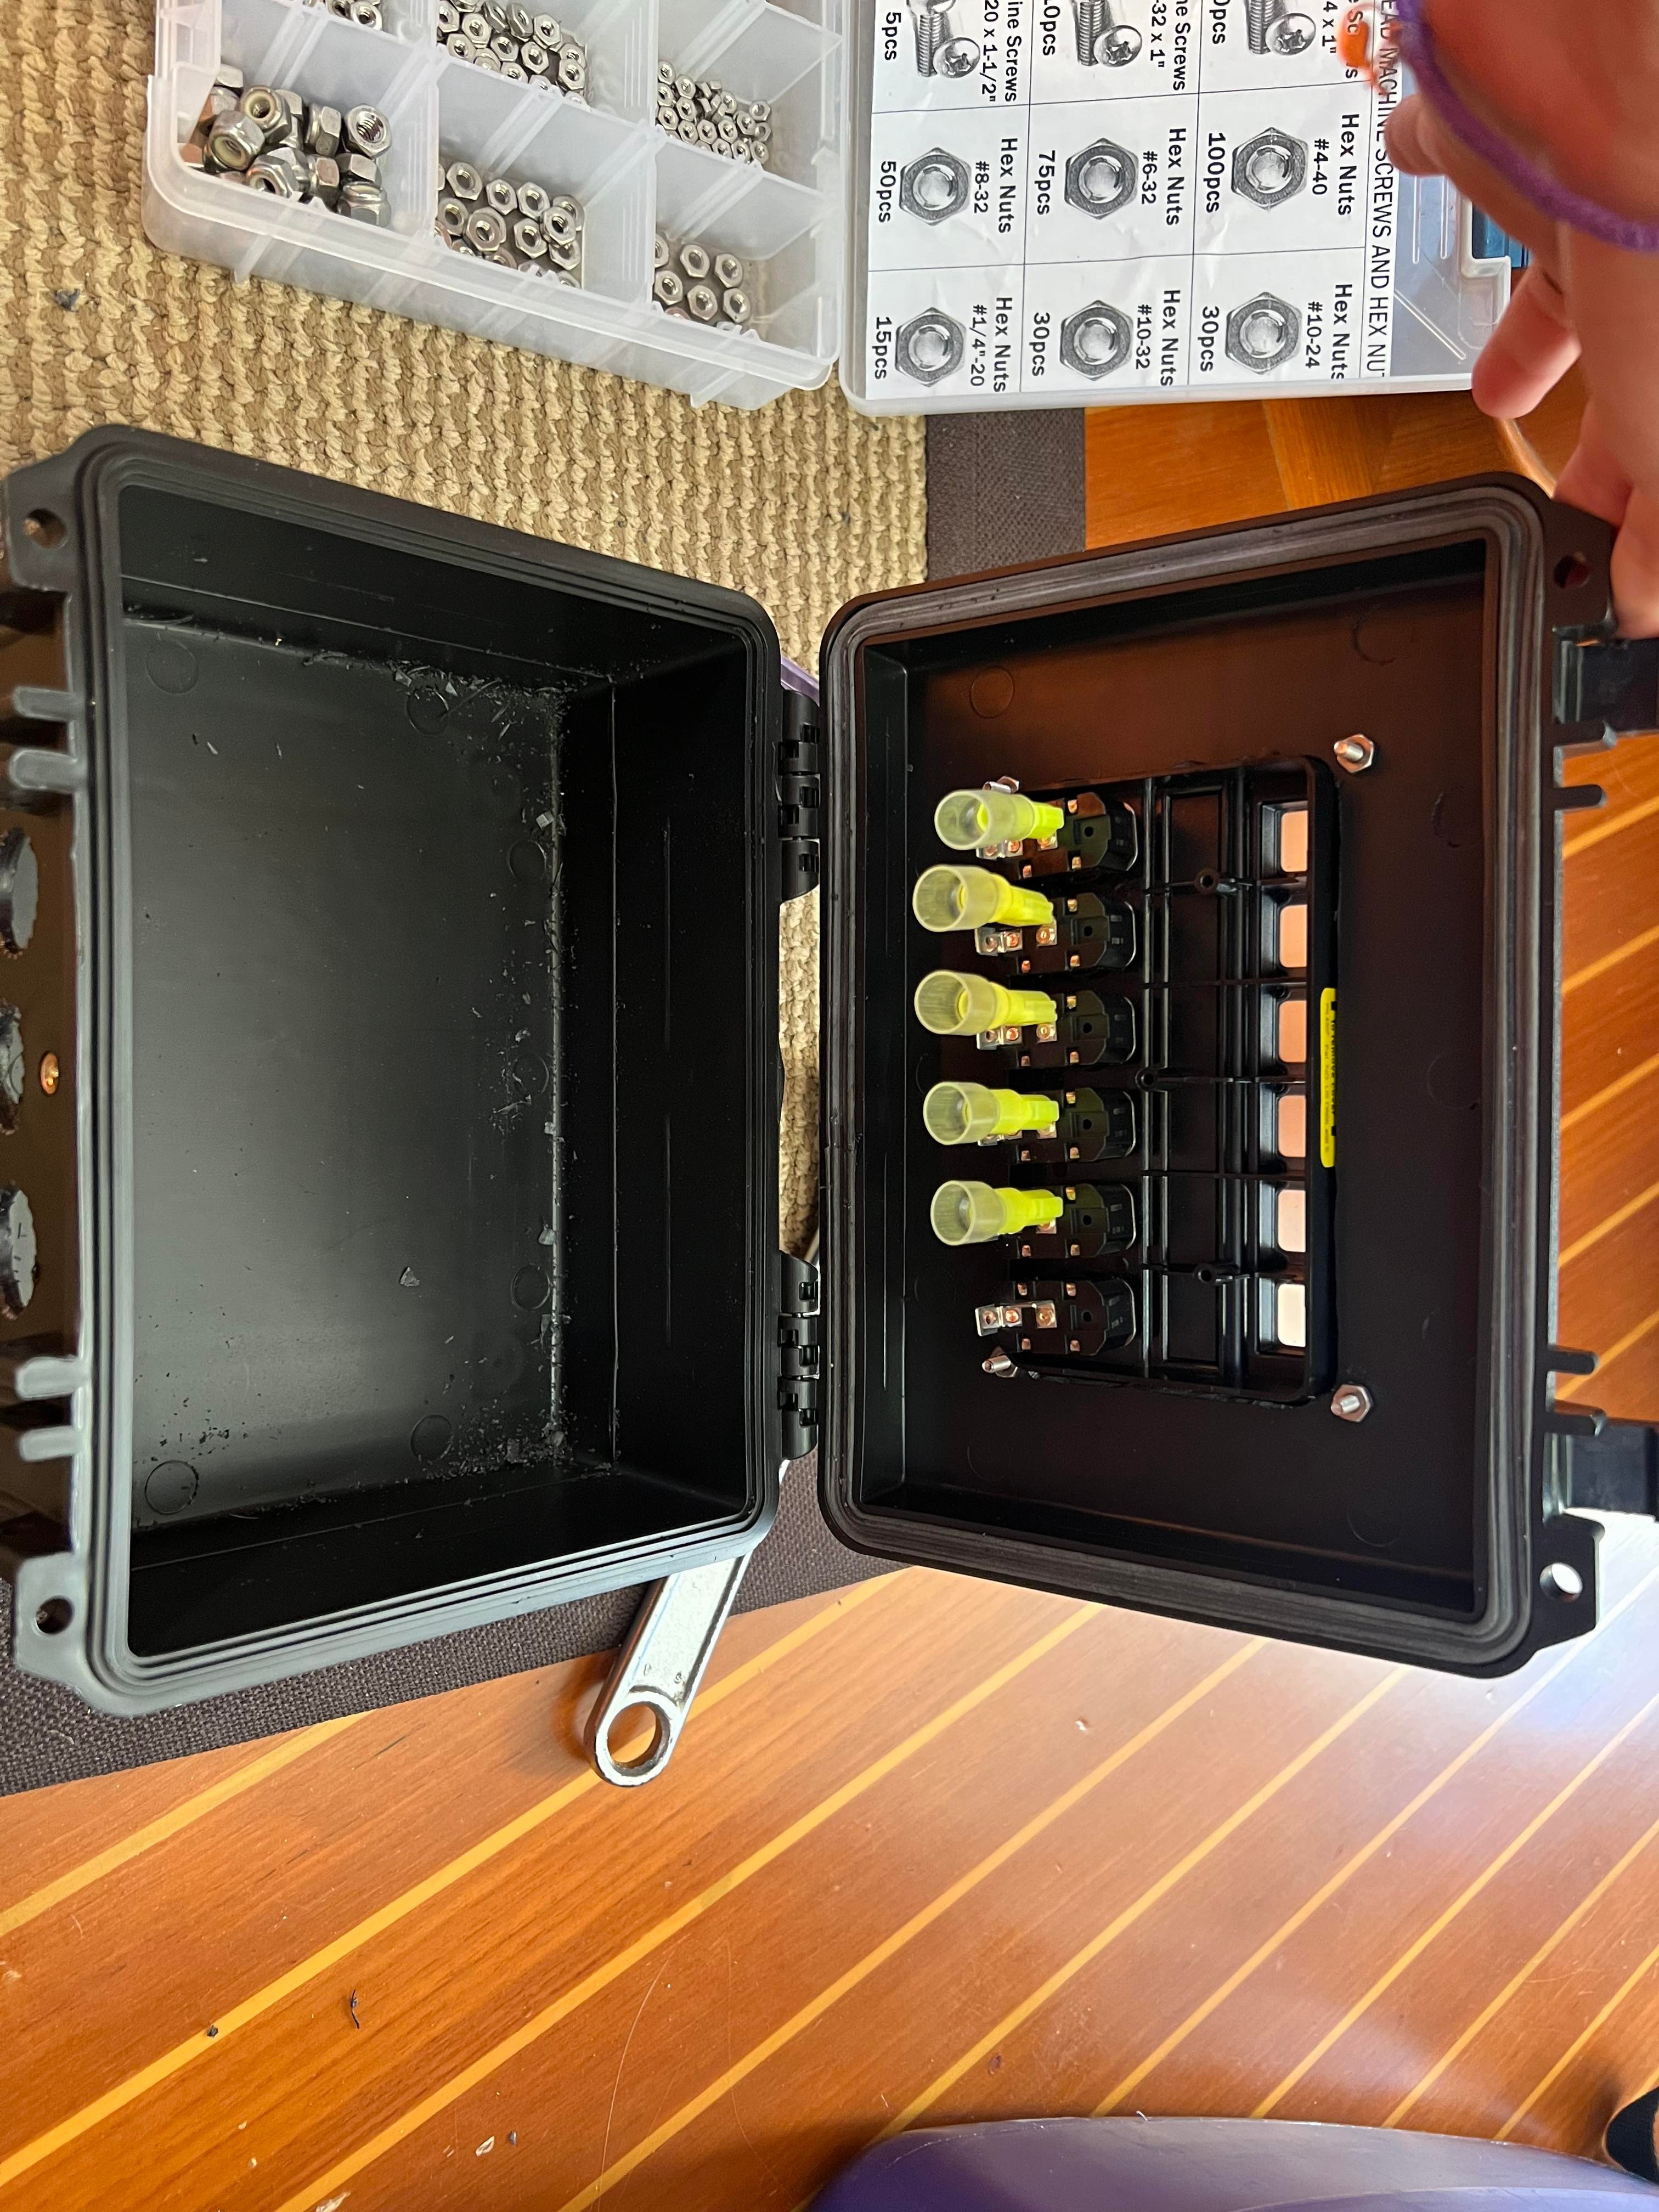

I even had the nice bus bar laying around on the boat to use for the main power and ground cables!
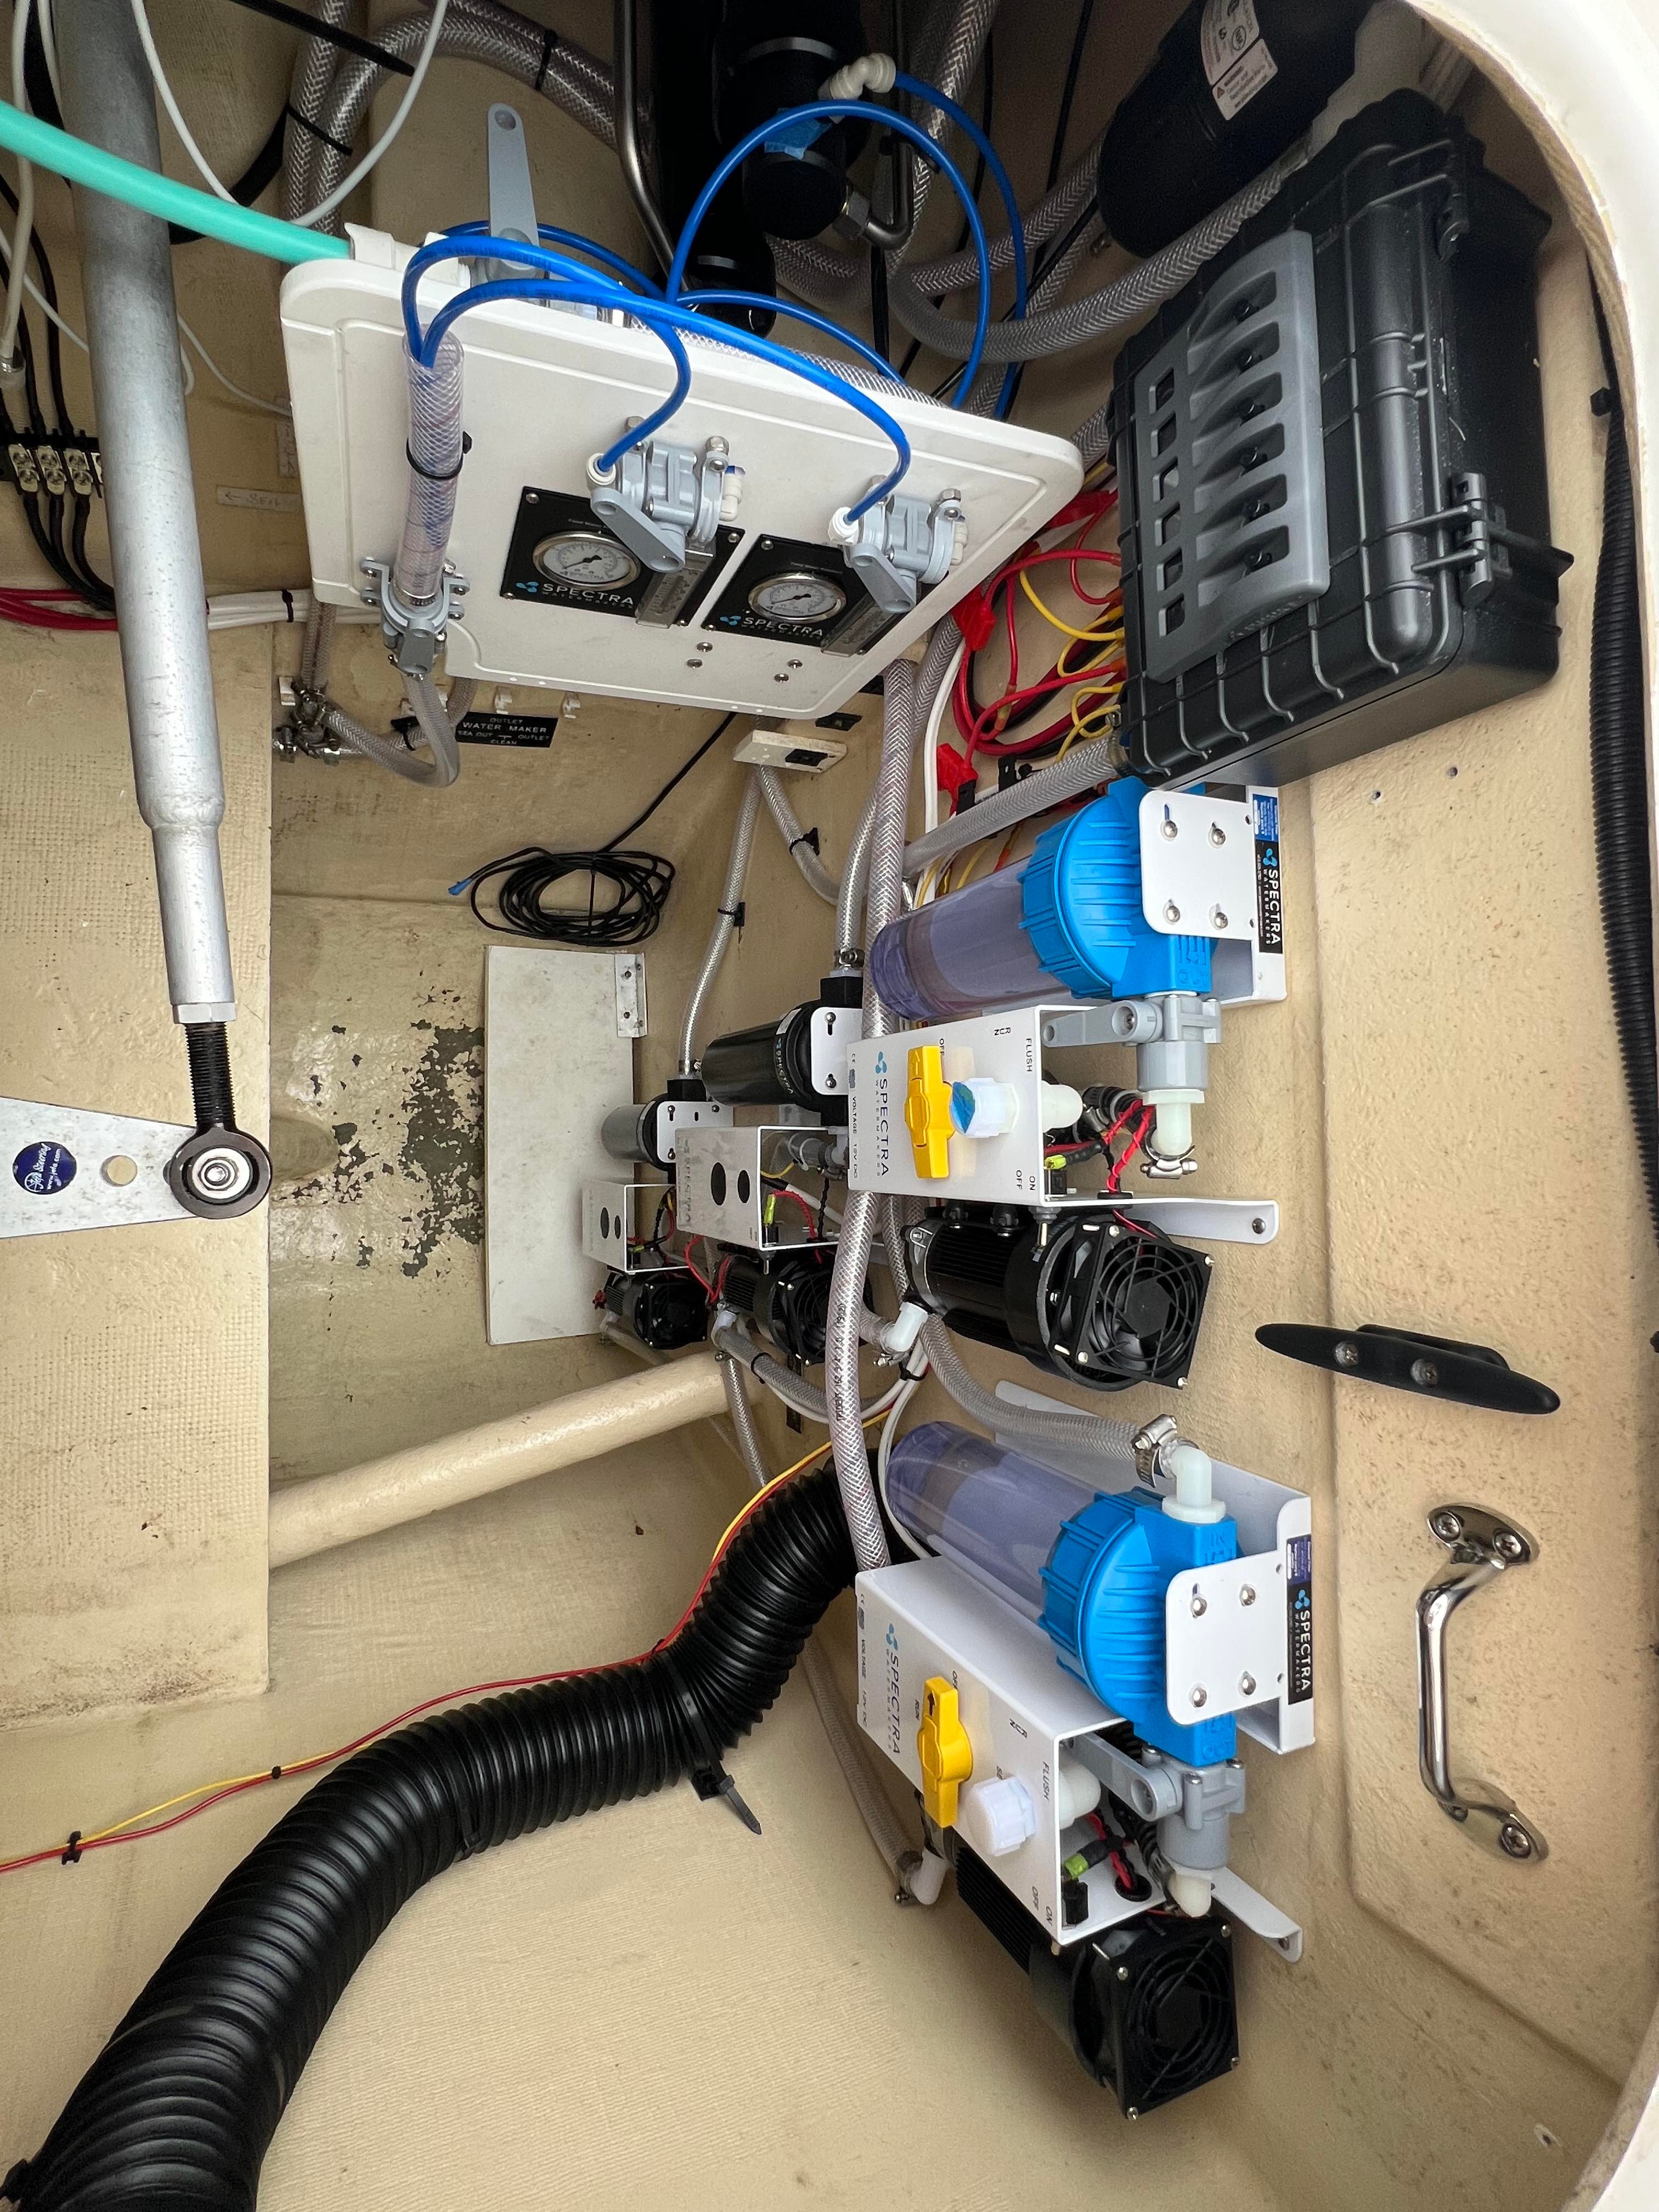
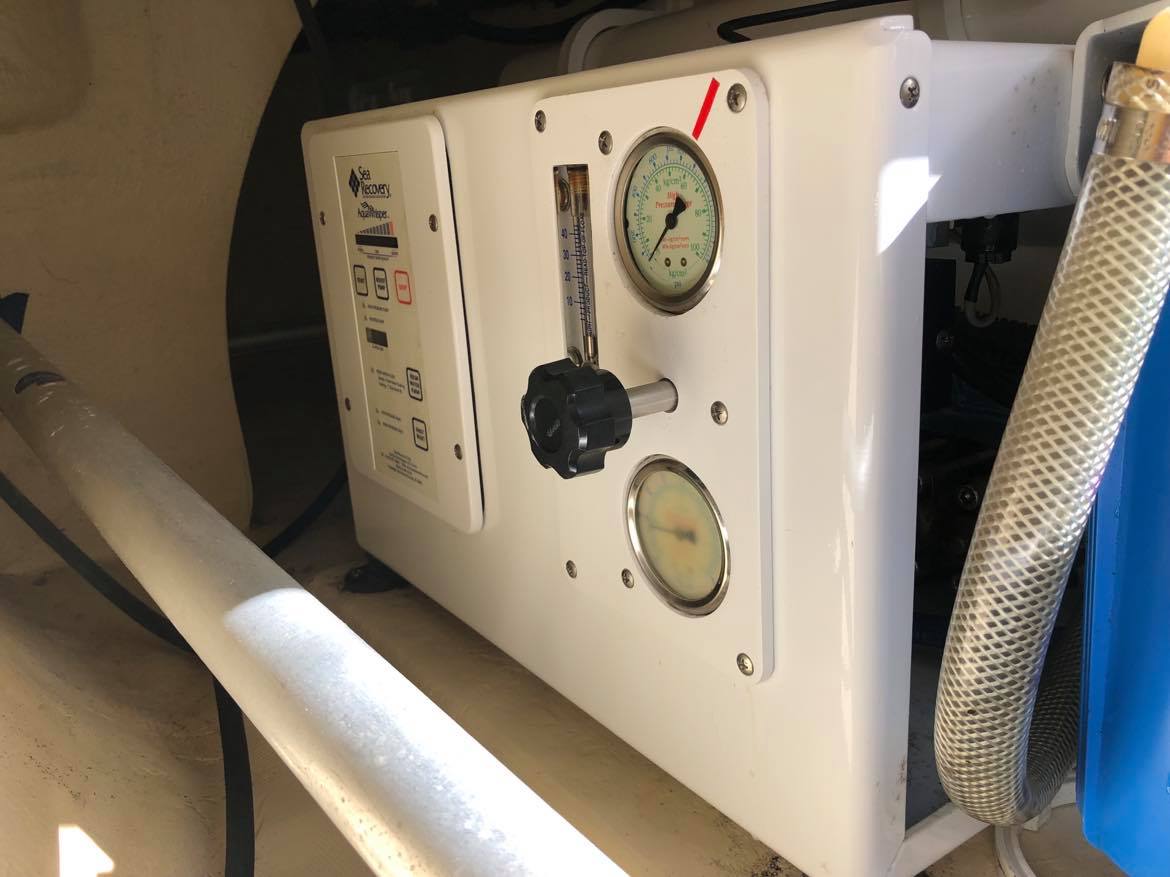
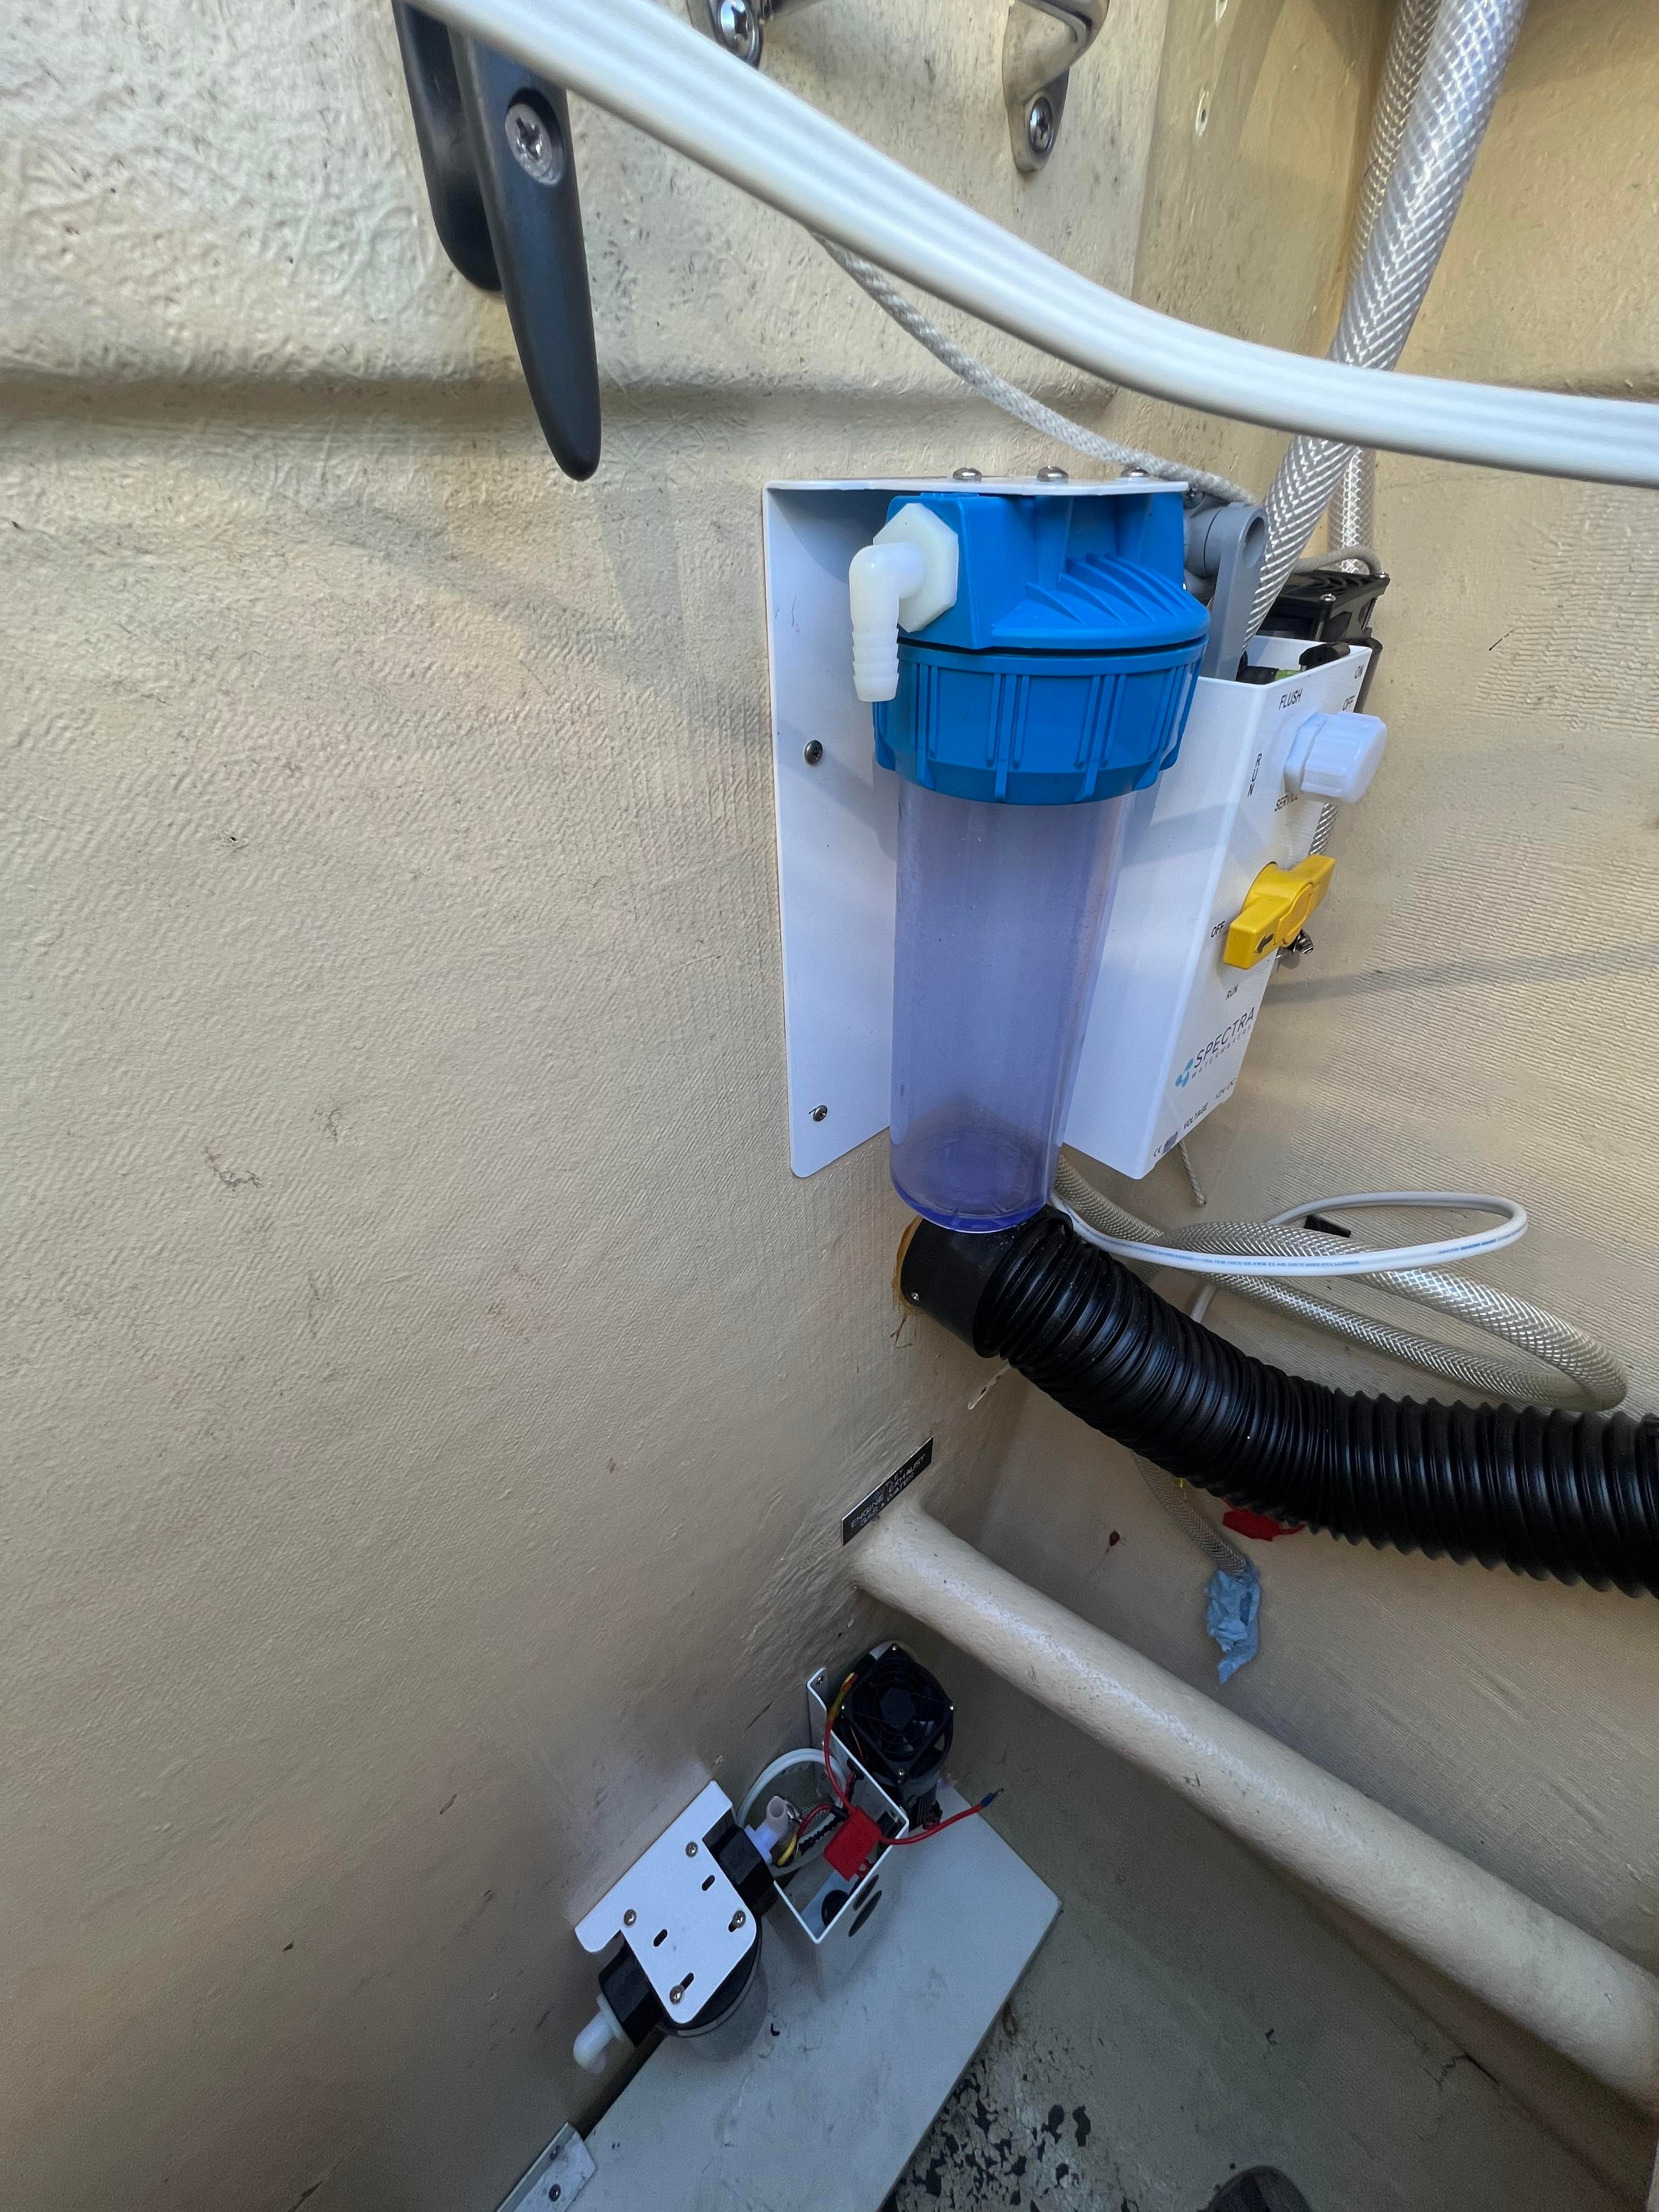
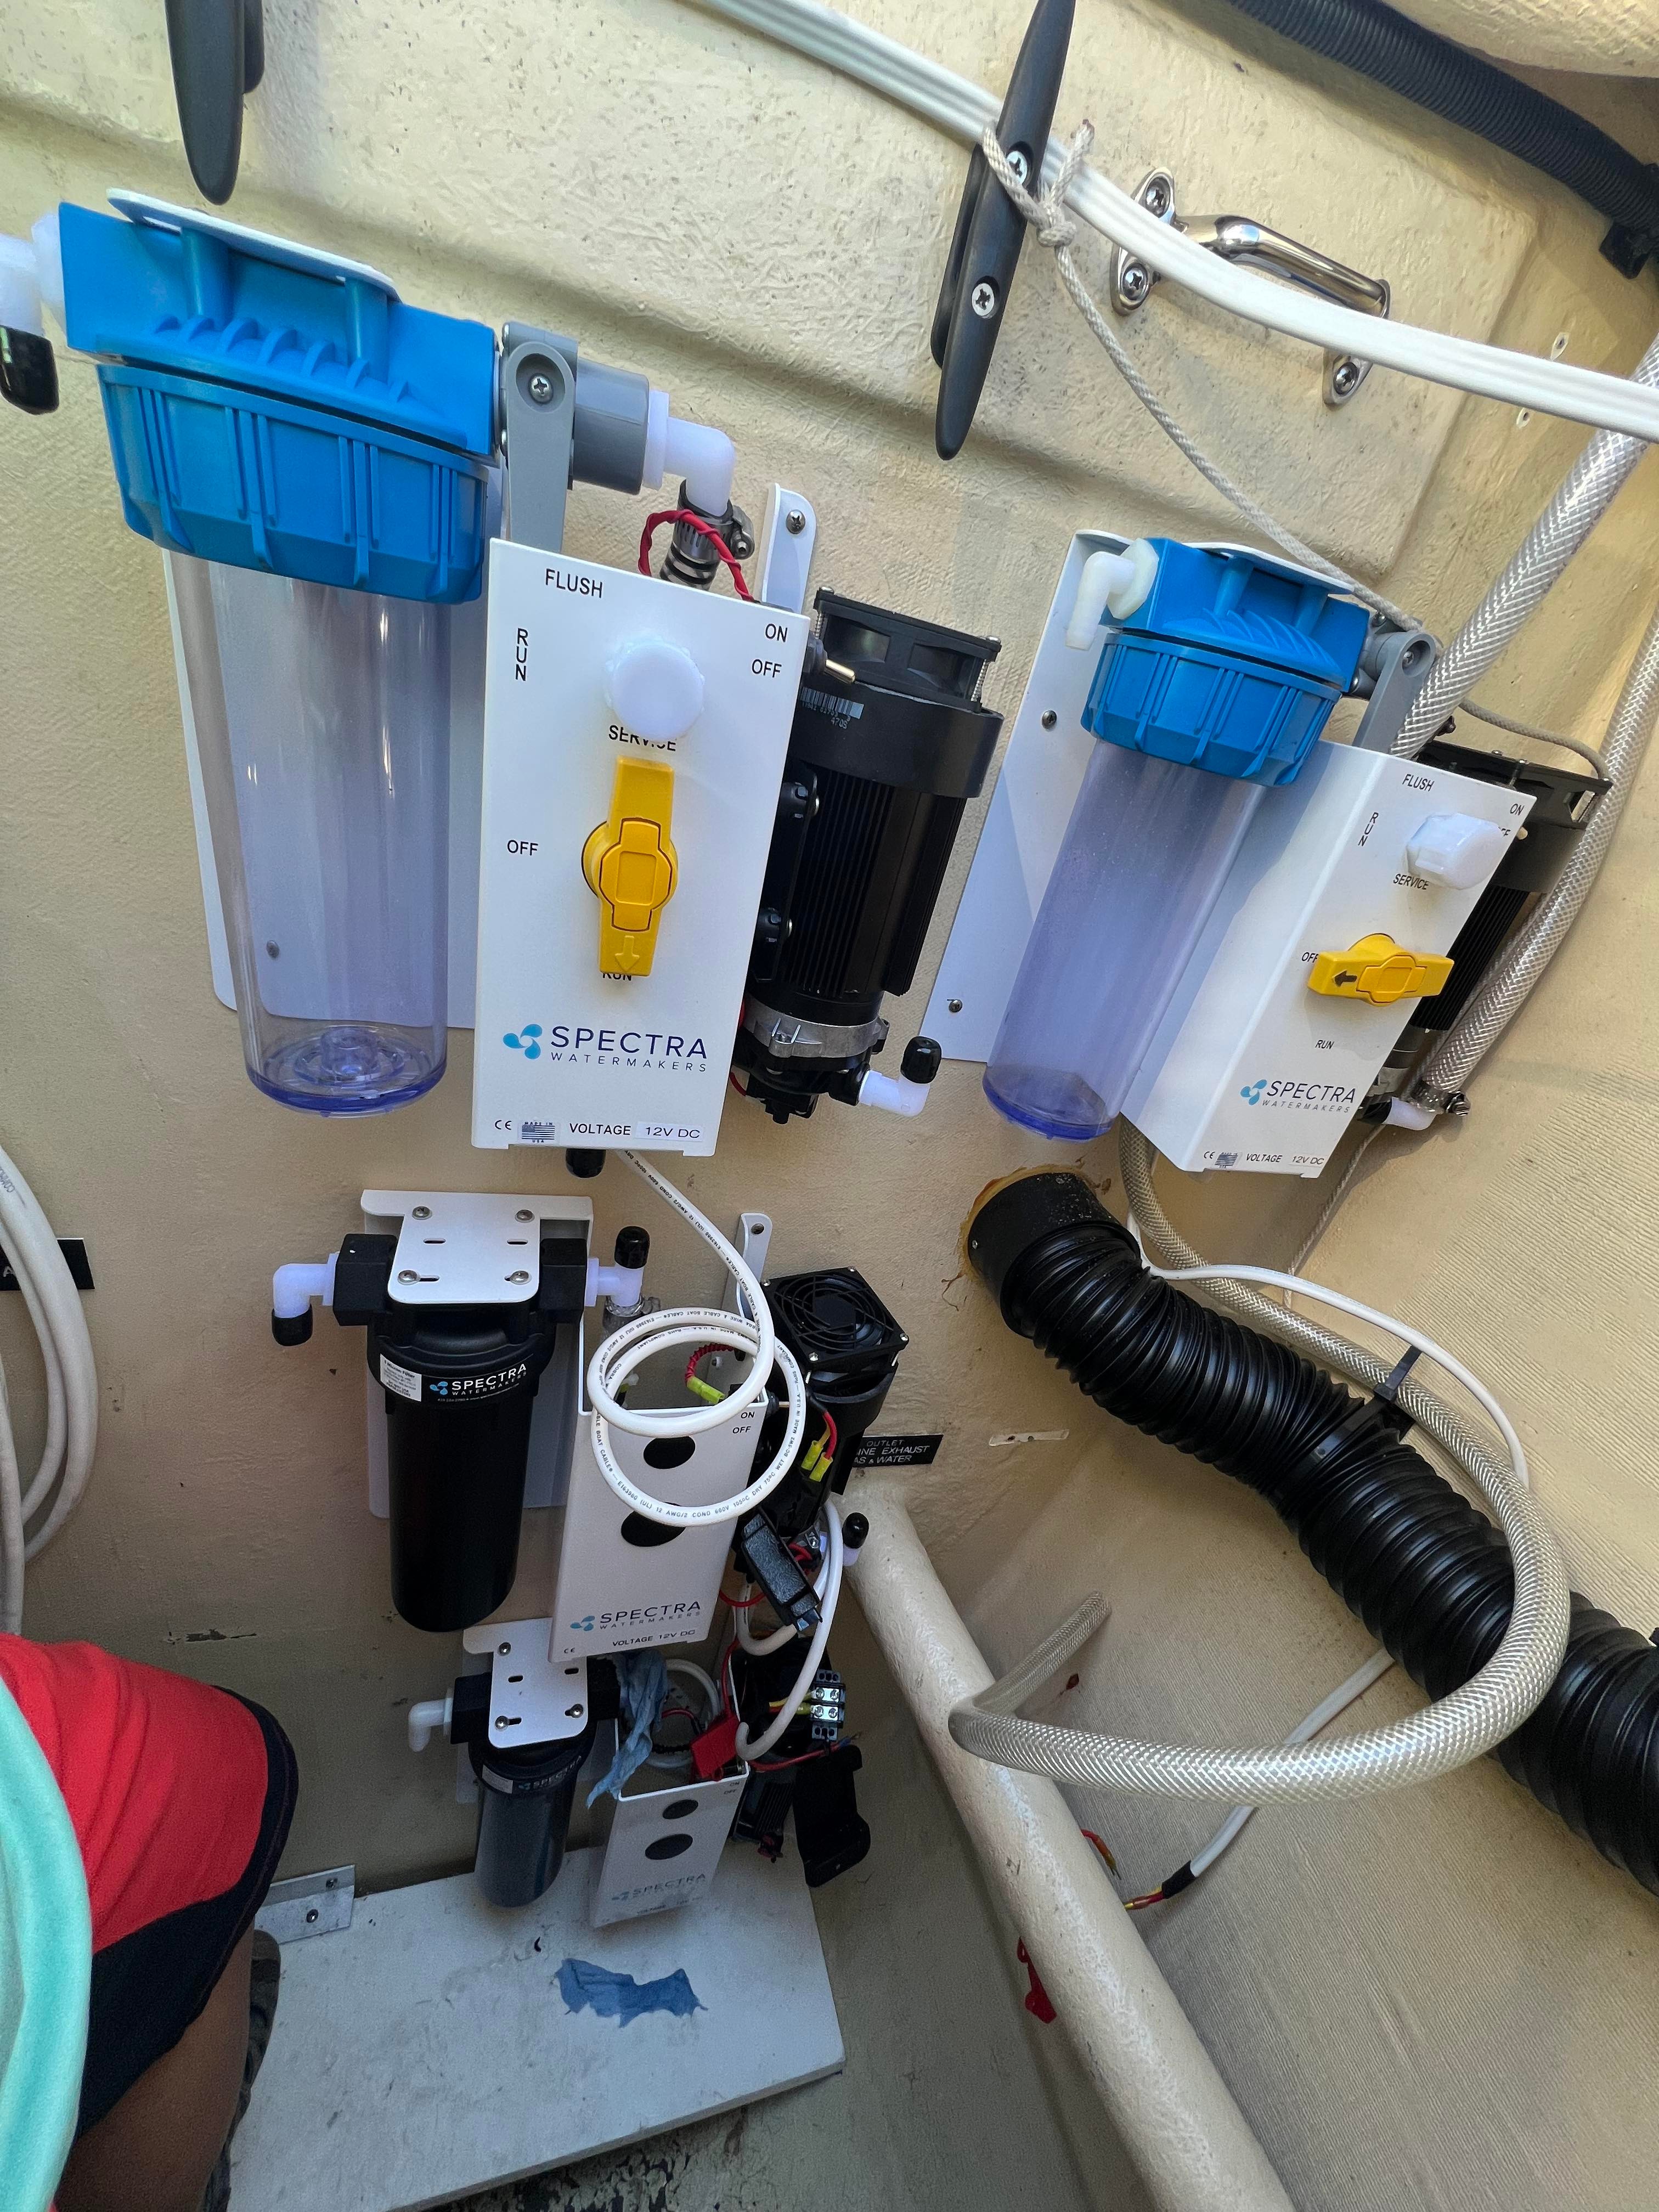
Now that all of the wiring and supply plumbing is done, I need to work on getting the gaugeboards mounted so I can finish the other half of the plumbing. I still need to be able to reach the main water maker clark pump on the shelf but we also want to be able to see the gauges and move the diverter valves without having to crawl into the compartment to do it. We went back and forth on what would work the best but eventually I just grabbed a sheet of starboard at the boat supply store and bolted it to the shelf with some existing holes. I can still reach what I need to above it and it looks pretty slick!
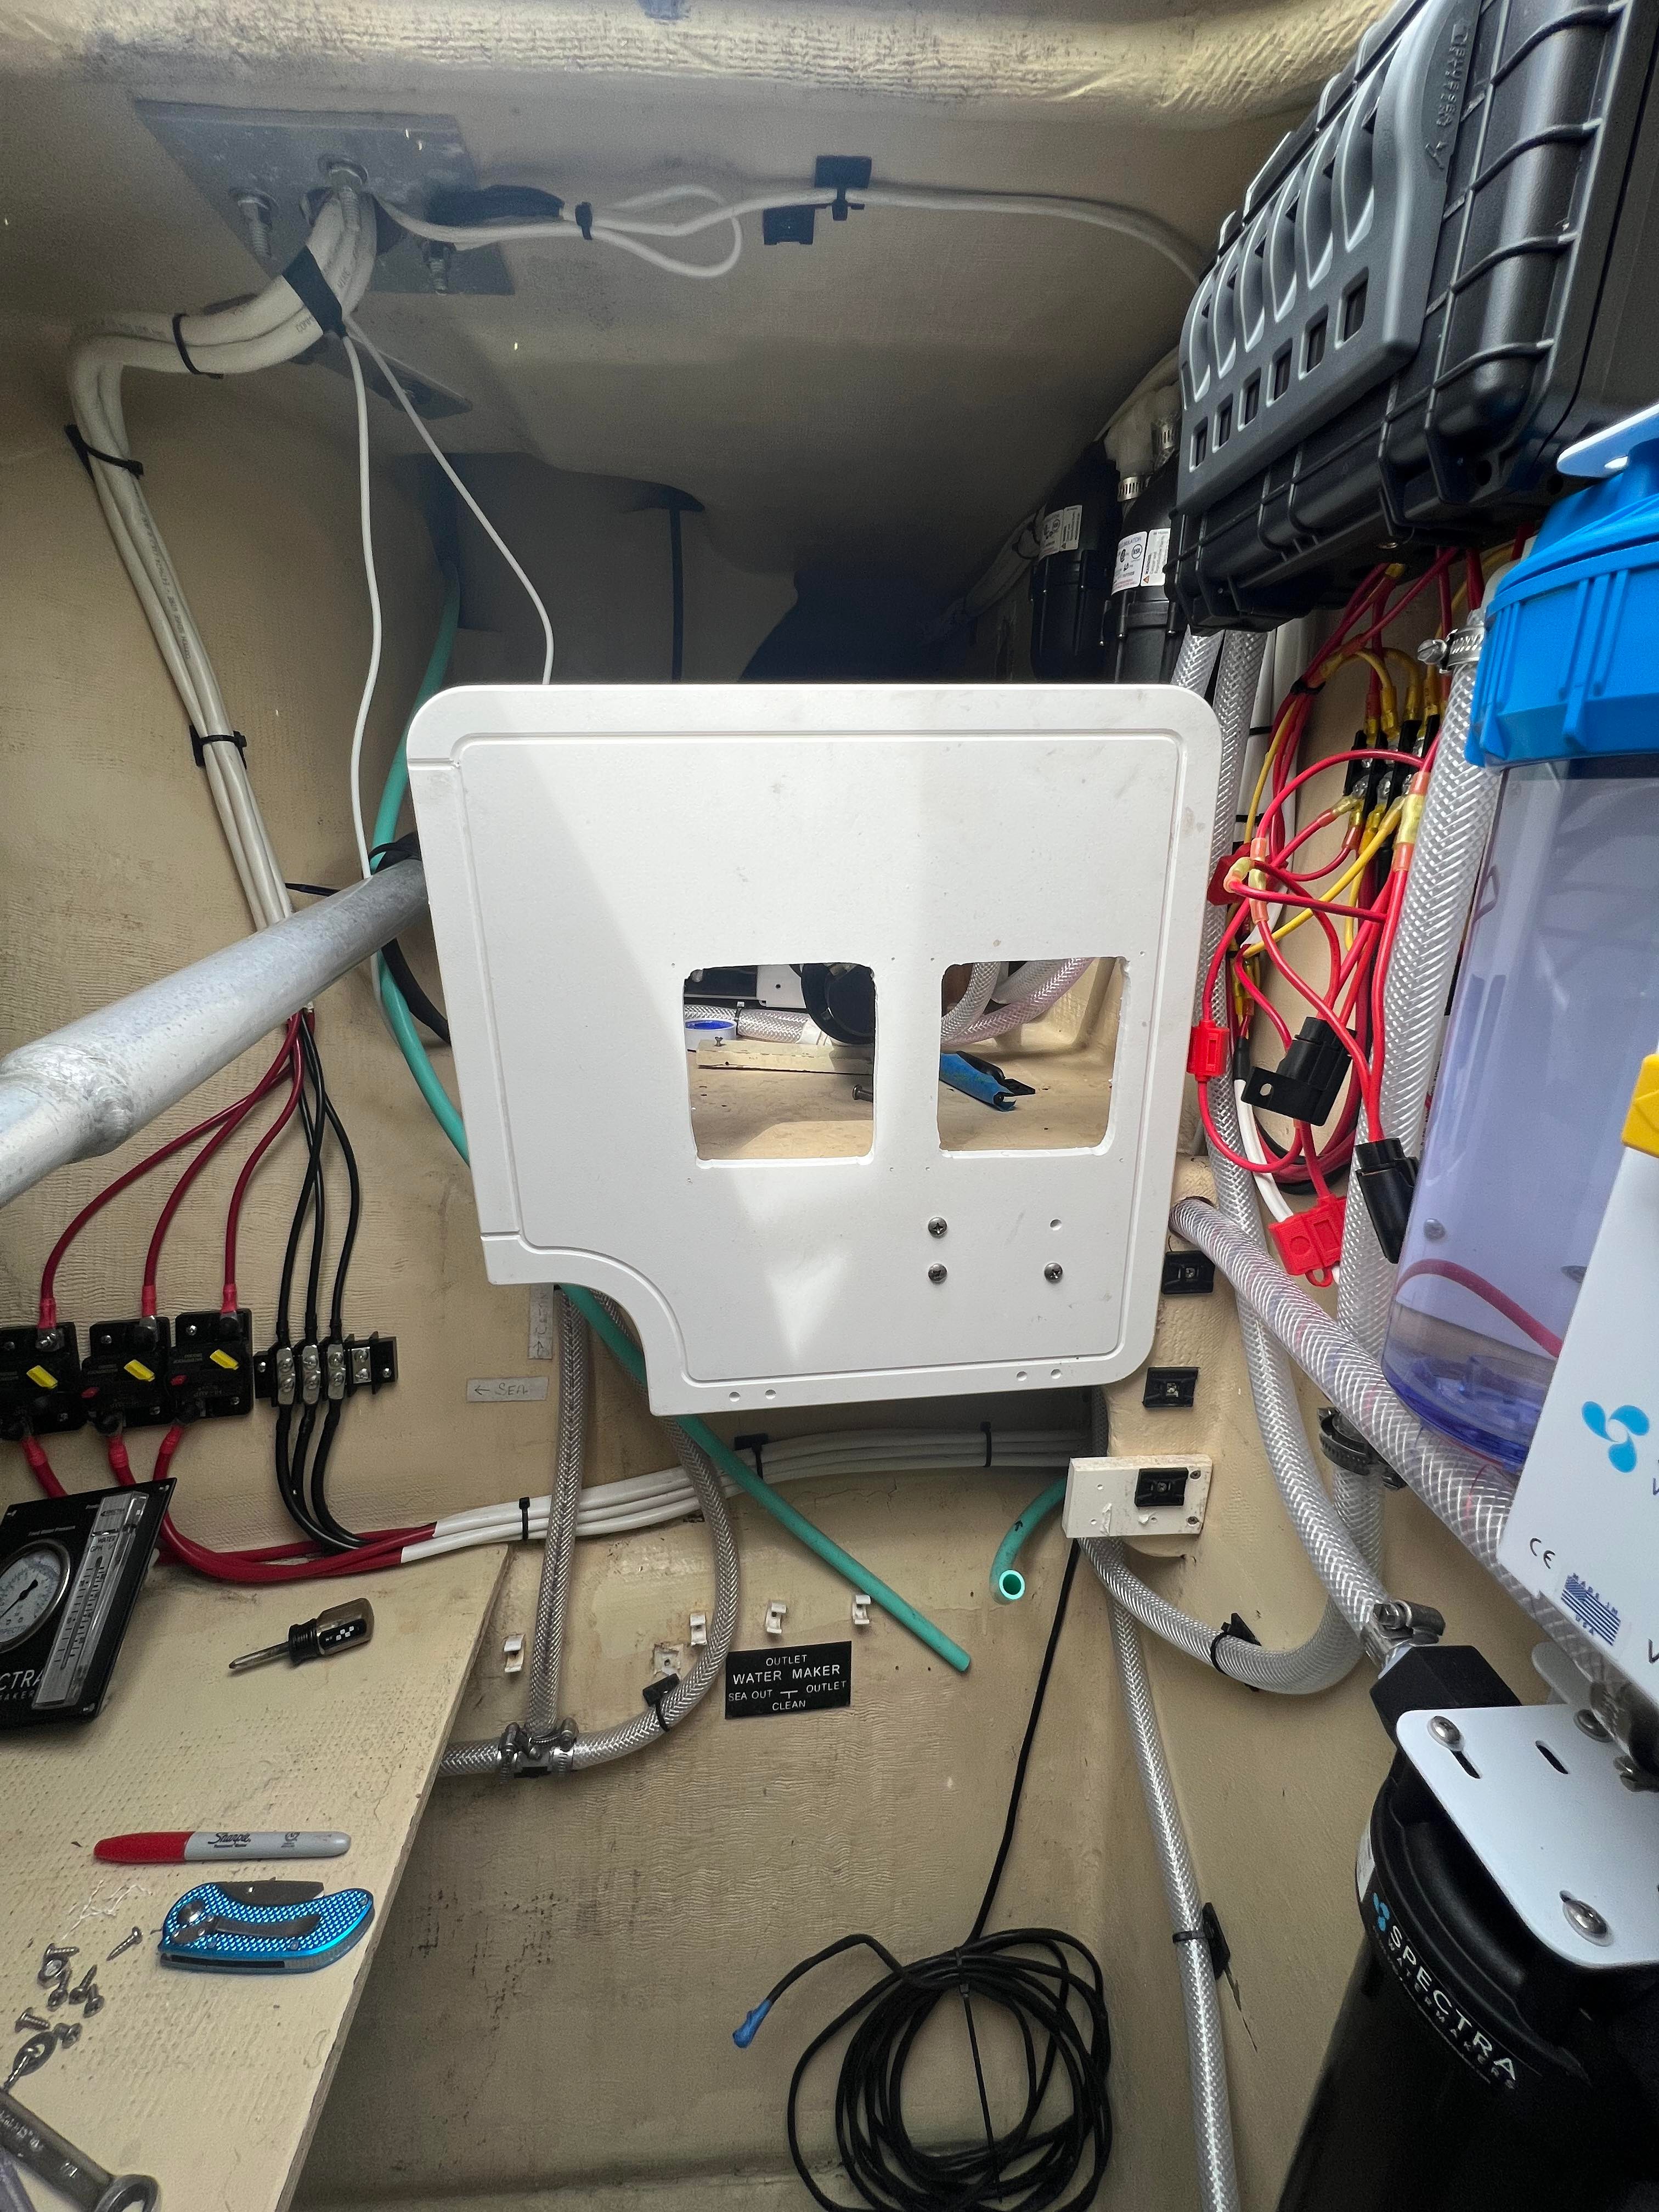
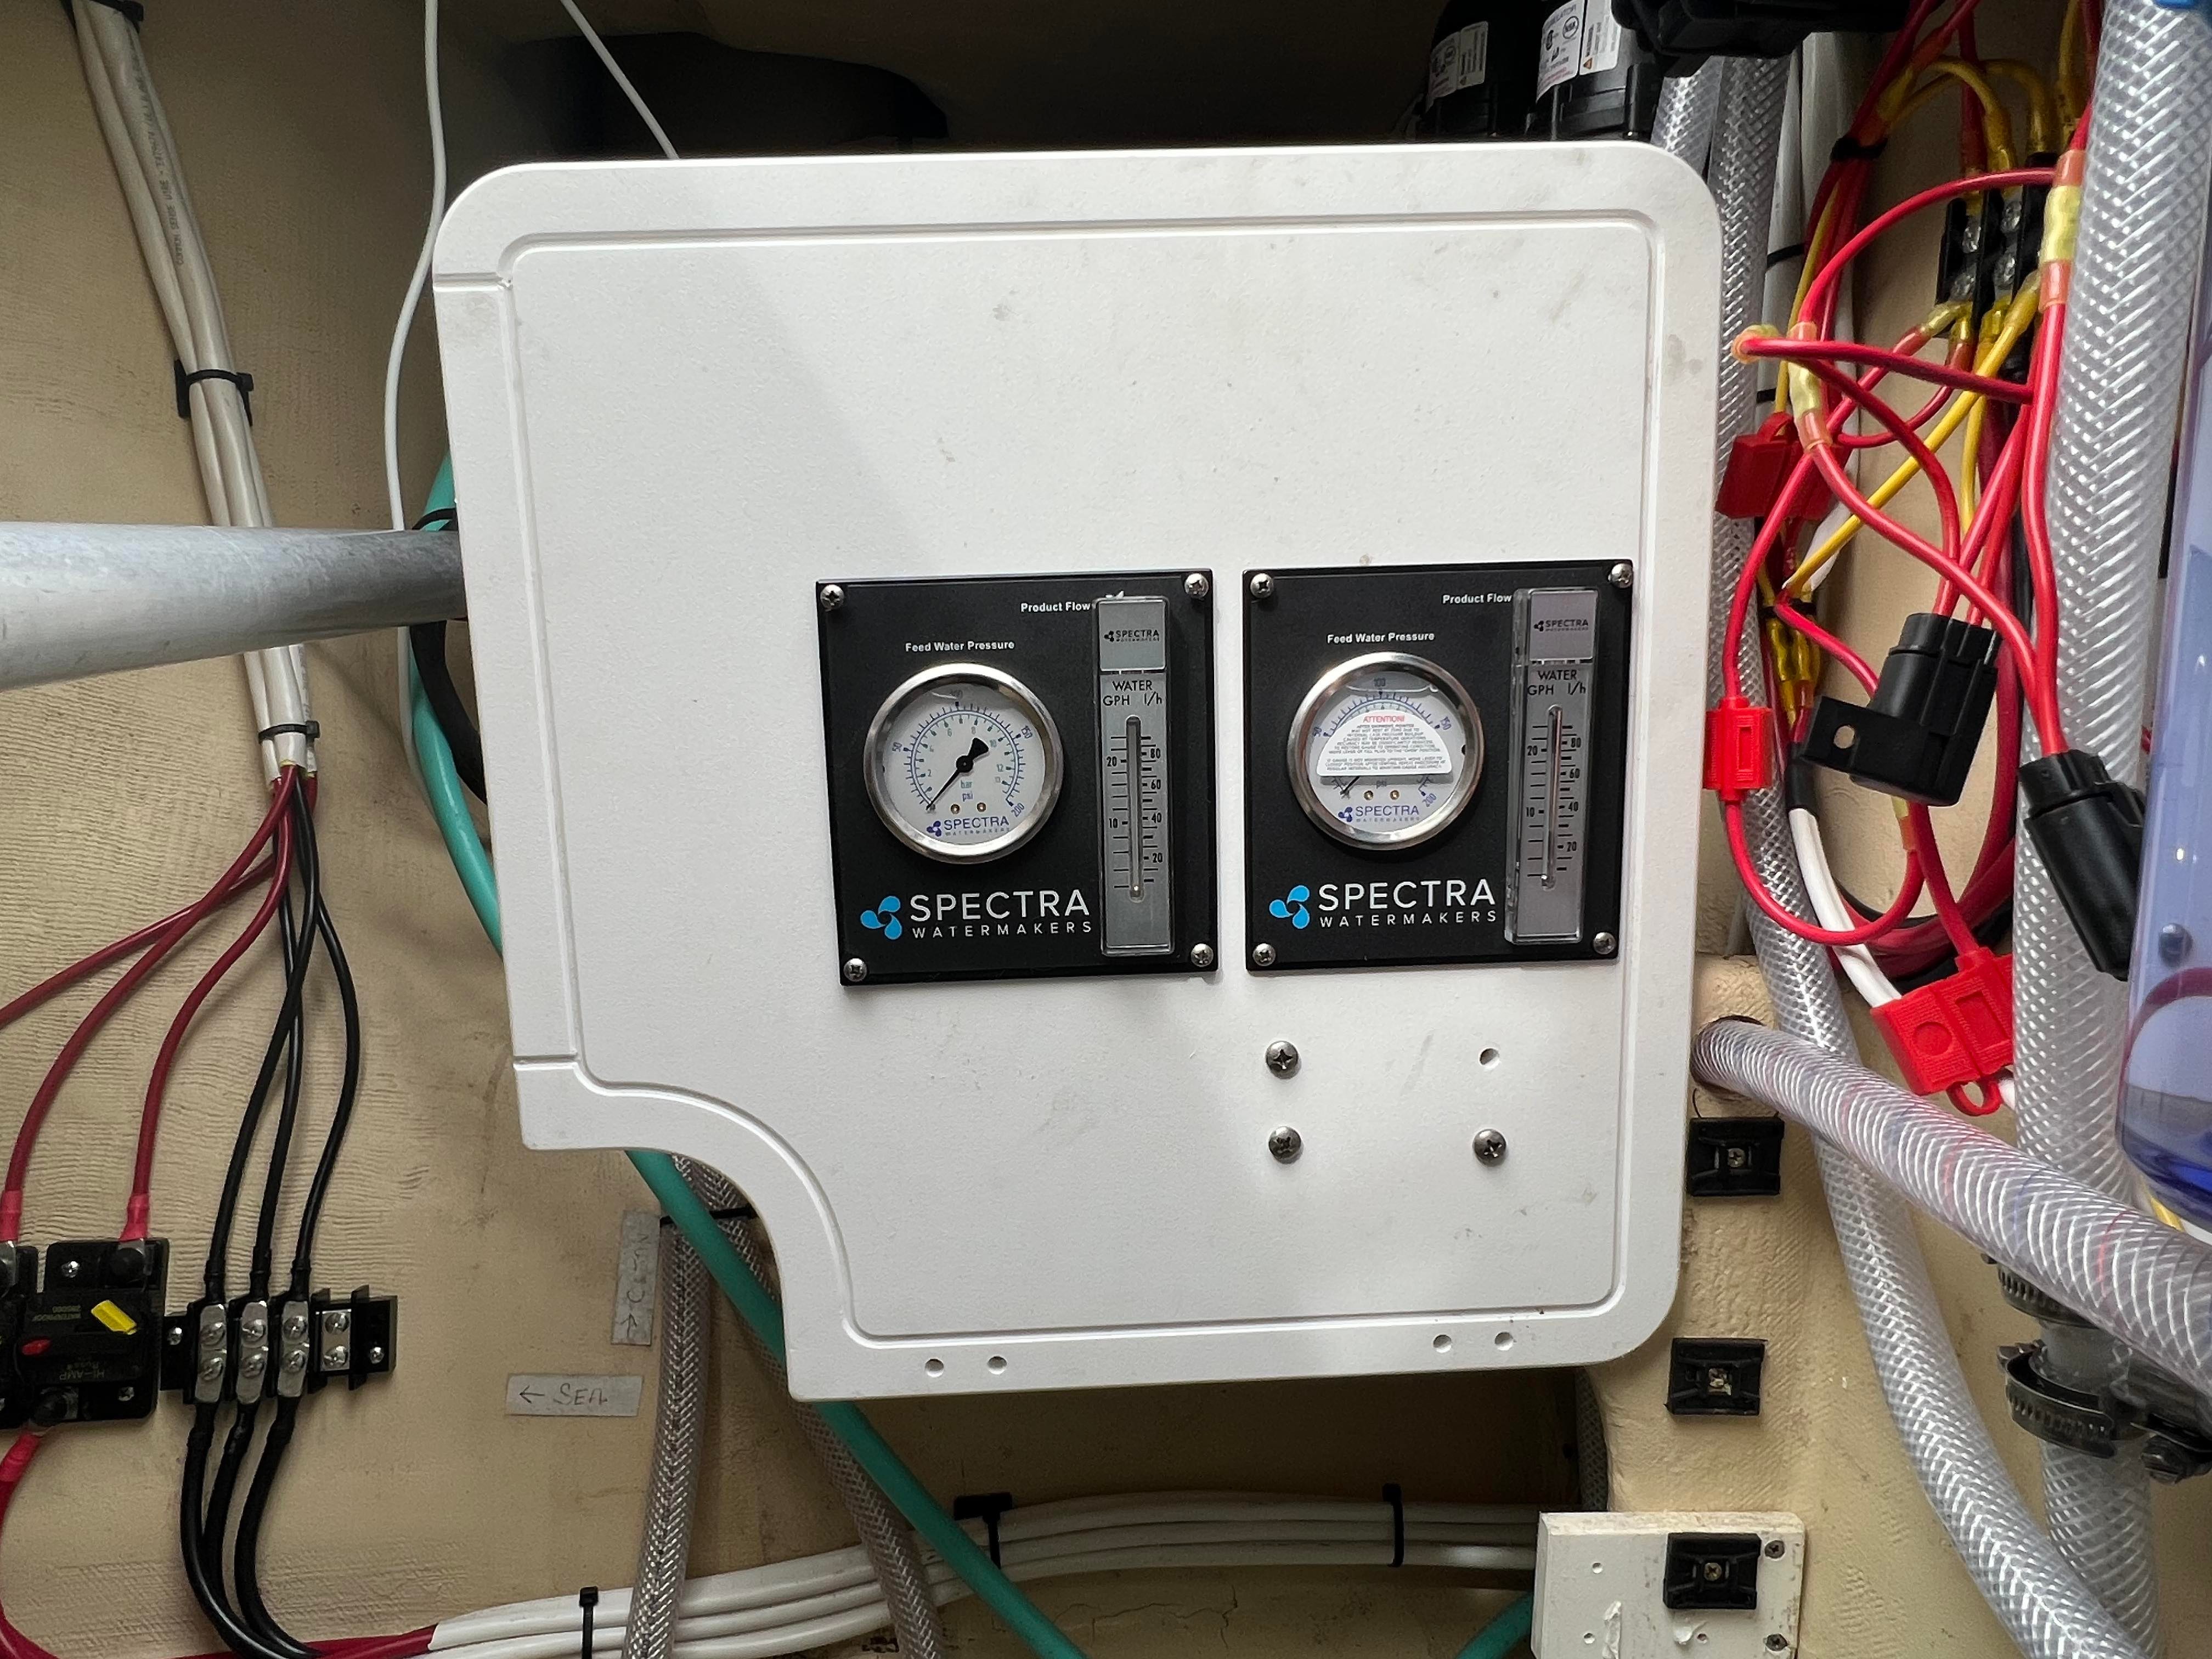
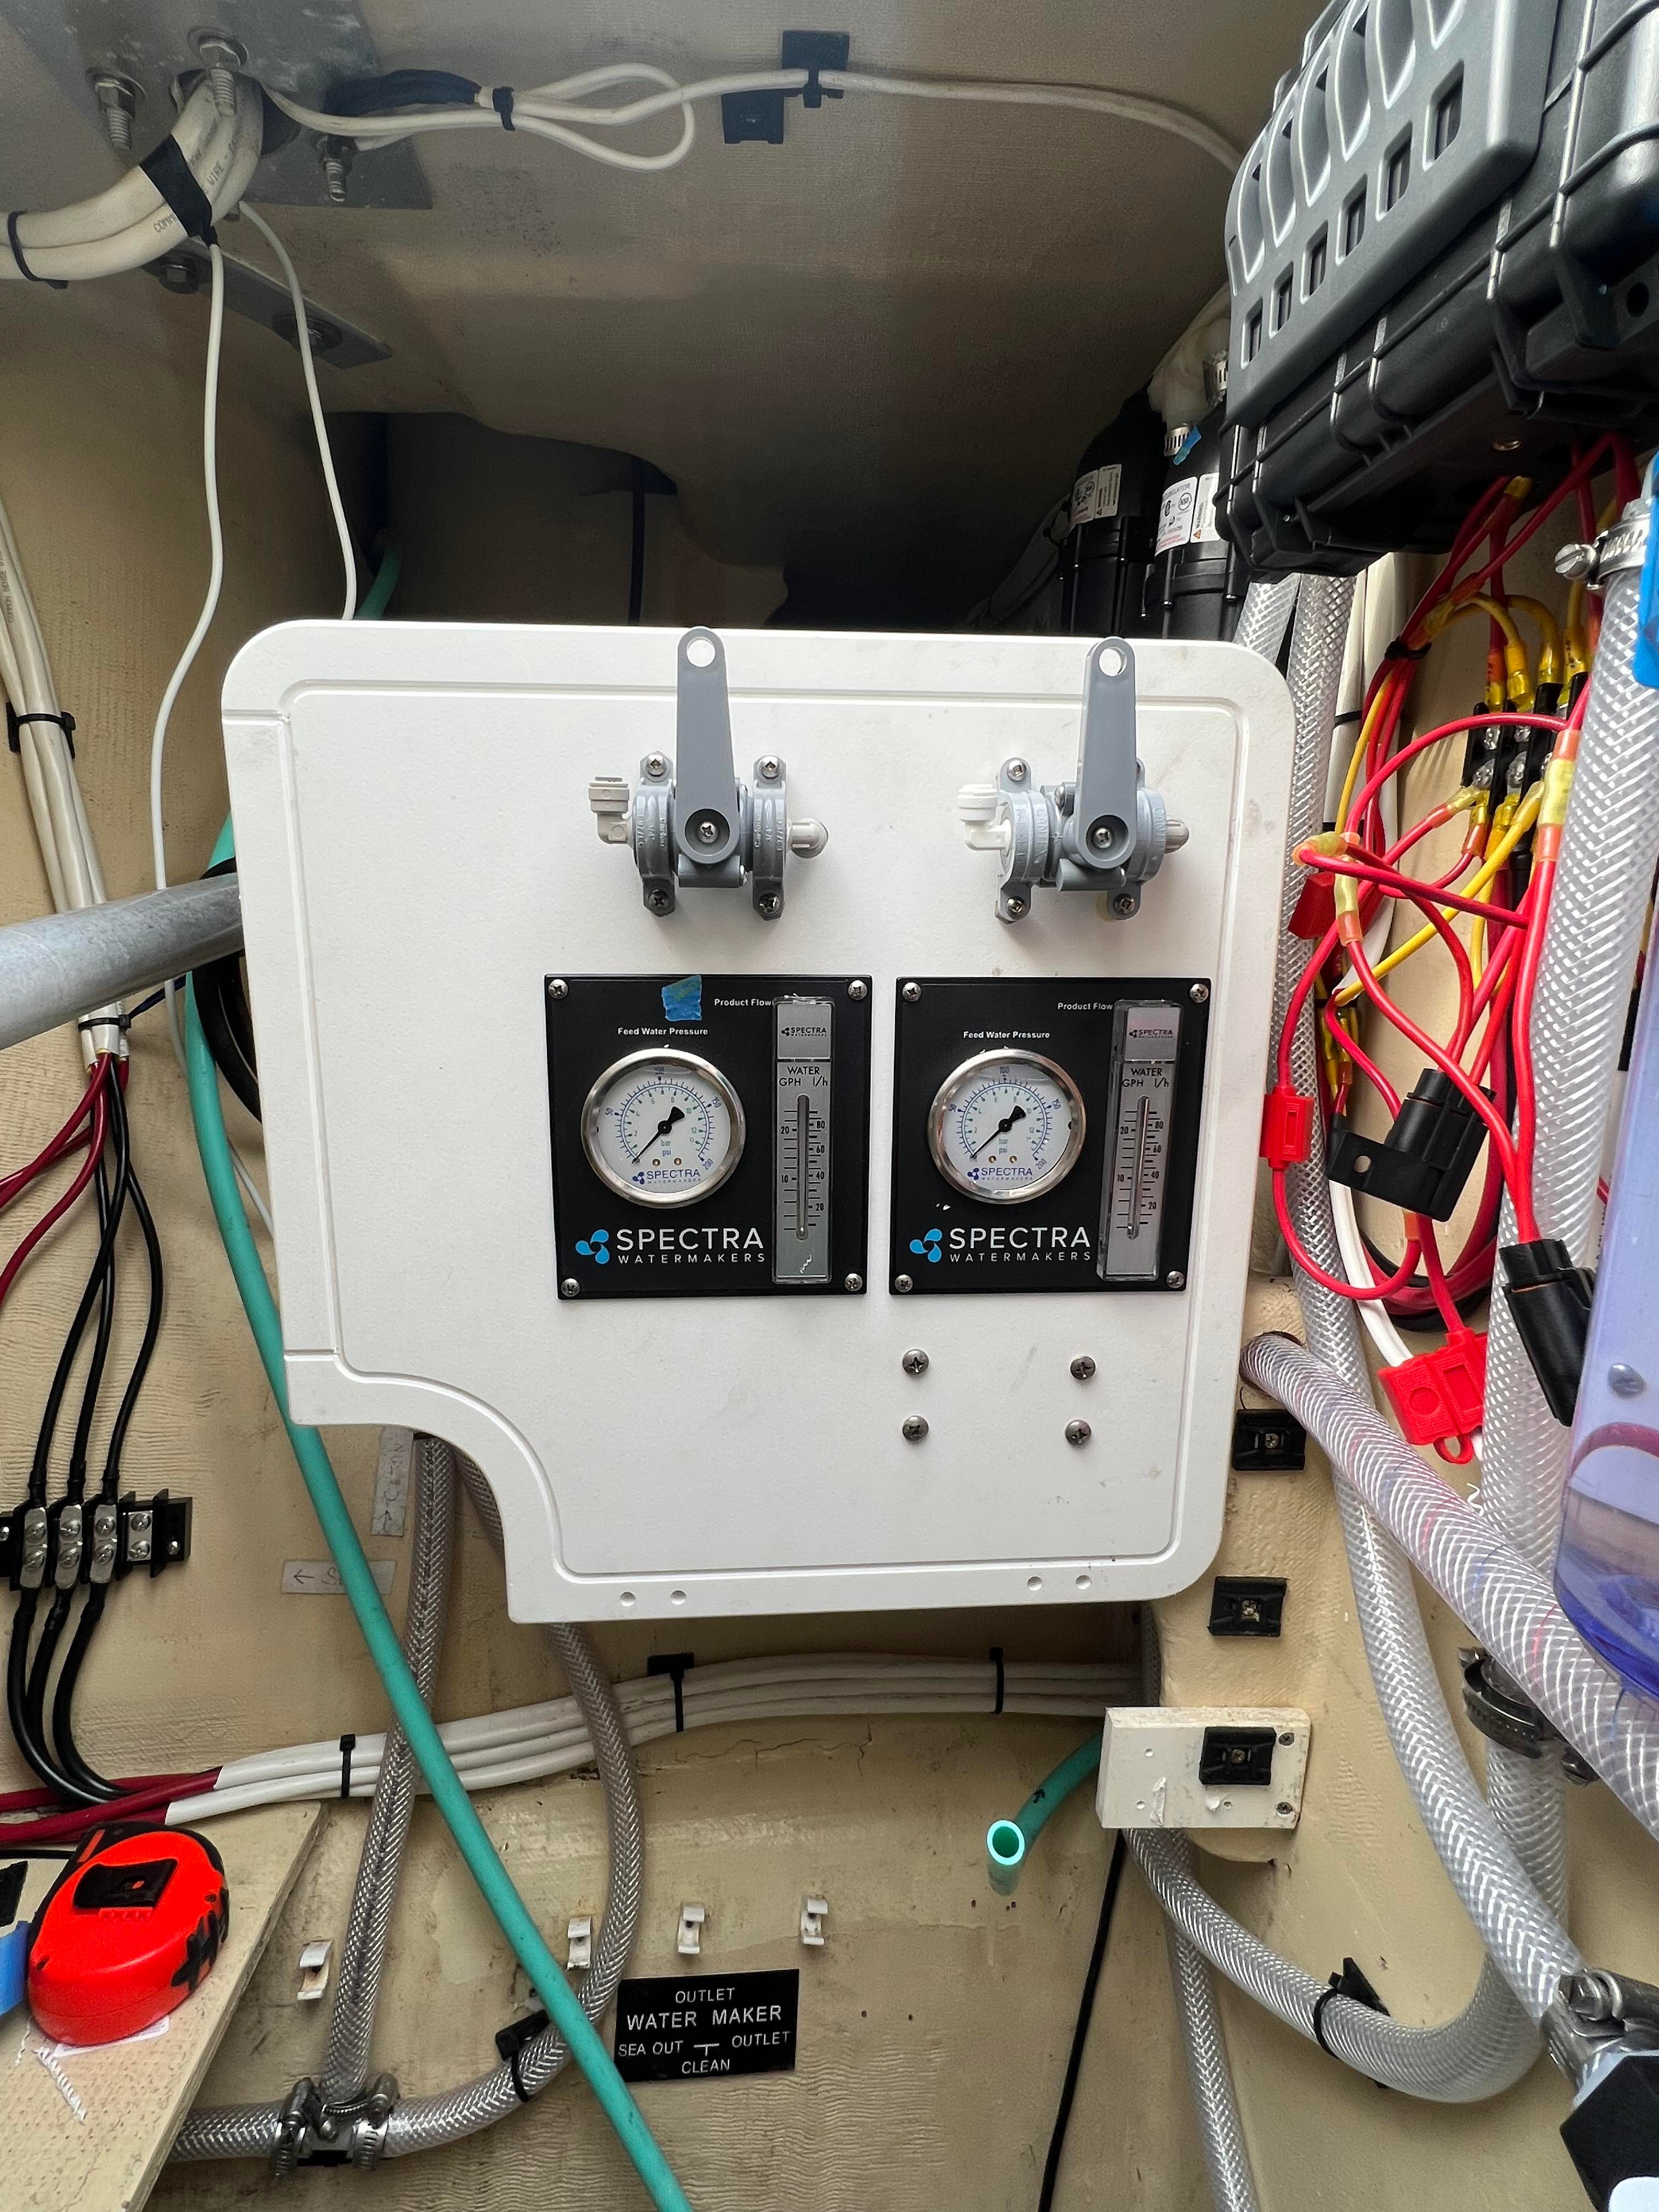
The tubing from the valves is run behind the panel so it’s mostly hidden from view and the tubing on the left will go to a drain hose and also be available for a sample tap. My label maker machine is going to get a workout once I’m done with this little project!
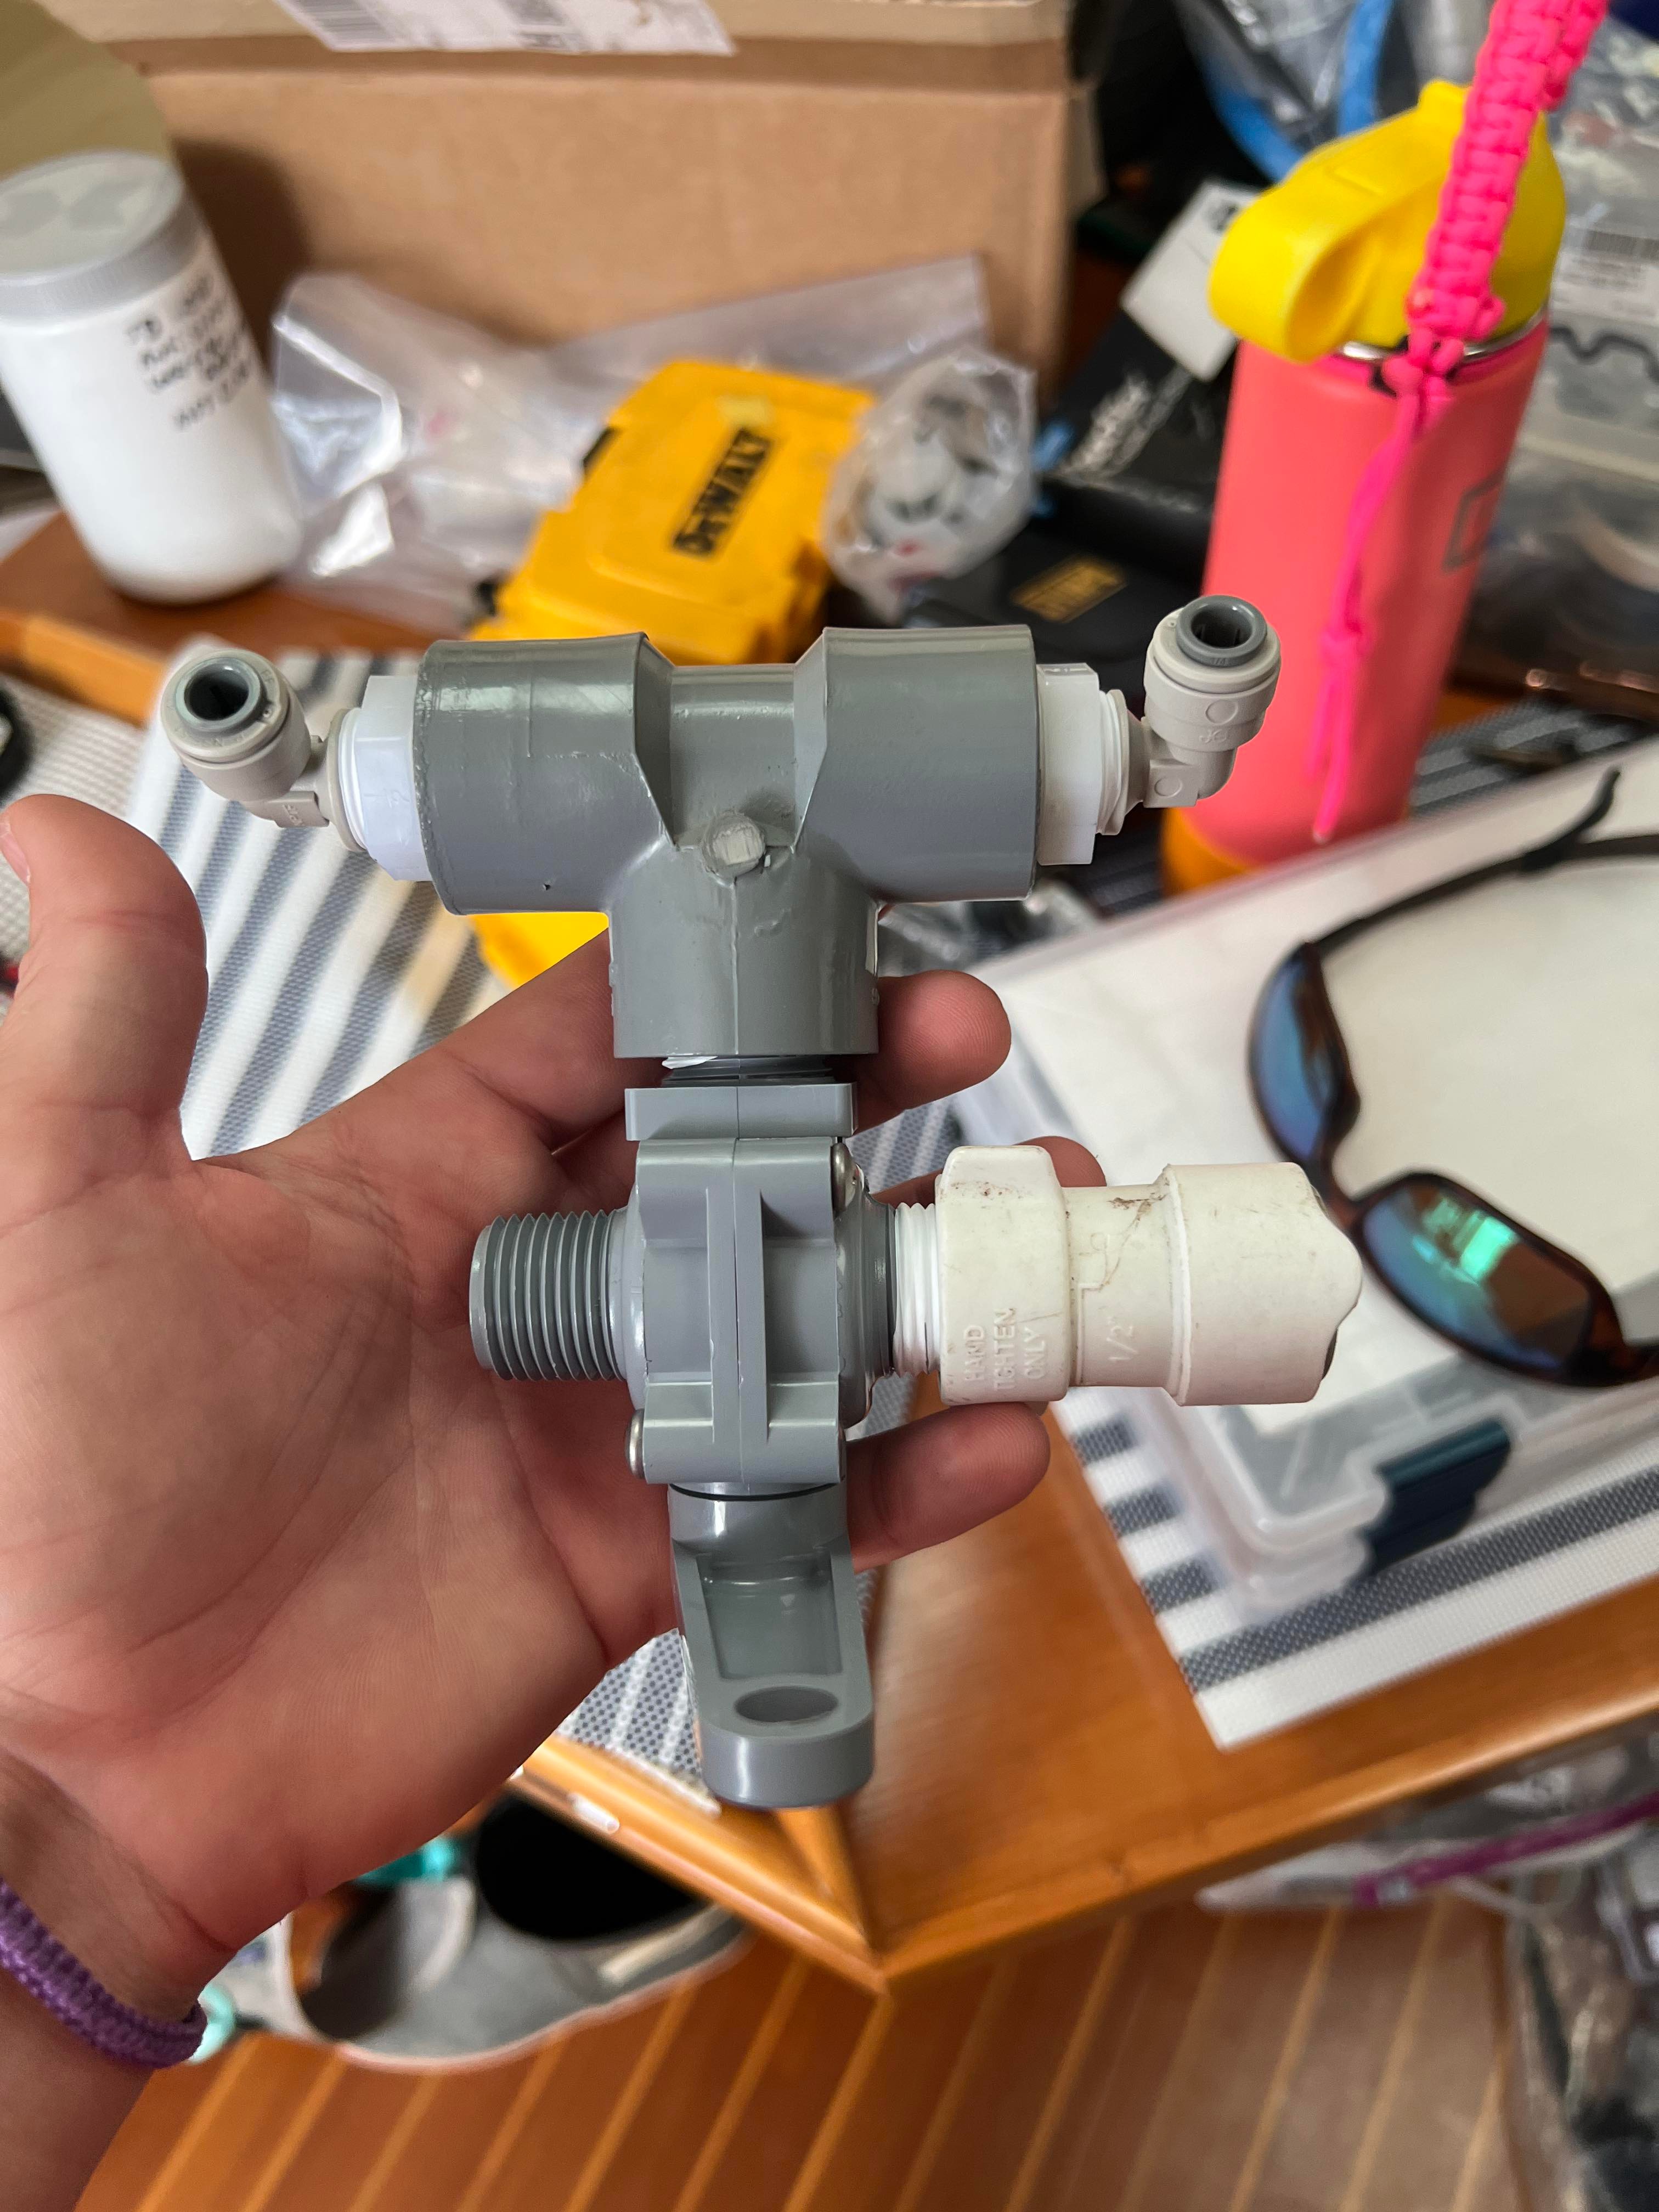
I searched forever to find a little 3-way diverter valve so I could direct the clean water to either the port or starboard tank. I never did find anything, even on Amazon, so when I did finally track down the exact thing I needed from a commercial supply place I went ahead and ordered it *and* paid extra for 2 day shipping because at this point I’ve wasted enough time. Luckily it was perfect. Quick and easy operation and the male thread ends meant I used less fittings and had less connections to leak than normal.
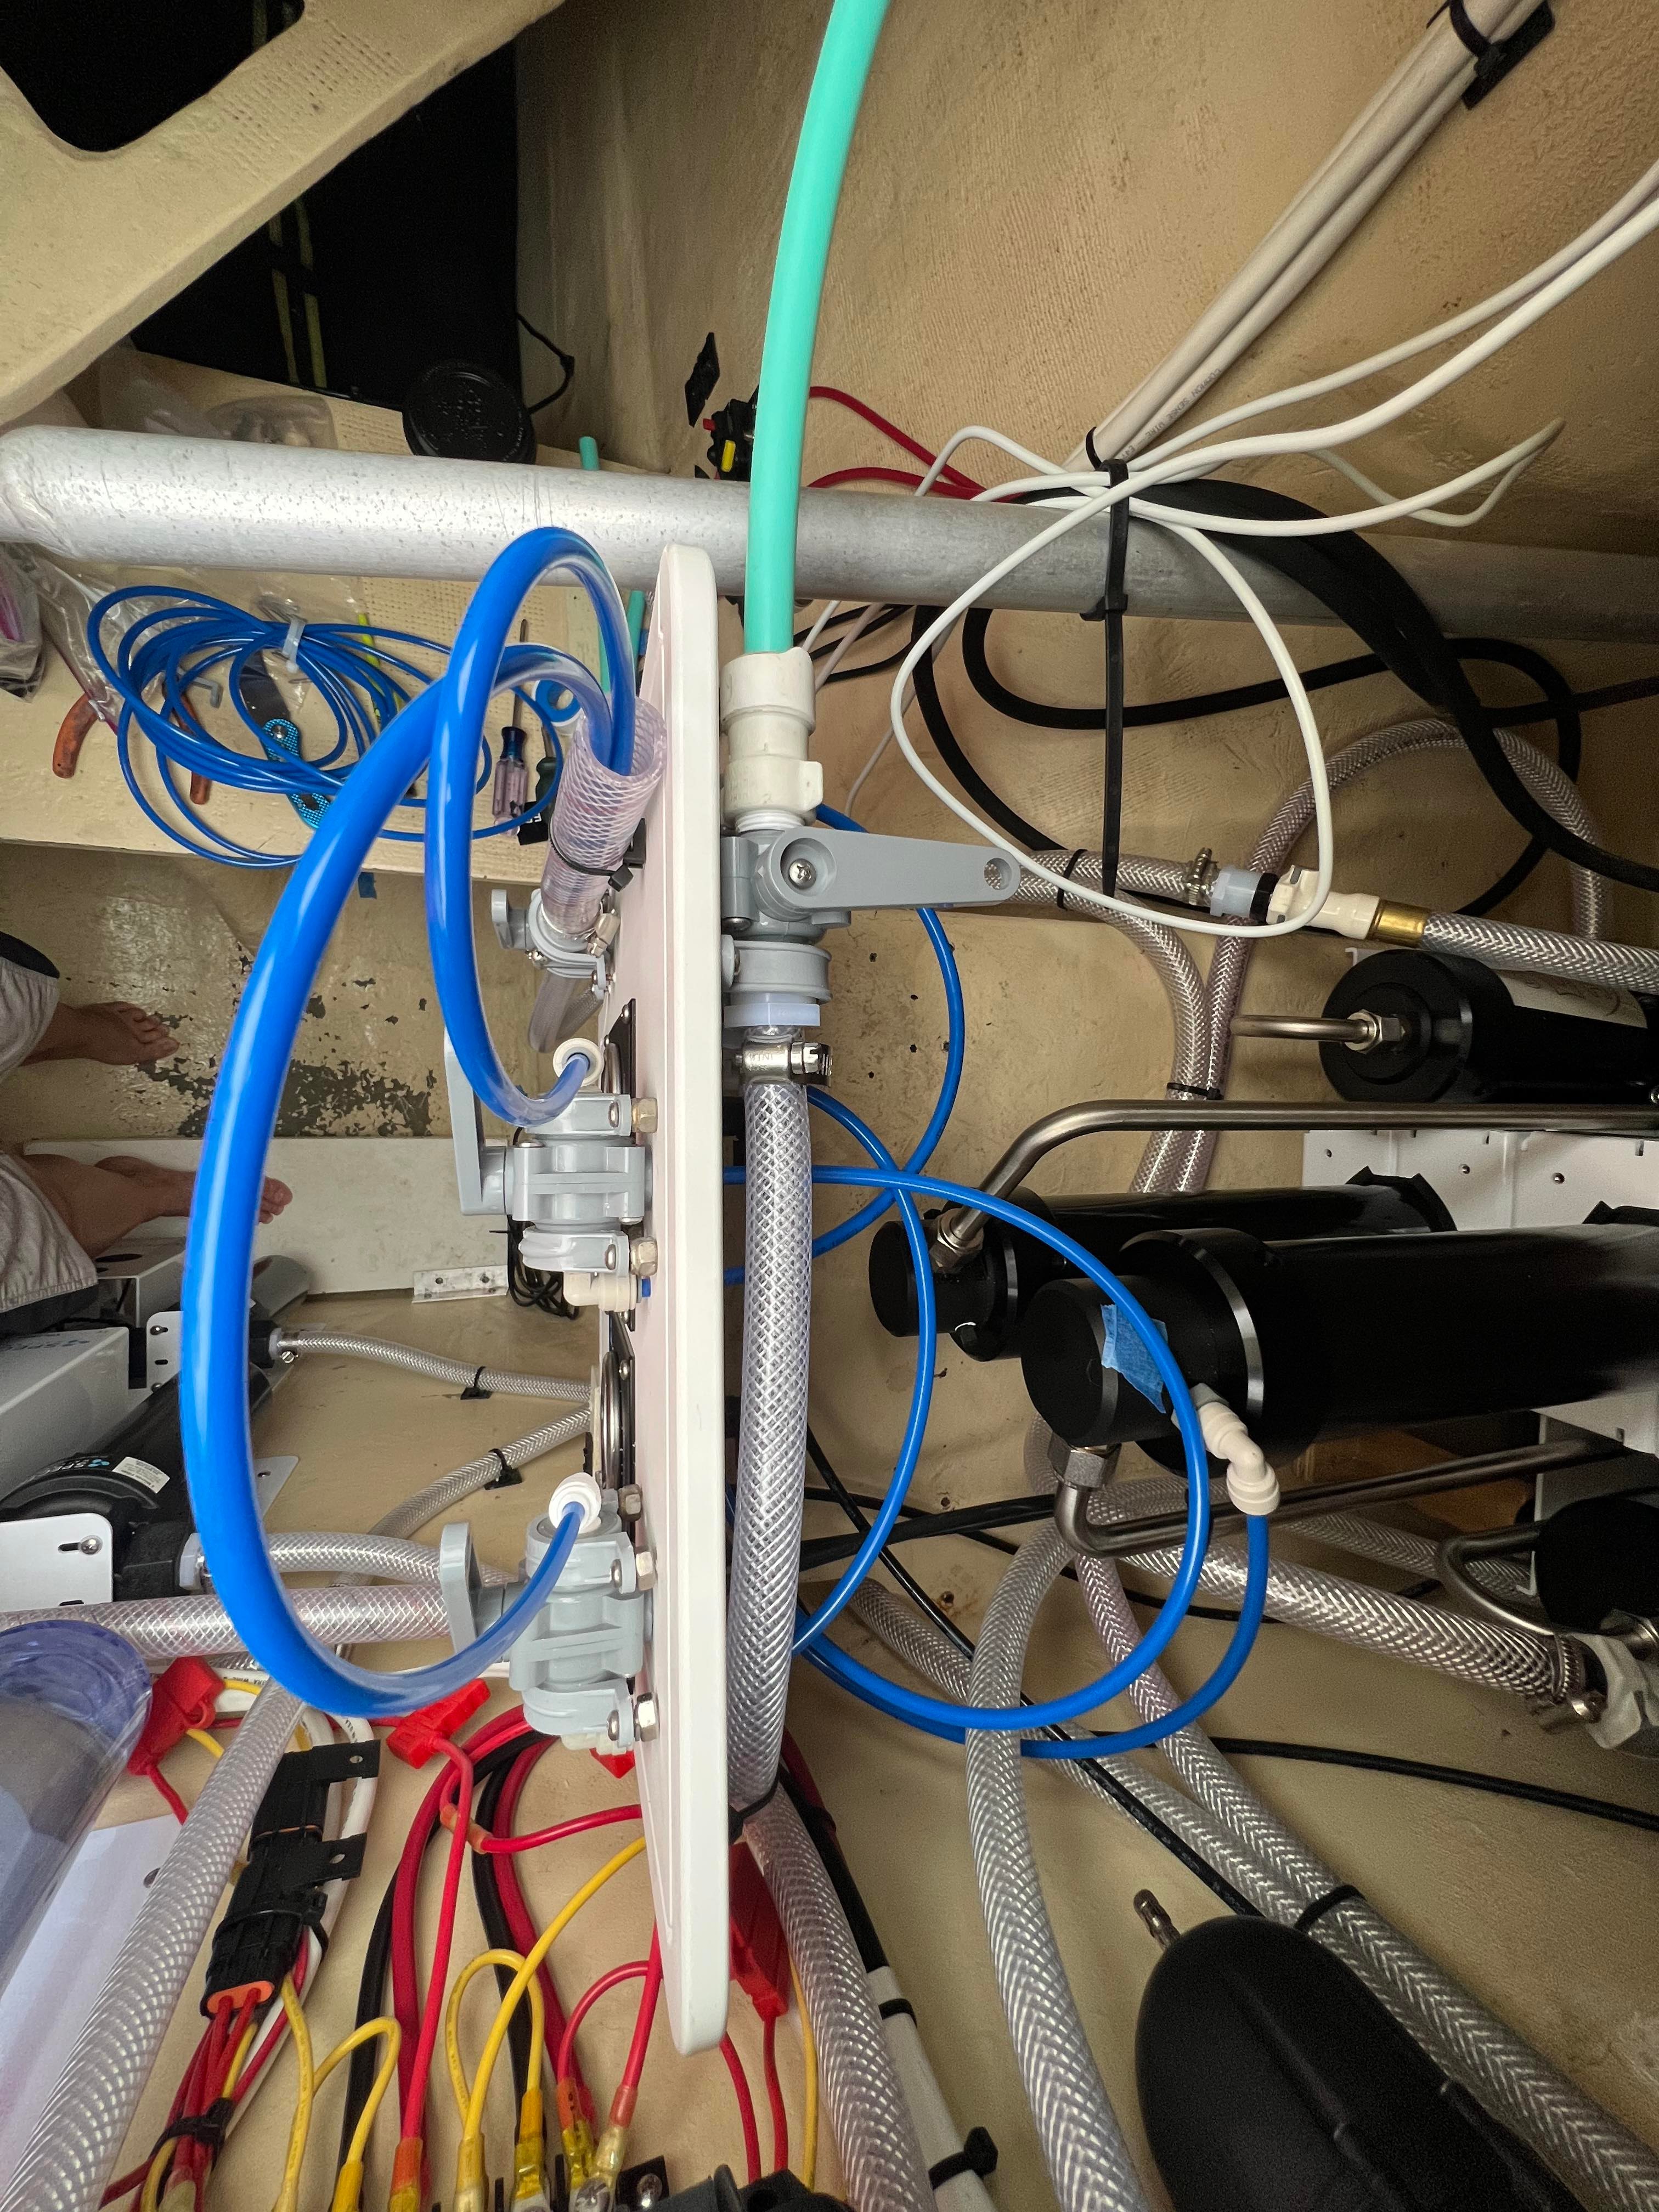
Each water maker assembly has a little diverter valve that will either run to a sample tap or to the freshwater tanks. Usually the sample tap is somewhere inside the boat and on Peregrine we just routed the hose into the drain of the bathroom sink. On True North there’s nowhere for it to go, so I added a tee for the overboard discharge line and made a little “funnel” to hold the sample lines. (you have to sample the water to make sure it’s good before dumping it into the tank…)
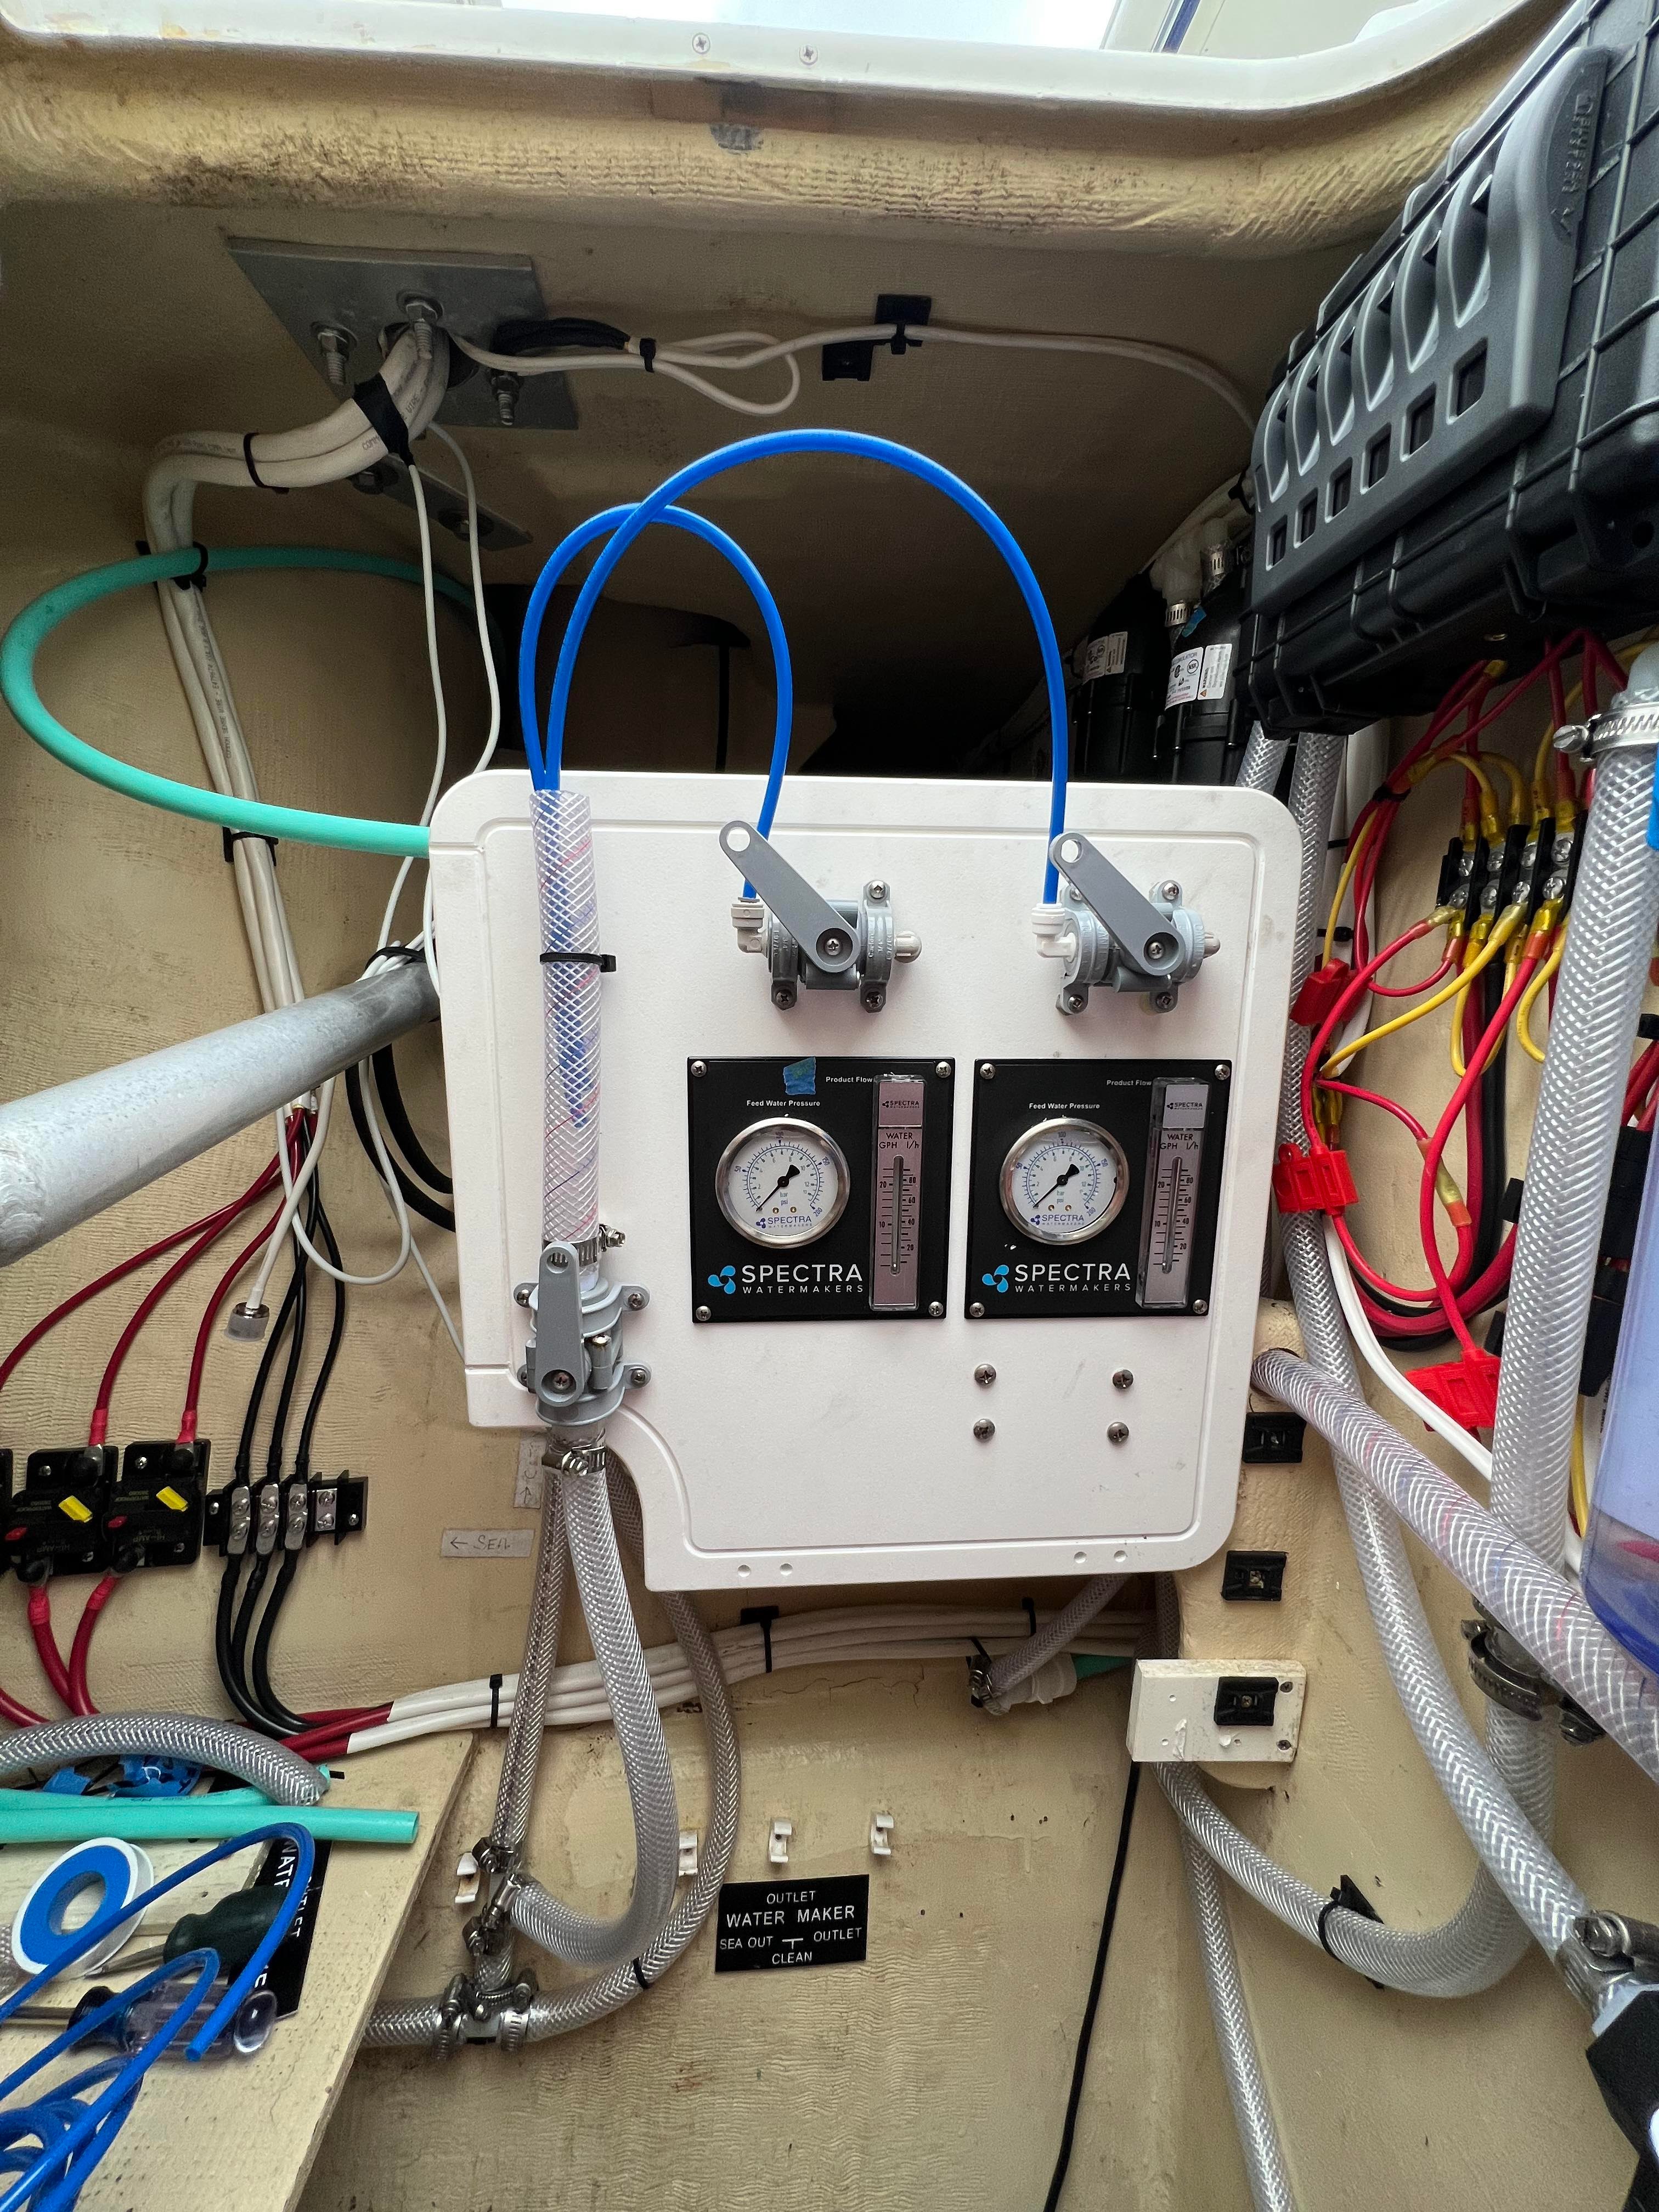
After finishing the drain and sample situation I tackled the last piece of the puzzle: the product water. Since I have two water maker units this was a bit more complicated than I wanted it to be. I joined both product water lines to a tee and then attached that to the diverter valve I just bought. Then I connected that to the port and starboard tank fill lines that were already in place from the old water maker installation. The port tank had a long run of 15mm hard tubing that I just had to cut to fit and shove into a fitting. The starboard was too short and I didn’t have any 15mm tubing laying around, so I adapted it to 1/2″ hose for a few feet using fittings I already had.
And now, after a few weeks of work, I have a finished product!