I’ve gotten quite a few questions and comments about the little camping trailer Jason and I made for our trip. I did take photos on my phone (excuse the quality and lack of artistic execution!) during the build, so aside from a few small steps that I didn’t document, I’m going to run y’all through how I designed and built it! Take a seat!
I started by getting on the internet (how I begin 99% of my research really…) and finding ideas of what people have done already and what I liked an didn’t like about each design. Then, usually while at work, I sketched up a few plans in pencil. At home, I used Google Sketchup to do a rough design of what the trailer would look like in 3d to verify that I like what I’ve started. I use AutoCAD at work, so Sketchup irritates me for detail work. Once I have the basic design roughed out, I’ll transfer the dimensions to AutoCAD for final tweaking, create my material list, clean a spot in the garage, and then go buy steel.
I’ve had the most questions about “why is the tongue so long?”. Well, the answer is mostly that we wanted to be able to completely jack knife the trailer more than 90* to the Jeep and not destroy bodywork just in case we got into a tight situation, and to do that the straight part of the tongue needed to be greater than half of the Jeep’s track width. The hitch we made ended up lengthening it a little bit more by accident. (more on that later). In general, in order for the trailer to have the same turning radius as the tow vehicle, the distance between the hitch to trailer’s wheel hub has to be equal to your wheelbase. In CAD I found a dimension that was long enough to meet the above criteria and ended up being close enough to a round number to make material ordering easy. We added the triangulation on the tongue forward of the main box later as an afterthought since we eventually plan on mounting a motorcycle rail or a big toolbox up there. Plus, it looks beefy! One other design criteria we used was to have the track width of the trailer equal to the track width of the Jeep, so anywhere the Jeep went, the trailer would follow exactly. Turns out we nailed it and the trailer towed like it wasn’t even there except for the fuel mileage hit!
So here is the frame. It’s 2×3″ rectangular tubing. Chosen mostly because 2×2 wasn’t quite big enough and 2×4 seemed excessive for something this small.

Most of the trailer builds I found for actual offroad/rockcrawling use built their own independent trailing arm suspension. We weren’t planning on wheeling our Jeep that hard, but we also didn’t want the harsh ride and decrease in ground clearance of a traditional solid axle. We ended up using Timbren Axleless suspension. It essentially joins the wheel hub with a built in suspension and shock onto a bracket that bolts to the trailer. We used the low travel lifted version, but they make a 4″ travel which we will probably use next time. I had to make a beefy bracket for the suspension to weld and bolt to the trailer frame.


We chose 31″ all terrain tires because they’re the same diameter as what’s currently on the Jeep and we wanted the trailer to have at least that much ground clearance. They’re also a lot stronger of a tire. We’ve had tire issues before and they’re not fun. The Jeep can be piloted around most sharp rocks and obstacles… the trailer has to just follow along.

Here’s the “rolling chassis”. The axles actually went on very easily. I would order them again for sure! …and the ground clearance under the trailer frame is incredible! It’s more than 2′ from the ground to the frame… More than enough room under there for a water tank that I’ll eventually ad! If I were planning on rock crawling with this, I would actually add some “skids” in front of the suspension/axles where they bolt to the frame, just in case we got hung up on something really bad.

As you may notice in the above picture, not only do we have the appropriate PPE scattered around the garage because we love safety…but we also have the top of the box sitting on the frame made out of 1×1 square. As you may have already guessed, the next step in the build was to make the framework for the actual trailer box. Since the width of the trailer was to be the same width as the Jeep, this meant that the box ended up being exactly 4’x6′. I calculated the height of the box so that the rooftop tent and roof rack wouldn’t be higher than the roof of the Jeep to try and conserve some fuel mileage. We made the box 30″ tall because we could cut each length of tubing into 4 equal lengths with no waste. Work smarter not harder.

My plan was to have a small door on the passenger side of the trailer with a bulkhead behind it to form a small separate compartment for soft goods like sleeping bags and to make it easier to reach from the back. The rear door is going to be hinged in the vertical so it pivots open and we can mount a flip-down table on it for cooking.


We argued about various methods of sealing the steel panels to the framework such as epoxy, JB weld, flashing, etc… in the end it was quicker, easier, and less messy to just weld the entire structure together to seal it and then grind the welds down. Sometimes the least elegant solution can also be the quickest.
At this point, the rolling chassis is done and the main box is done… however it still needs fenders for legality and courtesy reasons. 😉 We didn’t find any off the shelf steel fenders that were big enough and didn’t look stupid, so we ended up making them. I think it took longer to measure and fab these fenders than anything we’ve done on the trailer so far. The main frame was way easier. Just so many finicky little pieces and angles to cut.


It’s really looking like something now! We hadn’t considered any different styles of hitches besides the standard ball hitch, but after a little more research we saw that some of the offroad guys were building or buying 3-axis hinged hitches for their trailers. There were plans posted online for a 3-axis built for $50 all from stuff from Tractor Supply. Sounds good to me. We welded a receiver to the tongue of the trailer so we can easily interchange the 3axis for a normal ball hitch.


At this point we had been debating what color to paint the trailer for a while now. We love orange and our rig is orange… but it’s a lovely shimmery, color shifting metallic and we’re not going to be able to match that with spray paint and it would look terrible… so we decided on a “safe” shade of desert beige.

In the process of priming and painting the exterior of the trailer we realized that having bright white on the inside made it really easy to see stuff and a whole lot brighter! so we painted the interior white. The spray paint ended up not lasting very well with all the stuff sloshing around inside, so next time around we will be using a much more heavy duty paint.
The main motivation for building this trailer in the first place was that we have this sweet roof top tent that we had mounted on a canopy that went on the back of our Silverado truck. Well, we traded the truck in on the Jeep and now have no way to carry our super sweet and extremely comfortable tent… So now we need to make a roof rack for the trailer box to carry the tent. Fun fact: the trailer box is 4’x6′ and the tent while closed is 4’x6′. It’s like fate.

In order to be street legal we needed lights… so we bought the generic cheap waterproof kit from Tractor Supply and wired it up. Jason really wanted nice conduit for the wires, so that’s what we did.


…and now for finishing touches. We looked for a long time at various solutions for a locking latch for the doors… Something that we didn’t have to lock every time just to keep it closed.. not too expensive… durable enough for the trailer etc… Surprisingly hard to find.. until we stumbled across these steel truck canopy latches that we got with matching locks for $60 from the canopy place down the street. 😉

It also turned out that the big heavy rear door liked to swing around either slam into me or the side of the trailer. So I made a handy little pinned lock for the door so it was guaranteed to stay in place.

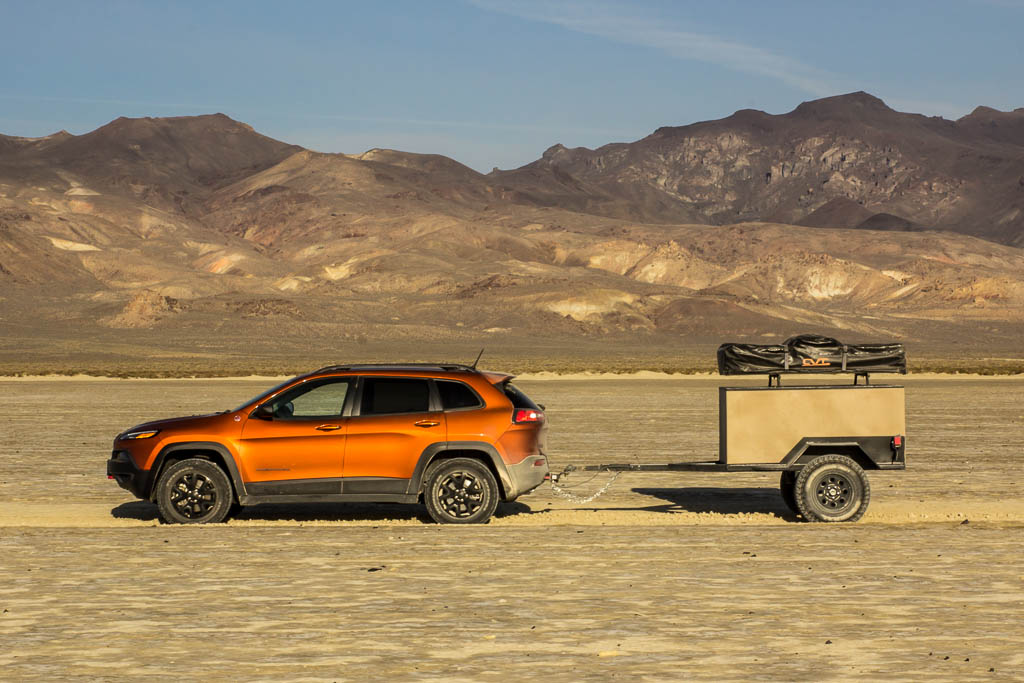
So at this point the trailer is ready to roll. We bolted the trailer to the top of the rack and made sure it was good to go. At this point we haven’t used it in over 2 years… super sad. but it wasn’t even really moldy! Aside from being slightly faded, it’s in great shape!


The night before we were going to leave I decided that I really really wanted to finish up the fold down table that I was going to mount on the rear door so Jason would have a place to put his stove and kitchen stuff. I used the same wood burning technique that I did on the flatbed of my 1937 Chevy truck and it turned out pretty cool looking and useful.

I actually had a lot of fun building this thing and it performed flawlessly on our trip!
I’ve already begun thinking about things that it could use for improvements. We needed extra fuel range for the Jeep, so we took our 2 5-gallon dirt bike fuel cans and put them in the back, along with our 2 5-gallon water jugs… As you can imagine this took up a lot of room in the trailer, and was kind of a pain in the ass to tie down every time we moved something around. I will be purchasing a set of the red jerry cans to mount to the outside of the trailer to fix that problem. Due to the lack of solid axle, there is a ton of room between the frame rails (that I may have left open on purpose!) for an actual potable water tank and small pump to eliminate the big water jugs inside the trailer…and lower the center of gravity a bit! For lighting I bought some cheap LED magnet lights… that lasted about 10 minutes before they rattled to the floor. Eventually I’d like a small solar panel to run a few hard wired LED lights and the little water pump. This is mostly so I don’t have to deal with wiring up power from the Jeep trailer plug. Apparently that’s harder than it looks.
Either way, the trailer performed flawlessly on our trip. I’ve already begun designing the next one I’d like to build. Maybe next year! 😉