Jason left last night on a work trip, so I slept in just a little longer than usual. It was glorious! But I almost waited too long to go outside and start working on the camper. The shade from the storage shed was almost gone! My goal for today was to paint the outside of the shell! That’s right, it’s finally time for paint! 🙂 We chose a color called “platinum” since we were going for a medium grey. We wanted it darker than the silver of the truck, but not so dark that it would get hot in the sun.

I used the same method to put on the camper paint that we used on the boat: roll and tip. Essentially you cover a large area quickly with a dense foam roller, and then knock the bubbles down with a soft paintbrush. If your surface is smooth and your technique is good, you can end up with a finish that looks like it was sprayed! I was working along and the fiberglass on the camper still has texture and odd spots.. so I think it’s as good as it was going to get but it’s still not super attractive. Dangit.
It’s kind of hard to see what color it really is because half of it is in bright morning sun and the other half is in the shade… but it’s now protected from the elements and will be way easier to repaint than it was to properly prep the bare fiberglass for paint.
I also feel like I should mention that I painted the entire area underneath the cabover piece and didn’t drip any on my hair or face. I consider that a win. I don’t envy Michelangelo painting upside down. My arms are so sore!
So now that I have wet paint covering the shell, I had to move on to something else while it dried. I want to paint the roof today also, so that seemed like a good place to start! Yesterday I marked the area to cut out for the roof vent, so once it was late enough in the morning to use power tools (another reason I began my day with paint) I went to town on it!

I also screwed up a little bit. 😉 Last night we put the roof up on the sawhorses, so this morning I go to drill my holes and realize that the roof was actually sitting on PLYWOOD on top of the sawhorses… so now we have some nice, thick marine plywood with a 1″ hole in the middle of it. >:/


That kept me entertained for a while, but once I finished I went back over to check out how my paint job was doing. There are no less than 25 bugs in the paint. Awesome. What is it about paint that draws them in?!?!?!? Meh… There were also way more runs onto the bedliner than I really like. I think we’re probably going to have to touch that up later…

After cleaning up the hole that I just cut in the roof, I went ahead and slapped a layer of white paint onto the inside of it.


So now I have everything covered in fresh paint.. time to switch gears entirely! I would like to start painting the interior of the camper, but I need to get some things installed first so I know where I can paint and where I need to leave space for fiberglass tape. The easiest place to start were the seat back storage cabinets for the dinette.
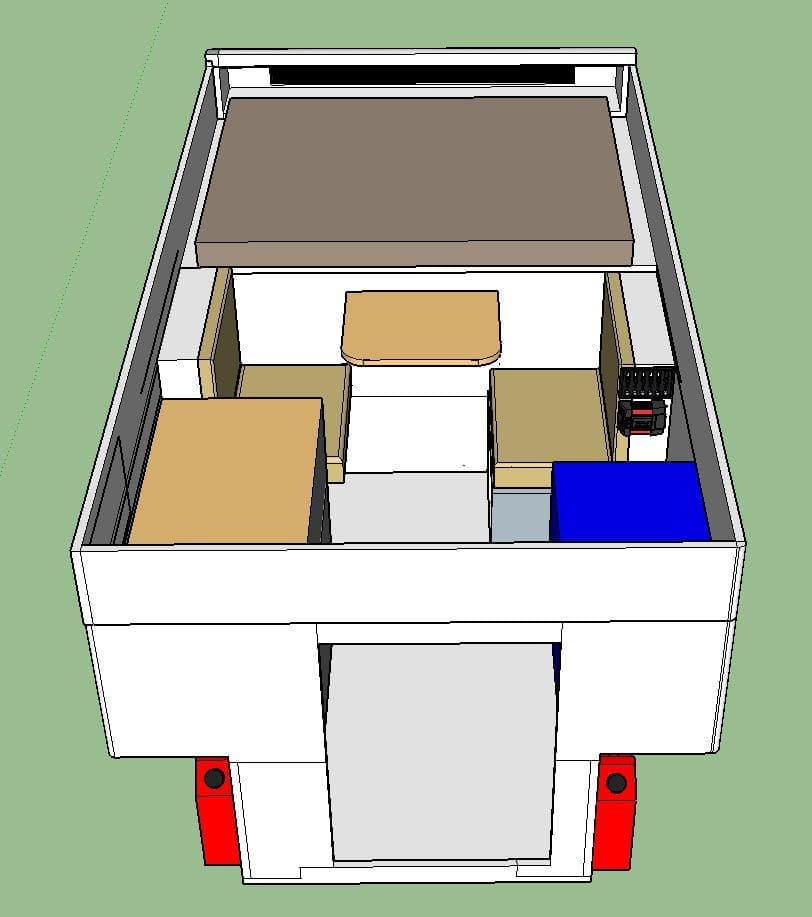
Remember that little 3d model? It’s actually starting to come together! Either way, you can see the dinette right there in the middle that I’m talking about. Jason cut a bunch of the pieces yesterday, so I decided to start putting them together.

I remember hearing that “glue and screw” is a type of assembly for wood, and I don’t know enough about woodworking to know how else to do it. So that’s what I did. I bought some Gorilla wood glue (fancy!) and some tiny screws and went to town on it.


Remember when we were still assembling the fiberglass shell and had to cut those little angle pieces so the fiberglass would wrap around? Yeah, I forgot about that. So I had to cut a radius on the inside edges of both cabinets so they would fit flush against the walls.


I really like the foaming gorilla glue, but it does make a bit of a mess to cut out later! 😮 Once this dries, I can start really figuring out where to put my galley stuff and maybe do some interior painting! 🙂


